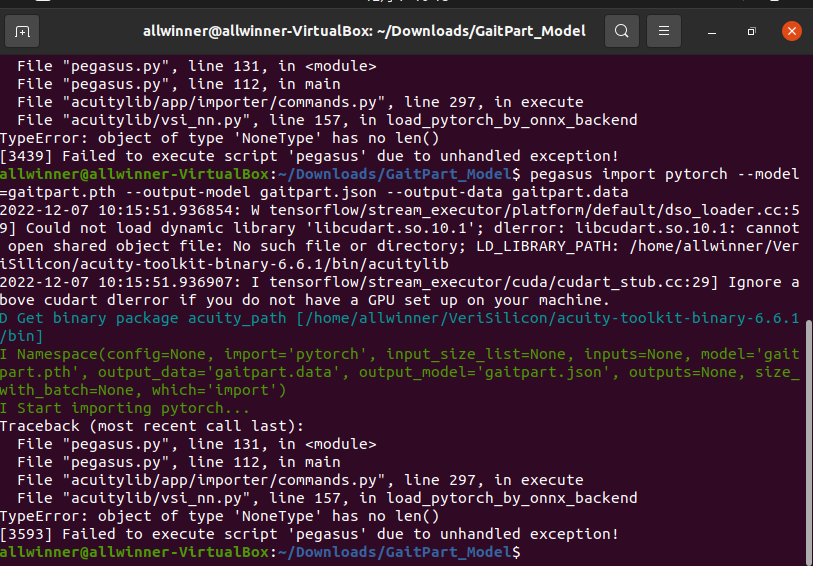
根据v853官方NPU模型转换的文档,将pytorch模型进行模型转换,出现了以下问题,请问大家知道如何将pytorch模型(.pth)进行模型转换吗
根据v853官方NPU模型转换的文档,将pytorch模型进行模型转换,出现了以下问题,请问大家知道如何将pytorch模型(.pth)进行模型转换吗
在GitHub上下载了OpenixCard之后,用其dump v853的img镜像。
xinzhe@xinzhe-G3-3590:~/Downloads$ OpenixCard -d v853.img
 _____             _     _____           _
|     |___ ___ ___|_|_ _|     |___ ___ _| |
|  |  | . | -_|   | |_'_|   --| .'|  _| . |
|_____|  _|___|_|_|_|_,_|_____|__,|_| |___|
      |_| Version: d0a8a7e Commit: 244
Copyright (c) 2022, YuzukiTsuru <GloomyGhost@GloomyGhost.com>

[OpenixCard INFO] Input file: v853.img Now converting...
[OpenixIMG INFO] Now Decrypt IMG header...
[OpenixIMG INFO] The IMG version is: 0x300
[OpenixIMG INFO] Now Decrypt IMG file contents...
[OpenixIMG INFO] Writing the IMG config data...
[OpenixCard INFO] Convert Done! Prasing the partition tables...
[OpenixCard INFO] Prase Done! Generating target image...
[GenIMG INFO]: cmd: "rm -rf "/tmp/tmp.WBcefwfipH"/*"
[GenIMG INFO]: cmd: "mkdir -p "/tmp/tmp.WBcefwfipH""
[GenIMG INFO]: cmd: "cp -a "/tmp/tmp.9hjbyNWcso" "/tmp/tmp.WBcefwfipH/root""
[GenIMG INFO]: cmd: "find '/tmp/tmp.WBcefwfipH/root' -depth -type d -printf '%P\0' | xargs -0 -I {} touch -r '/tmp/tmp.9hjbyNWcso/{}' '/tmp/tmp.WBcefwfipH/root/{}'"
[GenIMG INFO]: cmd: "mkdir -p "/home/xinzhe/Downloads/v853.img.dump.out""
[GenIMG INFO]: hdimage(v853.img): adding partition 'boot0' from 'boot0_sdcard.fex' ...
[GenIMG INFO]: hdimage(v853.img): adding partition 'boot-packages' from 'boot_package.fex' ...
[GenIMG INFO]: hdimage(v853.img): adding partition 'boot-resource' (in MBR) from 'boot-resource.fex' ...
[GenIMG INFO]: hdimage(v853.img): adding partition 'env' (in MBR) from 'env.fex' ...
[GenIMG INFO]: hdimage(v853.img): adding partition 'boot' (in MBR) from 'boot.fex' ...
[GenIMG INFO]: hdimage(v853.img): adding partition 'rootfs' (in MBR) from 'rootfs.fex' ...
[GenIMG INFO]: hdimage(v853.img): adding partition 'rootfs_data' (in MBR) from 'blank.fex' ...
[GenIMG INFO]: hdimage(v853.img): adding partition 'recovery' (in MBR) from 'blank.fex' ...
[GenIMG INFO]: hdimage(v853.img): adding partition '[MBR]' ...
[GenIMG INFO]: hdimage(v853.img): adding partition '[GPT header]' ...
[GenIMG INFO]: hdimage(v853.img): adding partition '[GPT array]' ...
[GenIMG INFO]: hdimage(v853.img): adding partition '[GPT backup]' ...
[GenIMG INFO]: hdimage(v853.img): writing GPT
[GenIMG INFO]: hdimage(v853.img): writing hybrid MBR
[GenIMG INFO]: cmd: "rm -rf "/tmp/tmp.WBcefwfipH"/*"
[OpenixCard INFO] Generate Done! Your image file at v853.img.dump.out Cleaning up...
xinzhe@xinzhe-G3-3590:~/Downloads$
然后将Dump后的img烧录到SD卡,插到板子上,使用adb查看,发现是只读文件系统。
xinzhe@xinzhe-G3-3590:~/Downloads$ adb push 0000.bin /root
adb: error: failed to copy '0000.bin' to '/root/0000.bin': remote Read-only file system
0000.bin: 0 files pushed. 9.6 MB/s (327640 bytes in 0.033s)
xinzhe@xinzhe-G3-3590:~/Downloads$
请问这个问题如何解决
把训练好的gaitset.onnx转化为network_binary.nb模型后,在开发板上运行时,出现错误,如下图所示。
root@TinaLinux:~# vpm_run sample.txt
vpm_run sample.txt loop_run_count device_id
    sample.txt: to include one ore more network binary graph (NBG) data file resource.  See sample.txt for details.
loop_run_count: the number of loop run network.
device_id: specify this NBG runs device.
example: ./vpm_run sample.txt 1 1, specify the NBG runs on device 1.
         ./vpm_run sample.txt 1000, run this network 1000 times.

test started.

init vip lite, driver version=0x00010800...
[0xb6fbd560]vip_init[104],
The version of Viplite is: 1.8.0-0-AW-2022-04-21
vip lite init OK.

cid=0xee, device_count=1
  device[0] core_count=1
init test resources, batch_count: 1 ...
create/prepare networks ...
batch i=0, binary name: ./network_binary.nb
input 0 dim 44 64 100 1, data_format=2, quant_format=2, name=input[0], scale=0.003922, zero_point=0
ouput 0 dim 256 62 1 0, data_format=1, name=uid_1_out_0, none-quant
nbg name=./network_binary.nb
create network 1: 24090 us.
memory pool size=11265280byte
read golden file ./outputg.tensor
input 0 name: ./input.tensor
prepare network 0: 395732 us.
batch: 0, loop count: 1
start to run network=./network_binary.nb
[0xb6fbd560]gcvip_os_call_kernel[344], fail to ioctl vipcore, command[4]:CMD_WAIT, status=-1
[0xb6fbd560]gcvip_user_wait[484], failed to check status=-1
[0xb6fbd560]gcvip_capture_init[1240], catpure file name .//viplite_hang_capture_617de3_460_b6fbd560.log
后来观察转换过程中的模型结构,发现存在问题。

上面这个是简化onnx模型后的gaitset-sim.onnx的结构图
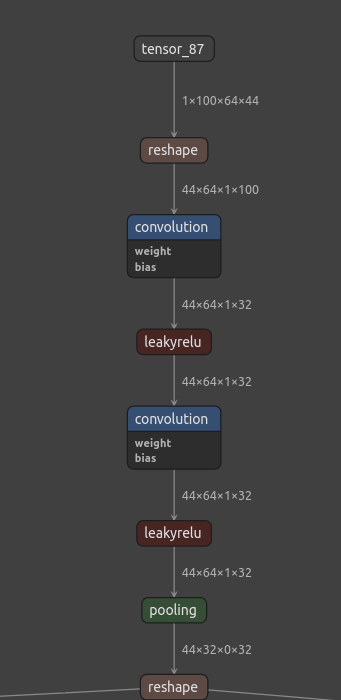
这个是导出nb模型之后保存的gaitset-simprj_fused.json的结构图。其中pooling之后的数据的结构为【44,32,0,32】,这个是不是有问题?
请问大家有解决这个问题的办法吗?
附上模型转换过程中的代码:
python -m onnxsim gaitset.onnx gaitset-sim.onnx --input-shape 1,100,64,44
pegasus import onnx --model gaitset-sim.onnx --output-data gaitset-sim.data --output-model gaitset-sim.json --outputs "feature"
pegasus generate inputmeta --model gaitset-sim.json --input-meta-output gaitset-sim_inputmeta.yml
pegasus generate postprocess-file --model gaitset-sim.json --postprocess-file-output gaitset-sim_postprocessmeta.yml
pegasus quantize --model gaitset-sim.json --model-data gaitset-sim.data --batch-size 1 --device CPU --with-input-meta gaitset-sim_inputmeta.yml --rebuild-all --model-quantize gaitset-sim.quantize --quantizer asymmetric_affine --qtype uint8
pegasus inference --model gaitset-sim.json --model-data gaitset-sim.data --batch-size 1 --dtype quantized --model-quantize gaitset-sim.quantize --device CPU --with-input-meta gaitset-sim_inputmeta.yml --postprocess-file gaitset-sim_postprocessmeta.yml
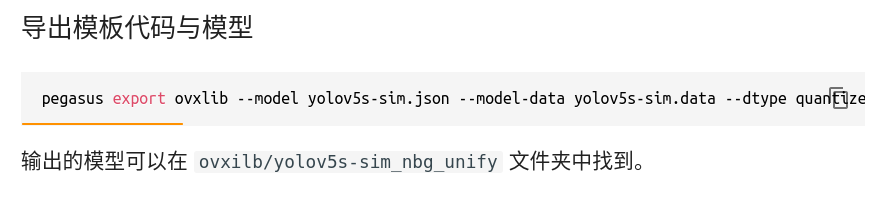
pegasus export ovxlib --model gaitset-sim.json --model-data gaitset-sim.data --dtype quantized --model-quantize gaitset-sim.quantize --batch-size 1 --save-fused-graph --target-ide-project 'linux64' --with-input-meta gaitset-sim_inputmeta.yml --output-path ovxilb/gaitset-sim/gaitset-simprj --pack-nbg-unify --postprocess-file gaitset-sim_postprocessmeta.yml --optimize "VIP9000PICO_PID0XEE" --viv-sdk ${VIV_SDK}
准备在V853上移植gaitset模型,但在量化过程中遇到了部分网络节点未量化的问题,导致板子上的NPU运行失败。
下面是模型量化的代码
pegasus quantize --model gaitset-sim.json --model-data gaitset-sim.data --batch-size 1 --device CPU --with-input-meta gaitset-sim_inputmeta.yml --rebuild --model-quantize gaitset-sim.quantize --quantizer asymmetric_affine --qtype uint8
量化之后,进行推理,发现输出的log中,部分网络节点没有量化为float32(fake asymmetric_affine),而是float32。由于NPU只能处理uint8,int8,int16这些类型的数据,不能直接处理float32数据,因此我猜测是量化未完全导致了板子上模型运行失败。
下面的是推理过程输出的log,可以看到部分节点未被量化
D Acuity output shape(add): (1 8 128)
D Tensor @Add_Add_306_13:out0 type: float32(fake asymmetric_affine)
D Process Add_Add_320_15 ...
D Acuity output shape(add): (1 16 128)
D Tensor @Add_Add_320_15:out0 type: float32(fake asymmetric_affine)
D Process Concat_Concat_321_5 ...
D Acuity output shape(concat): (1 62 128)
D Tensor @Concat_Concat_321_5:out0 type: float32(fake asymmetric_affine)
D Process Transpose_Transpose_322_3 ...
D Acuity output shape(permute): (62 1 128)
D Tensor @Transpose_Transpose_322_3:out0 type: float32(fake asymmetric_affine)
D Process MatMul_MatMul_323_2 ...
D Acuity output shape(matmul): (62 1 256)
D Tensor @MatMul_MatMul_323_2:out0 type: float32
D Process Transpose_Transpose_324_1 ...
D Acuity output shape(permute): (1 62 256)
D Tensor @Transpose_Transpose_324_1:out0 type: float32
D Process attach_Transpose_Transpose_324/out0_0 ...
D Acuity output shape(output): (1 62 256)
D Tensor @attach_Transpose_Transpose_324/out0_0:out0 type: float32
下面的是在板子上运行NPU模型时出错的log
root@TinaLinux:~# gaitset network_binary.nb 0000.bin
Usage:
    nbg_name input_data1 input_data2...
[0xb6ffa560]vip_init[104],
The version of Viplite is: 1.8.0-0-AW-2022-04-21
Create Neural Network: 24.63ms or 24631.92us
As input, scale=0.003922, zeroPoint=0
data_format=2, num of dimension=4
size=44,64,100,1
data_format=1
, num of dimension=3
size=256,62,1,0
Input size match for 0000.bin, file data size:281600, expected:281600
Start run graph [1] times...
[0xb6ffa560]gcvip_os_call_kernel[344], fail to ioctl vipcore, command[4]:CMD_WAIT, status=-1
[0xb6ffa560]gcvip_user_wait[484], failed to check status=-1
[0xb6ffa560]gcvip_capture_init[1240], catpure file name .//viplite_hang_capture_3cf88a_457_b6ffa560.log
[0xb6ffa560]gcvip_wait_network_segment[801], wait network=gaitset-simprj_NCHW timeout, cmd size=0x9d38, phy=0x48d6e000
[0xb6ffa560]gcvip_wait_network[2975], failed to wait network finish in gcvip wait network
[0xb6ffa560]gcvip_run_network[3021], failed to wait network finish in run network status=-1
Error: main.c: vnn_RunNeuralNetwork at 161
Error: main.c: main at 231
root@TinaLinux:~#
综上所述,请问大家有没有解决方法?
@whycanservice 转换成.pt,既包含模型结构又包含权重之后,好像还是同样的错误。不知道是不是我的模型出了问题
根据v853官方NPU模型转换的文档,将pytorch模型进行模型转换,出现了以下问题,请问大家知道如何将pytorch模型(.pth)进行模型转换吗
在官方文档中,对于NPU 转换部署 YOLO V5 模型,在导出模板代码与模型后。
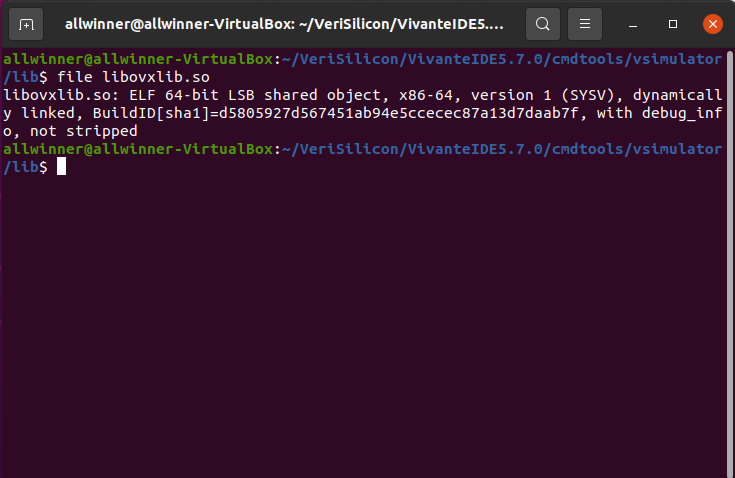
输出的模板代码通过arm-openwrt-linux-gcc编译,发现缺少ovxlib相关的arm版本的库。
之前的demo 比如yolov3,都是基于viplite的,viplite官方已经提供。
但是ovxlib等有关的库好像没有找到。
请问这些库有没有获取方式?
@whycan
试了试扩大roofs.fex大小,换了张64G的SD卡,重新烧录,好像还是不行。不过其他的demo,比如lenet,是不会出现这个问题的。只有YOLOV3 会有这个问题。