修改 uboot 的 mmc_startup 中
MMC_RSP_R6 修改 为 MMC_RSP_R4 即可识别EMMC

修改 uboot 中 sunxi_sprite_download_boot0 从介质2 改介质 0 , 即可完成 PhoenixSuit 烧录到EMMC 并启动进入系统。

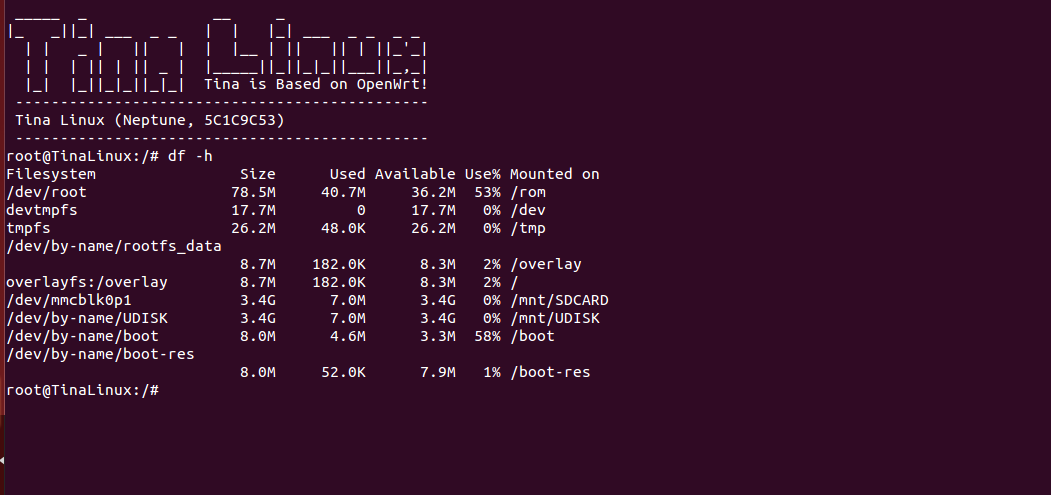
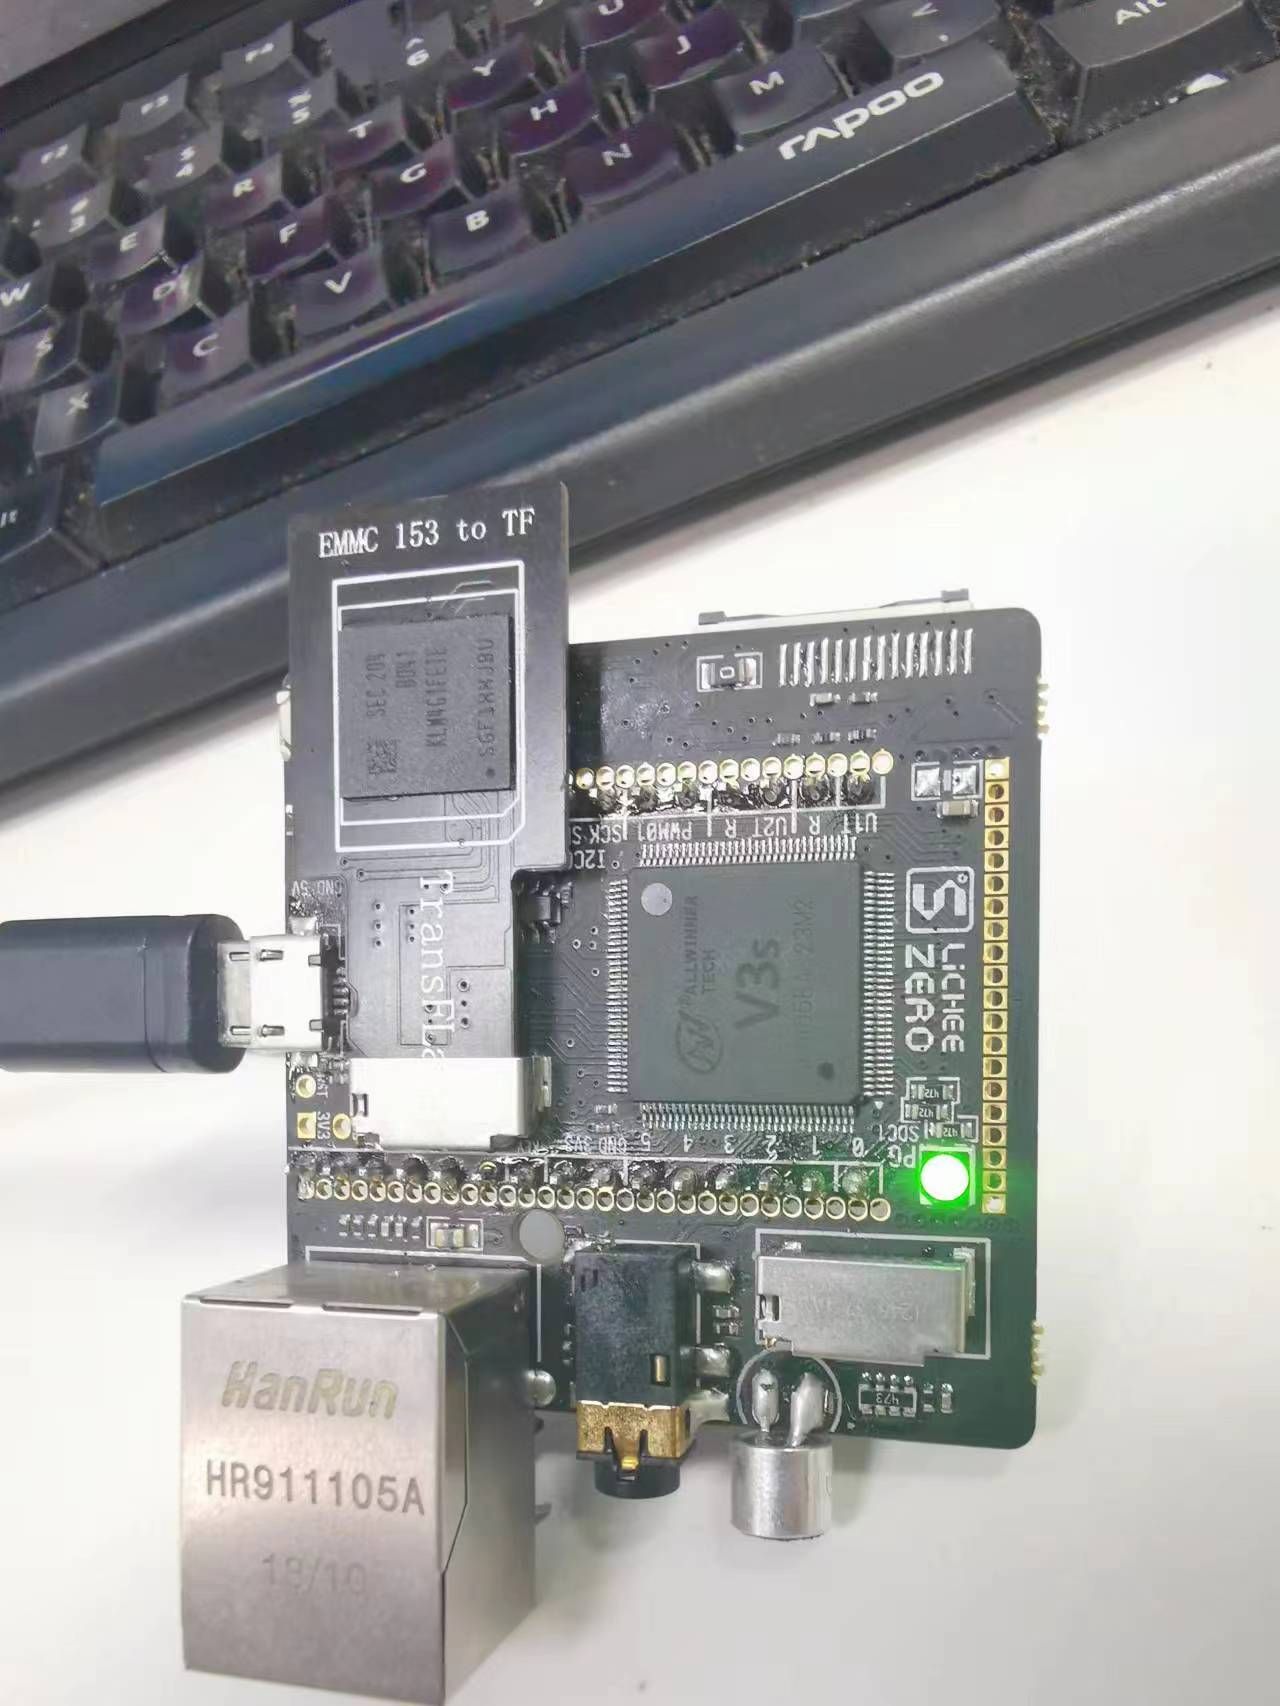
怎么说呢,荔枝派ZERO 老当益壮。
修改 uboot 的 mmc_startup 中
MMC_RSP_R6 修改 为 MMC_RSP_R4 即可识别EMMC

修改 uboot 中 sunxi_sprite_download_boot0 从介质2 改介质 0 , 即可完成 PhoenixSuit 烧录到EMMC 并启动进入系统。


怎么说呢,荔枝派ZERO 老当益壮。
如题, T113-S3的TVIN 功能令人垂涎。我想呢,看看本地预览咯。
但是这个trecorder 一开,给你提示:
[TR_ERR][VportInit] unknow camera type is sunxi-tvd
然后就没有然后了。
没关系,定位一下位置:
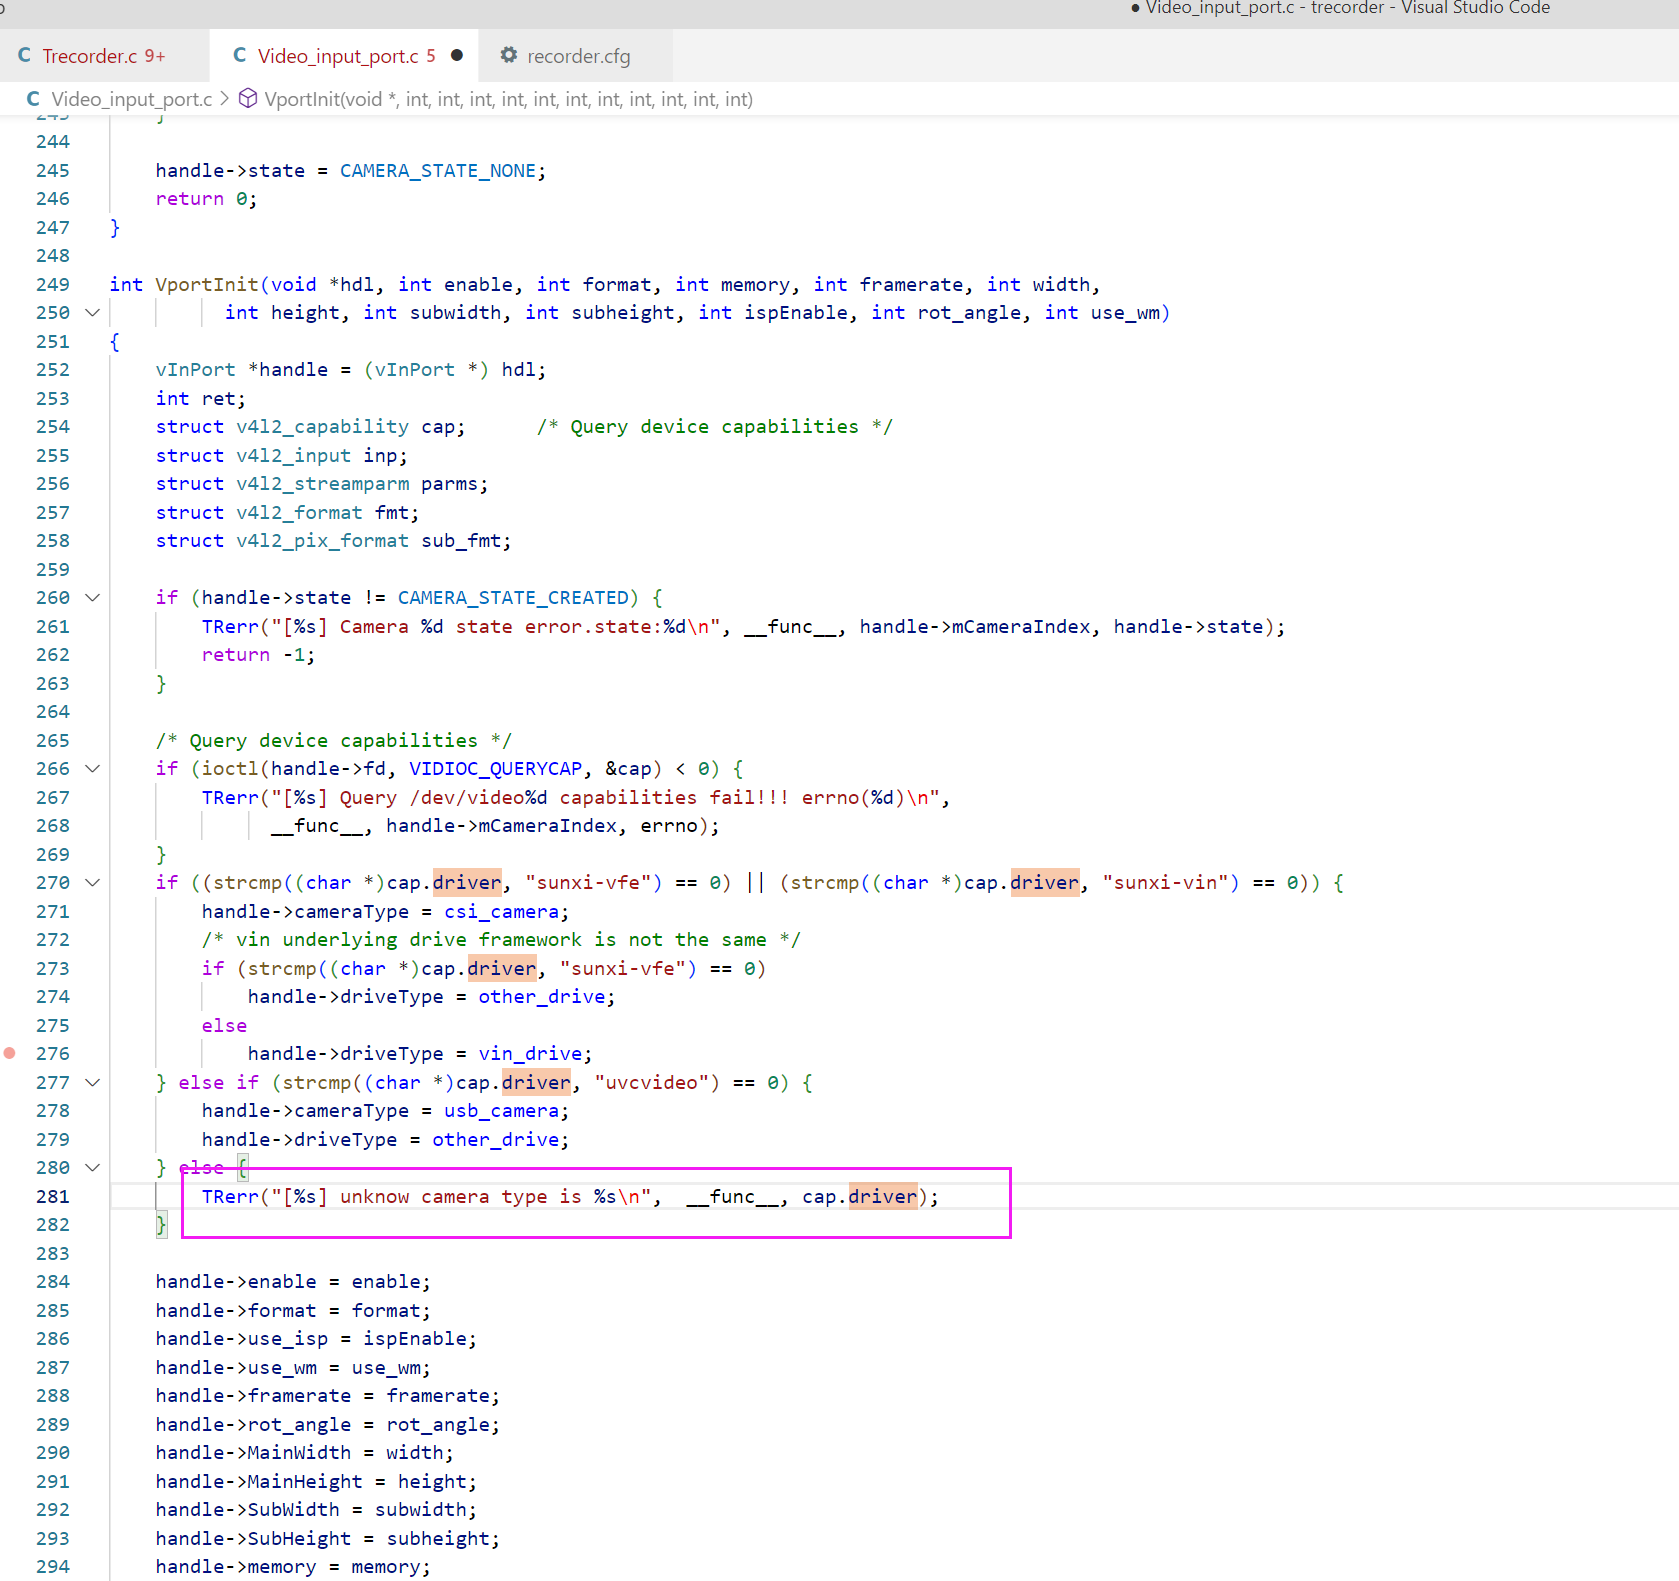
啊原来是这样呢,
那我试试给它赋予USB摄像头的属性呢? 比如这样:

非常惊喜的就是 ,真的可以跑,
看视频:
完结。
当前需要说前提:
内核的 CONFIG_VIDEO_SUNXI_TVD 要开。
设备树节点要开。
&tvd {
tvd_sw = <1>;
tvd_interface = <0>;
tvd_format = <0>;
tvd_system = <1>;
tvd_row = <1>;
tvd_column = <1>;
tvd_channel0_en = <1>;
tvd_channel1_en = <0>;
tvd_channel2_en = <0>;
tvd_channel3_en = <0>;
/*tvd_gpio0 = <&pio PD 22 GPIO_ACTIVE_HIGH>;*/
/*tvd_gpio1 = <&pio PD 23 GPIO_ACTIVE_HIGH>;*/
/*tvd_gpio2 = <&pio PD 24 GPIO_ACTIVE_HIGH>;*/
/* dc1sw-supply = <®_dc1sw>;*/
/* eldo3-supply = <®_eldo3>;*/
/*tvd_power0 = "dc1sw"*/
/*tvd_power1 = "eldo3"*/
};
&tvd0 {
used = <1>;
agc_auto_enable = <1>;
agc_manual_value = <64>;
cagc_enable = <1>;
fliter_used = <1>;
};
recorder.cfg可以用我的,分辨率根据自己摄像头自己改一下吧:
recorder.cfg
运行的时候执行:
trecorderdemo 0
就行啦
舒服一下。大佬们试试看咯!
但凡拿到了BSP的伙计们,没有开会员网速太慢或者啥的,总是会砸桌子,毕竟BSP辣么大!
但凡拿到了BSP的伙计们并且编译了BSP,硬盘没有买新的,虚拟机都装了,磁盘不够大,编译到一半总是会砸桌子,毕竟BSP编译后辣么大!du -sh 20多个GB
咱就是说,单独拿出来make 一下不就行了么
这里分享一下包包:
lv_examples_lvgl8_integrate_compile_small.tar.gz
这里,G2D 双缓冲 全给上了。
怎么用呢?
很简单,释放出来, cd lv_examples/src make -jx (x喜欢多少随意)
然后就可以在大佬们给的固件烧录后的机器上,舒服地搞上LVGL8 啦,还有2D加速还能随便旋转,还有双缓冲,美滋滋么。
舒服,试一下!

看到全志的V853开开发板申请活动,随提交了申请。
因为常年活跃在全志在线官方群和全志在线论坛,有幸通过了申请并得到了官方赠送的开发板。
前排占位。
准备做一个RTSP推流demo,懂的都懂。
我不懂,只能移植现成的。 LIVE555 探索一波!
基本思路:
客户端连接 -> 调用v4l2 获取摄像头yuv->H264编码器->喂流
现已新建文件夹
-----------------》》》》》》加入AWOL 全志在线豪华午餐
-------------------》》》》》》》》》》》》》》》》填写申请开发板问卷
未完待续,前排蹲坑。
如题
因为不喜欢插拔卡搞来搞去,喜欢直接USB插上直接干活烧录到底,
那就,看下D1怎么搞TF直接通过PhoenixSuit烧录 TF卡或者SDNAND
第一步,看启动过程的LOG:
U-Boot 2018.05-g0a62f10 (Dec 31 2021 - 07:53:57 +0000) Allwinner Technology

[03.820]DRAM:  512 MiB
[03.825]Relocation Offset is: 1def0000
[03.847]secure enable bit: 0
[03.851]CPU=1008 MHz,PLL6=600 Mhz,AHB=200 Mhz, APB1=100Mhz  MBus=300Mhz
[03.858]flash init start
[03.860]workmode = 16,storage type = 0
try card 2
set card number 2
get card number 2
[03.867][mmc]: mmc driver ver uboot2018:2021-04-16 14:23:00-1
[03.876][mmc]: get sdc_type fail and use default host:tm4.
[03.900][mmc]: Is not Boot mode!
[03.903][mmc]: SUNXI SDMMC Controller Version:0x50310
[03.914][mmc]: ************Try SD card 2************
[03.919][mmc]: mmc 2 cmd timeout 100 status 100
[03.924][mmc]: smc 2 err, cmd 8,  RTO
[03.927][mmc]: mmc 2 close bus gating and reset
[03.932][mmc]: mmc 2 cmd timeout 100 status 100
[03.936][mmc]: smc 2 err, cmd 55,  RTO
[03.940][mmc]: mmc 2 close bus gating and reset
[03.944][mmc]: ************Try MMC card 2************
[03.953][mmc]: mmc 2 cmd timeout 100 status 100
[03.957][mmc]: smc 2 err, cmd 1,  RTO
[03.960][mmc]: mmc 2 close bus gating and reset
[03.965][mmc]: Card did not respond to voltage select!
[03.969][mmc]: ************SD/MMC 2 init error!************
[03.975][mmc]: mmc init product failed
MMC init failed
try emmc fail
[03.988]sunxi-spinand: AW SPINand MTD Layer Version: 1.5 20200407
[03.994]sunxi-spinand-phy: AW SPINand Phy Layer Version: 1.9 20200306
[04.041]sunxi-spinand-phy: request spi0 gpio ok
[04.045]sunxi-spinand-phy: request general tx dma channel ok!
[04.050]sunxi-spinand-phy: request general rx dma channel ok!
[04.056]sunxi-spinand-phy: set spic0 clk to 20 Mhz
[04.060]sunxi-spinand-phy: init spic0 clk ok
[04.085]sunxi-spinand-phy: read id failed : -110
try nand fail
[04.132]unrecognized JEDEC id bytes: ff, ff, ff
try spinor fail
initcall sequence 000000005ff948c8 failed at call 000000004200d70e (err=-1)
### ERROR ### Please RESET the board ###
看到关键的点
try card 2
set card number 2
get card number 2
这里默认从card 2 开始
那么咱就先试试看,直接从card 0 行不行?
直接搜索到代码中定位到的是:
tina_d1_open_v1.0.1\lichee\brandy-2.0\u-boot-2018\drivers\sunxi_flash\mmc\sdmmc.c
中的接口:
int sunxi_sprite_mmc_probe(void)
{
#ifndef CONFIG_MACH_SUN50IW11
	return sdmmc_init_for_sprite(0, 2);
#else
	int workmode = uboot_spare_head.boot_data.work_mode;
	if (workmode == WORK_MODE_CARD_PRODUCT)
		return -1;
	else
		return sdmmc_init_for_sprite(0, 0);
#endif
}
这里 CONFIG_MACH_SUN50IW11 没有定义
默认是执行 return sdmmc_init_for_sprite(0, 2);
那么咱就是说,直接改return sdmmc_init_for_sprite(0, 0); 试试看?
好的说改就改了。
int sunxi_sprite_mmc_probe(void)
{
#ifndef CONFIG_MACH_SUN50IW11
	return sdmmc_init_for_sprite(0, 0);
#else
	int workmode = uboot_spare_head.boot_data.work_mode;
	if (workmode == WORK_MODE_CARD_PRODUCT)
		return -1;
	else
		return sdmmc_init_for_sprite(0, 0);
#endif
}
改动了下,直接烧录测一下:
U-Boot 2018.05-g0a62f10-dirty (Jan 28 2022 - 22:35:17 +0800) Allwinner Technology

[03.804]DRAM:  512 MiB
[03.809]Relocation Offset is: 1def0000
[03.831]secure enable bit: 0
[03.835]CPU=1008 MHz,PLL6=600 Mhz,AHB=200 Mhz, APB1=100Mhz  MBus=300Mhz
[03.842]flash init start
[03.844]workmode = 16,storage type = 0
running in sunxi_sprite_mmc_probe try card
sdmmc_init_for_sprite try card 0
set card number 0
get card number 0
[03.857][mmc]: mmc driver ver uboot2018:2021-04-16 14:23:00-1
[03.866][mmc]: get sdc_type fail and use default host:tm1.
[03.891][mmc]: can't find node "mmc0",will add new node
[03.896][mmc]: fdt err returned <no error>
[03.900][mmc]: Using default timing para
[03.904][mmc]: SUNXI SDMMC Controller Version:0x50310
[03.922][mmc]: card_caps:0x3000000a
[03.925][mmc]: host_caps:0x3000003f
[03.933]Loading Environment from SUNXI_FLASH... OK
[03.939]try to burn key
[03.943]out of usb burn from boot: not need burn key
Hit any key to stop autoboot:  0
sunxi work mode=0x10
run usb efex
delay time 2500
weak:otg_phy_config
usb init ok
set address 0x30
set address 0x30 ok
set address 0x31
set address 0x31 ok
SUNXI_EFEX_ERASE_TAG
erase_flag = 0x12
origin_erase_flag = 0x1
FEX_CMD_fes_verify_status
FEX_CMD_fes_verify last err=0
the 0 mbr table is ok
the 1 mbr table is ok
the 2 mbr table is ok
the 3 mbr table is ok
*************MBR DUMP***************
total mbr part 9

part[0] name      :boot-resource
part[0] classname :DISK
part[0] addrlo    :0x1f8
part[0] lenlo     :0x1f80
part[0] user_type :32768
part[0] keydata   :0
part[0] ro        :0

part[1] name      :env
part[1] classname :DISK
part[1] addrlo    :0x2178
part[1] lenlo     :0x1f8
part[1] user_type :32768
part[1] keydata   :0
part[1] ro        :0

part[2] name      :env-redund
part[2] classname :DISK
part[2] addrlo    :0x2370
part[2] lenlo     :0x1f8
part[2] user_type :32768
part[2] keydata   :0
part[2] ro        :0

part[3] name      :boot
part[3] classname :DISK
part[3] addrlo    :0x2568
part[3] lenlo     :0x50b8
part[3] user_type :32768
part[3] keydata   :0
part[3] ro        :0

part[4] name      :dsp0
part[4] classname :DISK
part[4] addrlo    :0x7620
part[4] lenlo     :0x3f0
part[4] user_type :32768
part[4] keydata   :0
part[4] ro        :0

part[5] name      :recovery
part[5] classname :DISK
part[5] addrlo    :0x7a10
part[5] lenlo     :0x6e40
part[5] user_type :32768
part[5] keydata   :0
part[5] ro        :0

part[6] name      :rootfs
part[6] classname :DISK
part[6] addrlo    :0xe850
part[6] lenlo     :0x1000000
part[6] user_type :32768
part[6] keydata   :0
part[6] ro        :0

part[7] name      :rootfs_data
part[7] classname :DISK
part[7] addrlo    :0x100e850
part[7] lenlo     :0x6400
part[7] user_type :32768
part[7] keydata   :0
part[7] ro        :0

part[8] name      :UDISK
part[8] classname :DISK
part[8] addrlo    :0x1014c50
part[8] lenlo     :0x0
part[8] user_type :33024
part[8] keydata   :0
part[8] ro        :0

total part: 10
mbr 0, 1f8, 8000
boot-resource 1, 1f80, 8000
env 2, 1f8, 8000
env-redund 3, 1f8, 8000
boot 4, 50b8, 8000
dsp0 5, 3f0, 8000
recovery 6, 6e40, 8000
rootfs 7, 1000000, 8000
rootfs_data 8, 6400, 8000
UDISK 9, 0, 8100
[07.119]erase all part start
need erase flash: 18
[07.125][mmc]: mmc_mmc_erase: sd card don't support erase
[07.130]read item0 copy0
[07.132][mmc]: memalign dst_align is NULL!
read first backup failed in fun sunxi_sprite_mmc_secread line 468
[07.142][mmc]: memalign dst_align is NULL!
read first backup failed in fun sunxi_sprite_mmc_secread line 468
[07.152]unknown error happen in item 0 read
[07.155]get secure storage map err
[07.159][mmc]: memalign src_align is NULL!
write first backup failed in fun sunxi_sprite_mmc_secwrite line 533
[07.168]erase secure storage block 0 err
SUNXI_EFEX_MBR_TAG
mbr size = 0x10000
write primary GPT success
write Backup GPT success
[08.043]update partition map
FEX_CMD_fes_verify_status
FEX_CMD_fes_verify last err=0
running in sunxi_sprite_mmc_init try card 2
******Has init
FEX_CMD_fes_verify_value, start 0x1f8, size high 0x0:low 0x2f8c00
FEX_CMD_fes_verify_value 0x3481d9f0
FEX_CMD_fes_verify_value, start 0x2178, size high 0x0:low 0x20000
FEX_CMD_fes_verify_value 0xcb347ad3
FEX_CMD_fes_verify_value, start 0x2370, size high 0x0:low 0x20000
FEX_CMD_fes_verify_value 0xcb347ad3
FEX_CMD_fes_verify_value, start 0x2568, size high 0x0:low 0x91d000
FEX_CMD_fes_verify_value 0xe5a32b17
FEX_CMD_fes_verify_value, start 0x7620, size high 0x0:low 0x4059c
FEX_CMD_fes_verify_value 0x413a5c54
FEX_CMD_fes_verify_value, start 0xe850, size high 0x0:low 0x6400000
FEX_CMD_fes_verify_value 0x87284509
bootfile_mode=4
SUNXI_EFEX_BOOT1_TAG
boot1 size = 0xfc000, max size = 0x200000
uboot size = 0xfc000
storage type = 7
FEX_CMD_fes_verify_status
FEX_CMD_fes_verify last err=0
bootfile_mode=4
SUNXI_EFEX_BOOT0_TAG
boot0 size = 0x10000
[36.353][mmc]: write mmc 0 info ok
dram para[0] = 318
dram para[1] = 3
dram para[2] = 7b7bfb
dram para[3] = 1
dram para[4] = 10f210f2
dram para[5] = 4001000
dram para[6] = 1c70
dram para[7] = 42
dram para[8] = 18
dram para[9] = 0
dram para[10] = 4a2195
dram para[11] = 2423190
dram para[12] = 8b061
dram para[13] = b4787896
dram para[14] = 0
dram para[15] = 48484848
dram para[16] = 48
dram para[17] = 1620121e
dram para[18] = 0
dram para[19] = 0
dram para[20] = 0
dram para[21] = 870000
dram para[22] = 24
dram para[23] = b4056103
dram para[24] = 0
dram para[25] = 0
dram para[26] = 0
dram para[27] = 0
dram para[28] = 0
dram para[29] = 0
dram para[30] = 0
dram para[31] = 0
storage type = 7
FEX_CMD_fes_verify_status
FEX_CMD_fes_verify last err=0
sunxi_efex_next_action=2
exit usb
next work 2
▒[33]HELLO! BOOT0 is starting!T
[36]BOOT0 commit : 603490b
[38]set pll start
[40]periph0 has been enabled
[43]set pll end
[44][pmu]: bus read error
[47]board init ok
[49]DRAM only have internal ZQ!!
[52]get_pmu_exist() = -1
[54]DRAM BOOT DRIVE INFO: V0.24
[57]DRAM CLK = 792 MHz
[59]DRAM Type = 3 (2:DDR2,3:DDR3)
[62]DRAMC ZQ value: 0x7b7bfb
[65]DRAM ODT value: 0x42.
[67]ddr_efuse_type: 0x0
[70]DRAM SIZE =1024 M
[74]DRAM simple test OK.
[76]dram size =1024
[78]card no is 0
[79]sdcard 0 line count 4
[82][mmc]: mmc driver ver 2021-04-2 16:45
[91][mmc]: Wrong media type 0x0
[94][mmc]: ***Try SD card 0***
[103][mmc]: HSSDR52/SDR25 4 bit
[106][mmc]: 50000000 Hz
[108][mmc]: 15280 MB
[110][mmc]: ***SD/MMC 0 init OK!!!***
[158]Loading boot-pkg Succeed(index=0).
[162]Entry_name        = opensbi
[165]Entry_name        = u-boot
[169]Entry_name        = dtb
[171]mmc not para
[173]Jump to second Boot.
23333 还真就烧录进去了,也不知道这会有什么隐患没,反正我用着很舒服,不用插拔卡了。若有啥隐患还请大佬们指正。
同时呢,这个烧录口USB还能做adb shell调试用,美滋滋了。
而且呢额外挂载的 /mnt/SDCARD 空间等可以在烧录后保留,不会被擦除。
芜湖,起飞!
如题
竖的屏幕横过来用很难受,要转图像,很烦的。
TinaV2.2 已经有LVGL8 GUI福利package

那么咱就是说,转一波?
很难受的一点是G2D这设置没找到哪里是完整的配置案例,
一波摸索以后是这样的:
disp_rotation_used	= <1>;
degree0			 = <3>;

fb0_format               = <0>;
fb0_buffer_num           = <2>;
fb0_pixel_sequence = 	<3>;
fb0_scaler_mode_enable = <1>;

fb0_width                = <854>;
fb0_height               = <480>;  /*read from lcd*/
fb1_format               = <0>;
fb1_width                = <0>;
fb1_height               = <0>;
chn_cfg_mode             = <0>;
当然 内核的g2d 配置项目要开启:
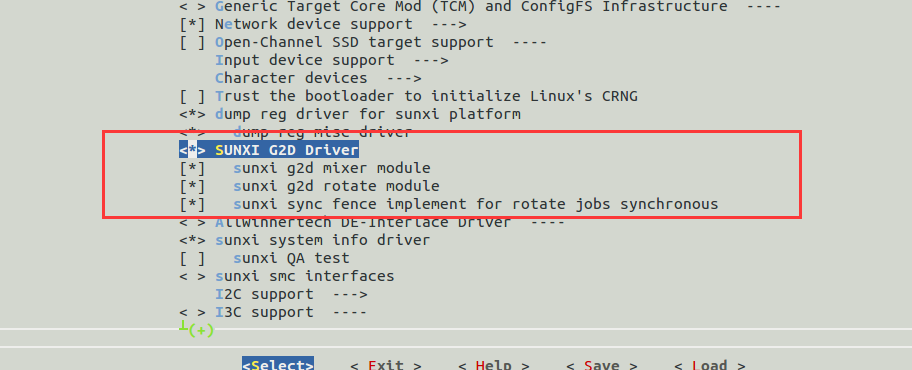
编译一波测试一下吧,
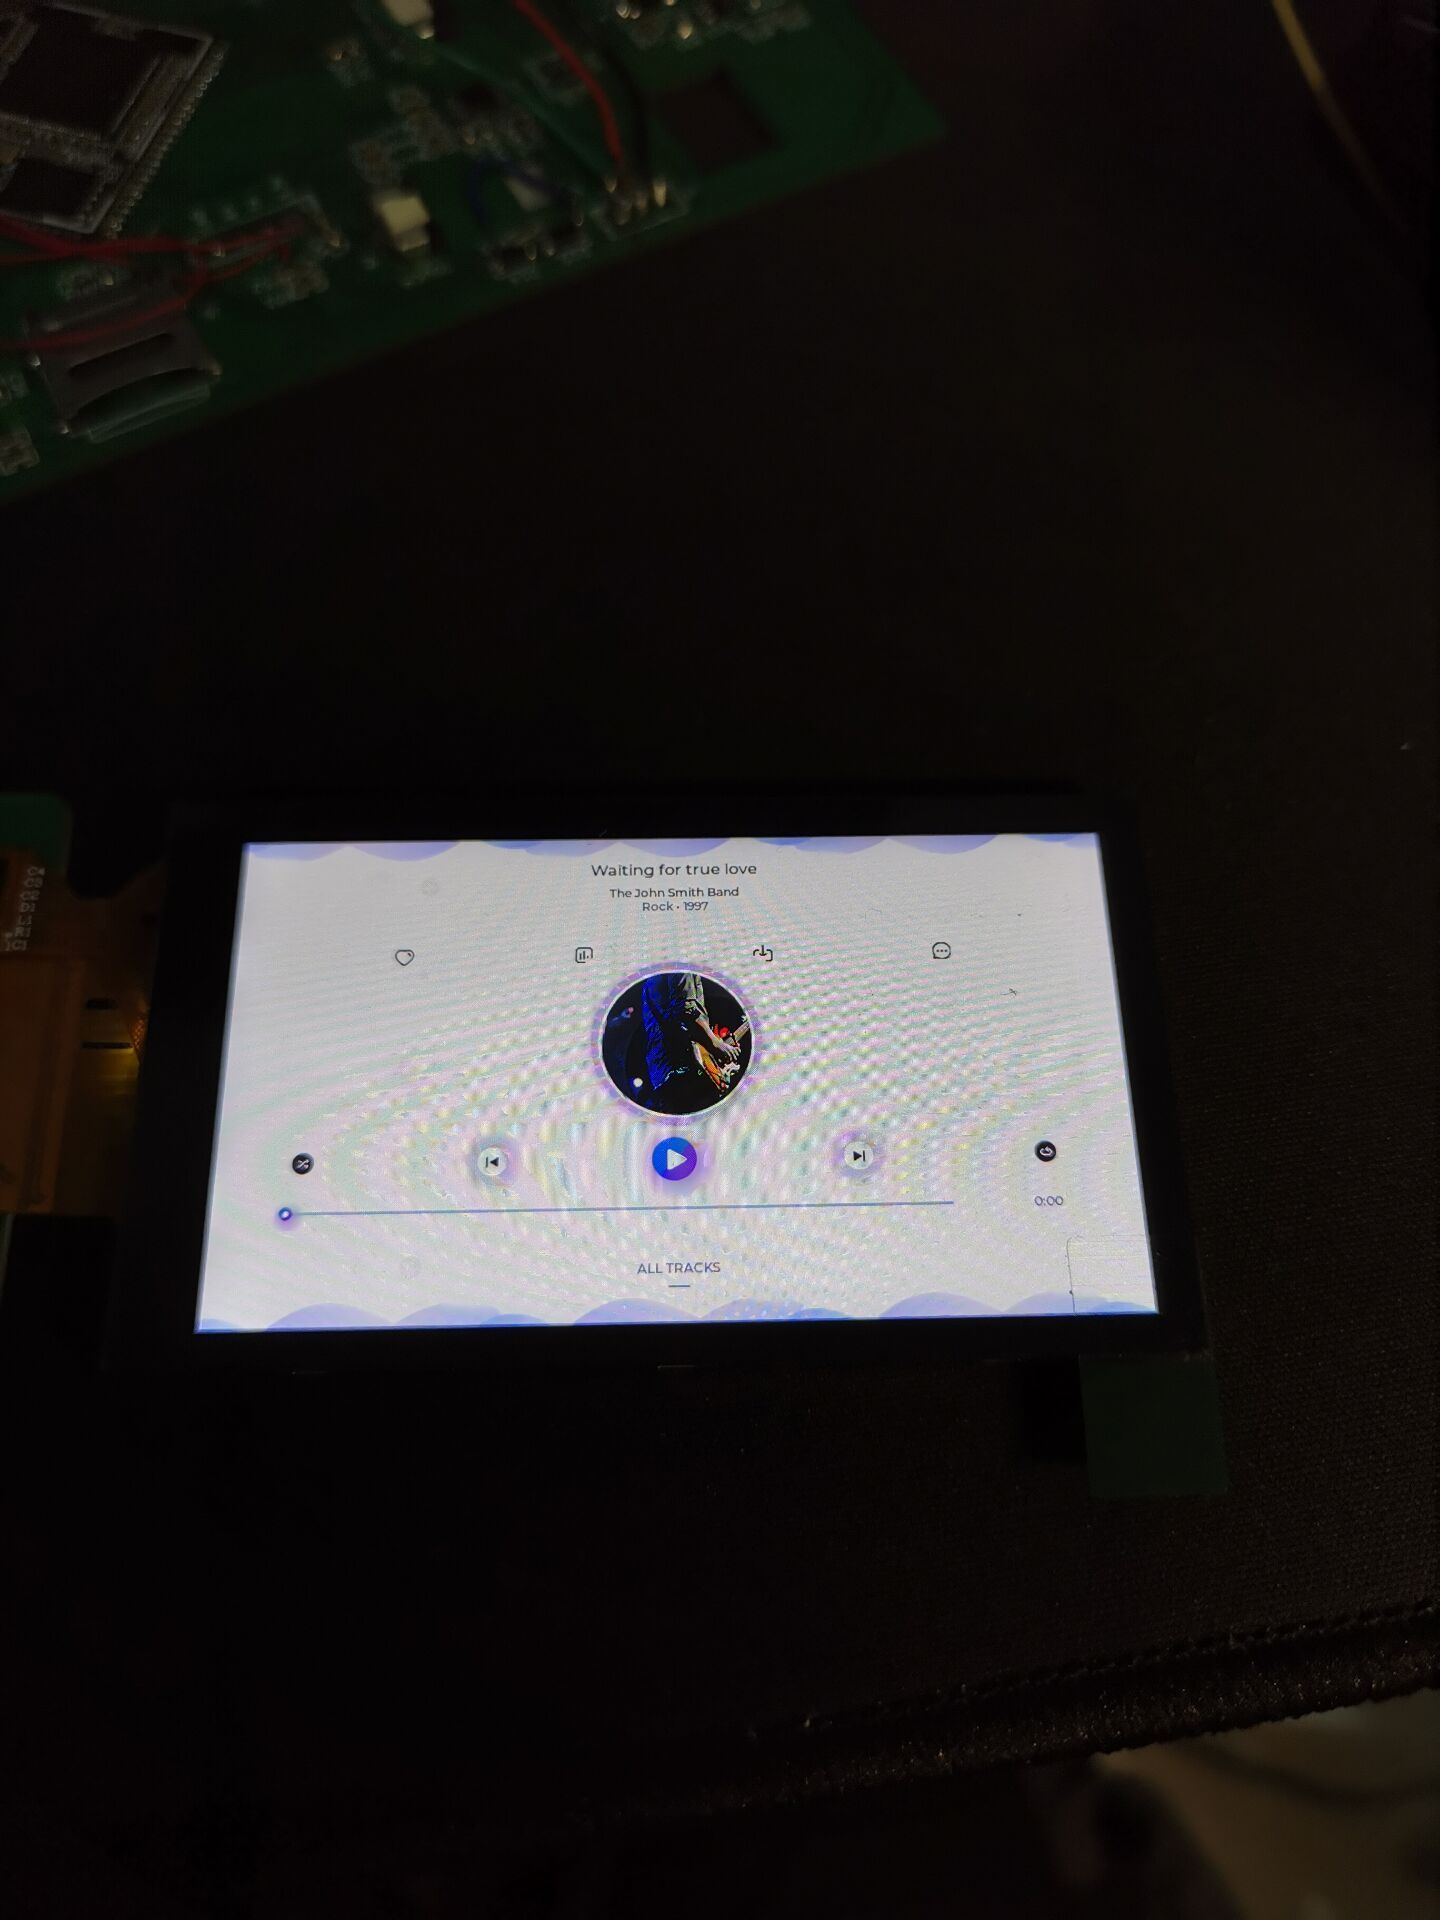
舒服啦
手焊A133/R818 总是可能有差错的吧,反正我是遇到过。
不甘心拆下来重来的话,通用钢网是比较费劲的,反正我是费劲,有点烦躁。
某宝找找还是找到了,好用!
链接在这:
https://item.taobao.com/item.htm?spm=a1z09.2.0.0.4cc72e8dvWjSjR&id=650981298737&_u=633iclm9fa8
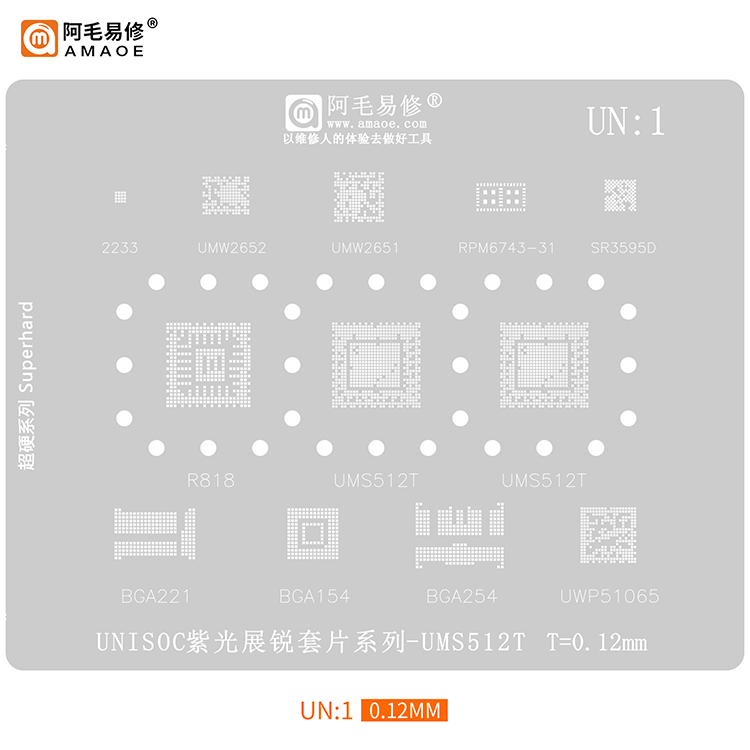
选择UN:1 就对了,
没有广告,没有广告,仅仅是好物分享。
16块一张还要啥自行车。
@yteraa
大佬大佬,
前排求一份 h264 编码接口api 头文件和 使用说明呀。
里边库配套的。
感谢!
@conyhong
修改2个数字让V3S TINA 跑在SDC0口EMMC
https://bbs.aw-ol.com/topic/3891/share/1
可以试试我的方法
@planevina 仿照ESD扫描读取寄存器的方式修改即可。 我帖子中有修改后调用的过程,可以试试看。目前点的几个OLED都没问题。
@barsonsss package 下自己建个包可以自己打包,拿个其他的包参考一下即可。 或者直接选用package 下的gui 里的lv_examples ,改完编译打包。