【Sipeed D1 Dock Pro】YoC RTOS 实战:Lichee D1 Dock 开发板 Button按键
-
原文链接:https://occ.t-head.cn/community/post/detail?spm=a2cl5.14300979.0.0.6719180famVQy0&id=4037255443398668288
作者 @ 未来开发者1. 准备工作
建议在操作前先阅读以下技术文章:
Lichee D1 dock 开发板用户指南
Lichee D1 dock 开发板快速上手教程2. 示例介绍
本示例集成了各种基础控件。可以通过屏幕触控进行页面的操作。HaaS UI小程序相关的开发指南可以参考官方指南。
3. 示例演示
3.1 剑池CDK(以下简称CDK)演示
3.1.1 示例获取
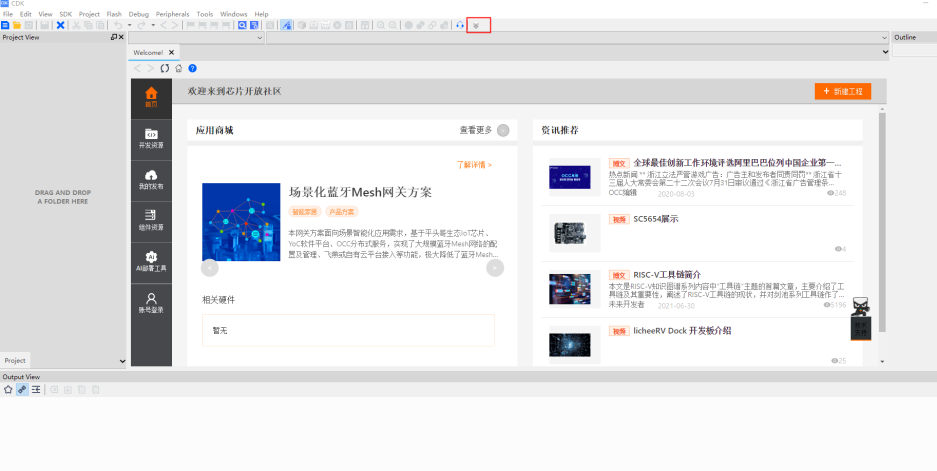
双击打开CDK,点击工具栏最右侧的平头哥图标。点击新建工程按钮。
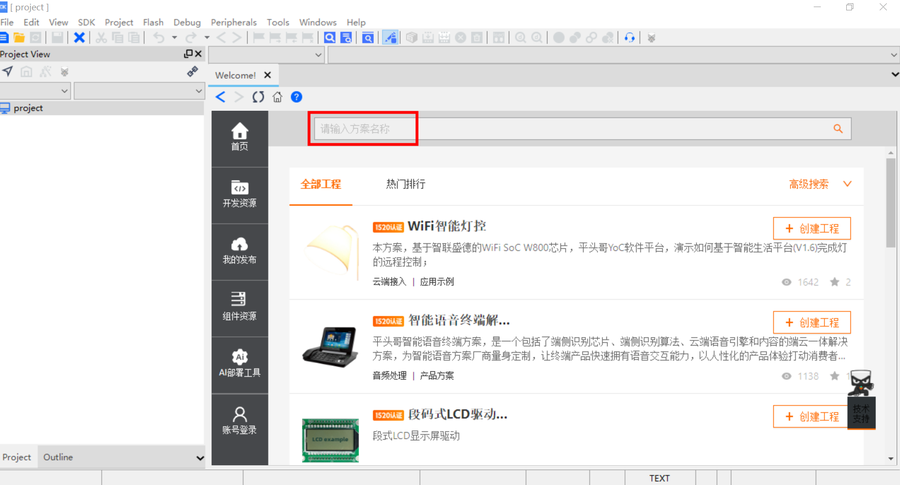
在搜索栏里输入haasui, 在结果里选择haasui_falcon_demo,点击右侧的创建工程,版本选择v7.5.1。
3.1.2 编译
右键点击haasui_falcon_demo工程,选择build,进行编译,直到结束。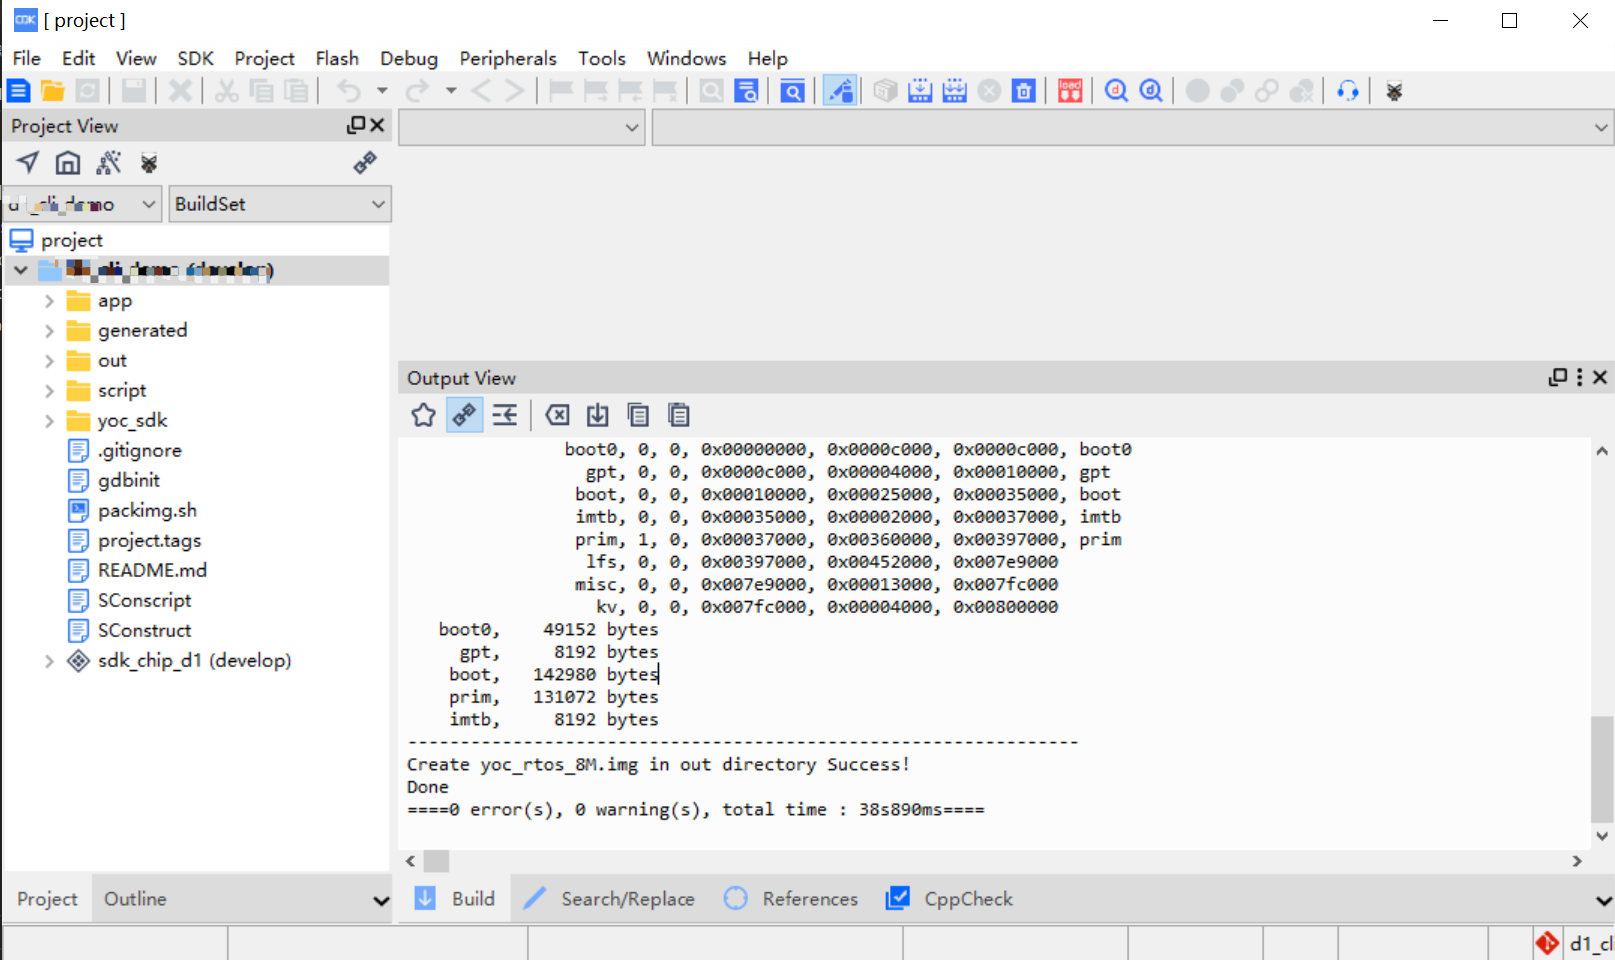
编译完成后,可以在工程目录下out文件夹里找到yoc_rtos_8M.img文件。
3.1.3 下载
- 通过CDK烧写
先连接好硬件JTAG。然后点击红色框框处的按钮开始烧写。
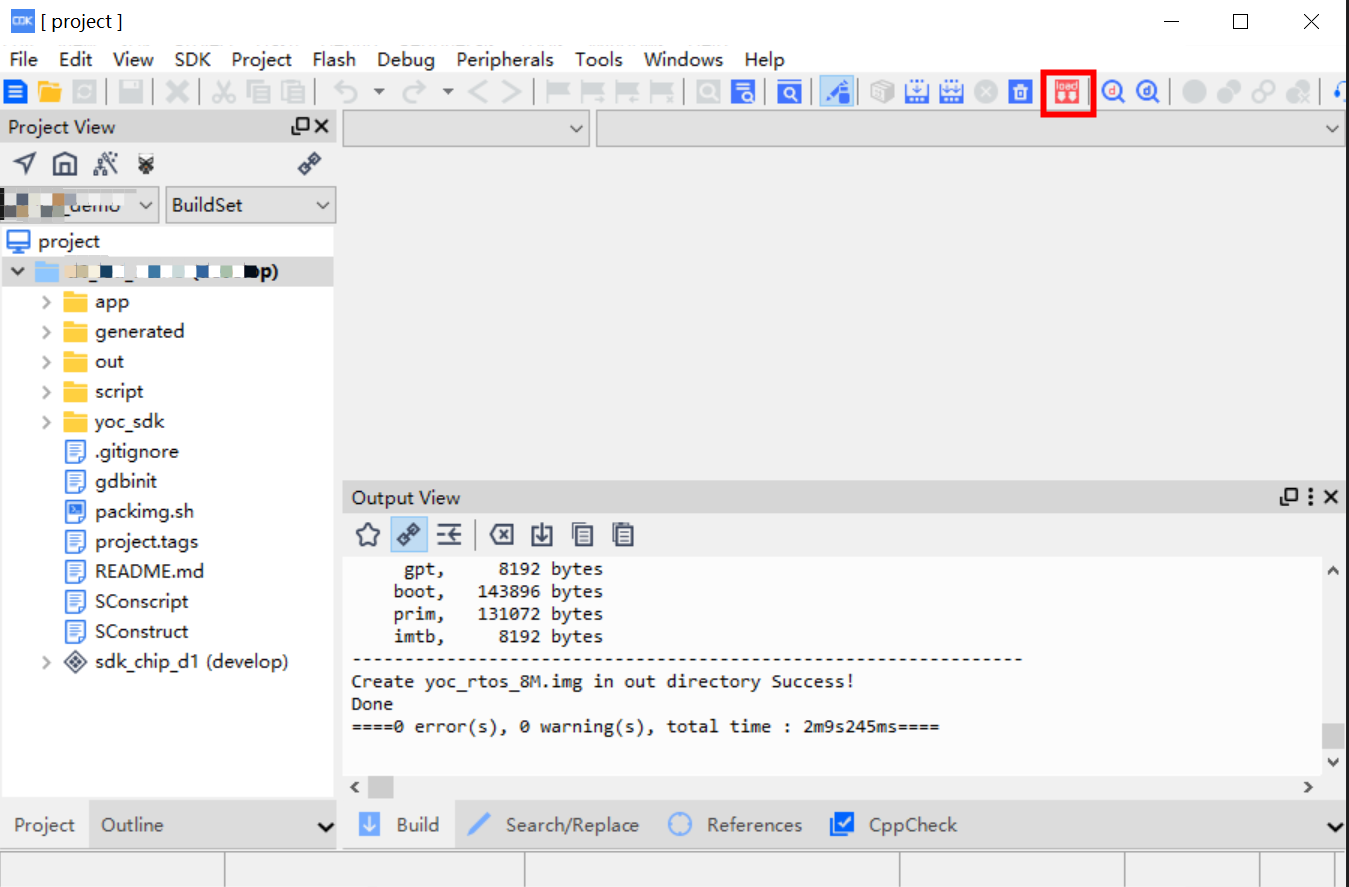
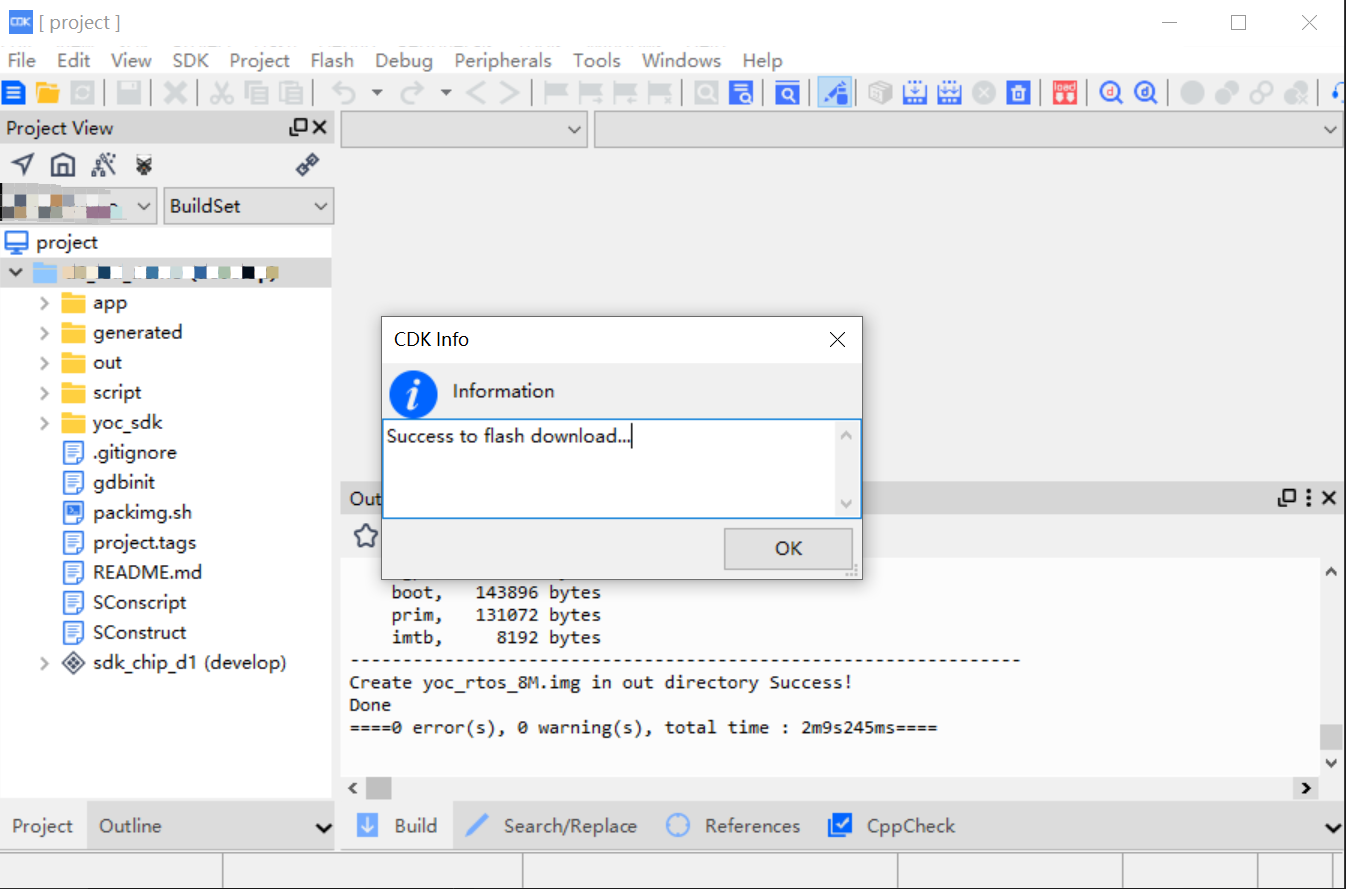
烧写完毕之后,按复位键即可启动。
- 通过全志工具烧写
在没有JTAG的情况下,只能通过全志的PhoenixSuit工具进行烧写。将编译出来的yoc_rtos_8M.img文件选中,
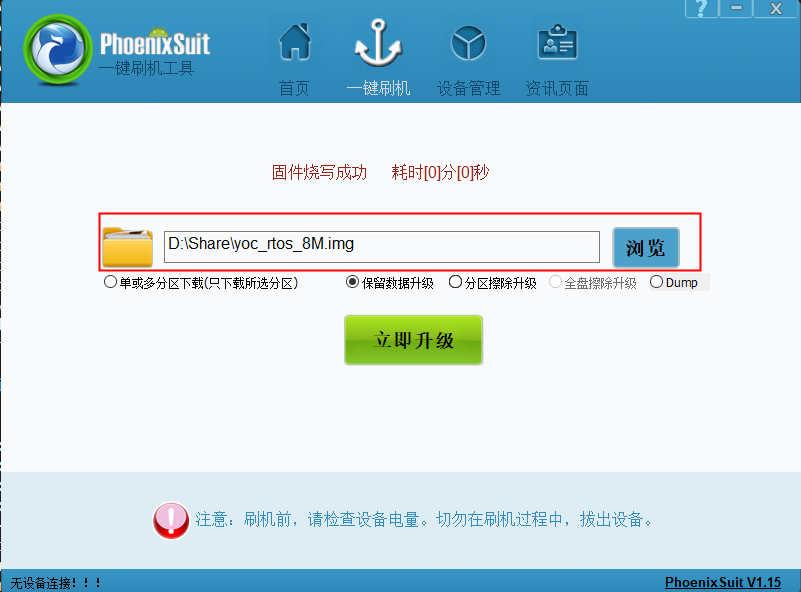
-
按住FEL按钮,重新上电后,重启后固件开始烧录,直到完成。
-
如果当前镜像支持xfex模式烧写,直接在串口命令行执行“xfex"命令,再执行"reboot"命令进行重启,重启后固件开始烧录,直到完成。
3.2 命令行演示
3.2.1 示例获取docker-ubuntu18:~$ mkdir test docker-ubuntu18:~$ cd test docker-ubuntu18:~$ yoc init docker-ubuntu18:~$ yoc install sdk_app_d1 -b v7.5.1 Start to install components... sdk_app_d1 (v7.5.1), clone https://gitee.com/yocop/sdk_app_d1.git ... …… (省略) …… d1_evb (v7.5.1), clone https://gitee.com/yocop/d1_evb.git ... chip_d1 (v7.5.1), clone https://gitee.com/yocop/chip_d1.git ... Download components finish. docker-ubuntu18:~/test$ ls boards components solutions3.2.2 编译
docker-ubuntu18:~/test/solutions$ cd haasui_falcon_demo
docker-ubuntu18:~/test/solutions/haasui_falcon_demo$ make
…… (省略) ……
LINK out/haasui_falcon_demo/yoc.elf
INSTALL yoc.elf
riscv64-unknown-elf-objdump -d out/haasui_falcon_demo/yoc.elf > yoc.asm
Generating yoc.bin
scons: done building targets.
YoC SDK Done
[INFO] Create bin files
update /home/shuta.lst/work/aone/yoc/dasai3/solutions/haasui_falcon_demo/data/resources
[2022-02-23 16:12:39] Start to sign images with key:def_otp
[2022-02-23 16:12:39] Sign [prim] with [def_otp]
[2022-02-23 16:12:39] rsa verify ok....
[2022-02-23 16:12:39] Sign prim ok.
----------------------------------------------------------------
               boot0, 0, 0, 0x00000000, 0x0000c000, 0x0000c000, boot0
                 gpt, 0, 0, 0x0000c000, 0x00004000, 0x00010000, gpt
                boot, 0, 0, 0x00010000, 0x00025000, 0x00035000, boot
                imtb, 0, 0, 0x00035000, 0x00002000, 0x00037000, imtb
                prim, 1, 0, 0x00037000, 0x00360000, 0x00397000, prim
                 lfs, 0, 0, 0x00397000, 0x00452000, 0x007e9000, lfs
                misc, 0, 0, 0x007e9000, 0x00013000, 0x007fc000
                  kv, 0, 0, 0x007fc000, 0x00004000, 0x00800000
   boot0,    49152 bytes
     gpt,     8192 bytes
    boot,   143896 bytes
    prim,  1982620 bytes
     lfs,  4530176 bytes
    imtb,     8192 bytes
----------------------------------------------------------------
Create yoc_rtos_8M.img in out directory Success!
3.2.3 下载
可以通过3.1.3的下载方式进行烧录,也可以通过命令行进行烧录。
命令行烧录之前要先连接好T-HeadDebugServer。然后在终端输入make flashall命令:
lh@lh:~/.../solutions/haasui_falcon_demo > make flashall
[2022-02-17 10:29:22] I am RISC-V
Program partition: boot0        address: 0x0, size 49152 byte
erasing...
program 00x0000c000, 100%
Program partition: gpt          address: 0xc000, size 8192 byte
erasing...
program 00x0000e000, 100%
Program partition: boot         address: 0x10000, size 143896 byte
erasing...
program 0x00032000, 100%
Program partition: imtb         address: 0x35000, size 8192 byte
erasing...
program 00x00037000, 100%
Program partition: prim         address: 0x37000, size 1966236 byte
erasing...
program 0x00217000, 100%
Program partition: lfs          address: 0x397000, size 4530176 byte
erasing...
program 00x007e9000, 100%
lh@lh:~/.../solutions/haasui_falcon_demo >
4. 运行
重新上电或按下RST键,系统启动,串口会有以下打印信息,表示系统运行成功。
(cli-uart)# ###YoC###[Feb 17 2022,10:44:07]
cpu clock is 1008000000Hz
display init ok.
haasui entry here!
haasui build time: Feb 17 2022, 10:39:48
[TP] GT9xx init

[TP] start to probe![2, 0x5d]

0X39 0X31 0X31 0X0 0X0

[TP] Found chip gt911

[TP] GT9xx Config version: 0x5C

[TP] GT9xx Sensor id: 0x03
4. 运行
重新上电或按下RST键,系统启动,串口会有以下打印信息,表示系统运行成功。
###YoC###[Feb  7 2022,11:34:48]
cpu clock is 1008000000Hz
(cli-uart)# Run lradc test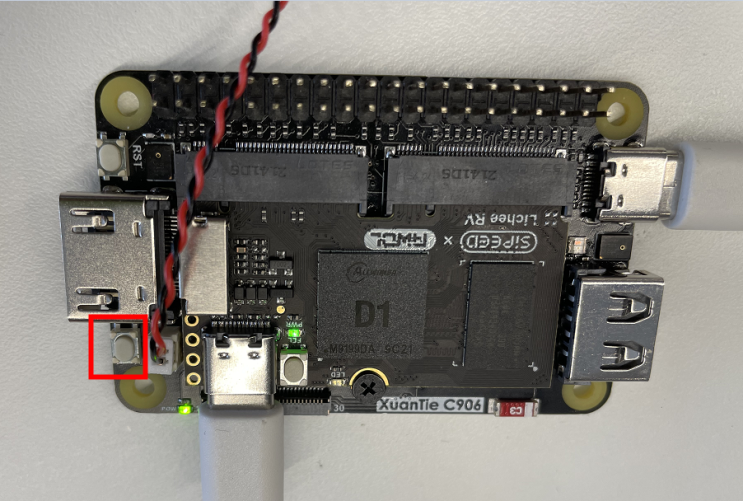
当按下对应的按键之后会有相应的打印信息输出:
user key is pressed one times5. 总结
本文介绍了DOCK开发板的按键使用示例,用户可以通过示例代码了解按键的简单触发机制
Copyright © 2024 深圳全志在线有限公司 粤ICP备2021084185号 粤公网安备44030502007680号