解决 T113 修改 UART3 后 Uboot 有输出但是 Kernel 无法启动
-
请按照如下步骤依次验证是否配置正确
使用UART3,需要从UART0改为UART3(PB6,PB7)
- 修改
sys_config.fex(BOOT0与Uboot的串口)
sys_config.fex的路径是device/config/chips/t113/configs/evb1/sys_config.fex中的uart_debug_port修改前:
[uart_para]
uart_debug_port = 0
uart_debug_tx   = port:PF02<3><1><default><default>
uart_debug_rx   = port:PF04<3><1><default><default>
修改后
[uart_para] uart_debug_port = 0 uart_debug_tx = port:PB06<7><1><default><default> uart_debug_rx = port:PB07<7><1><default><default>- 修改设备树(Linux使用的串口输出)
路径:
device/config/chips/t113/configs/evb1/board.dts修改前
uart3_pins_a: uart3_pins@0 {
	pins = "PC6", "PC7";
	function = "uart0";
	drive-strength = <10>;
	allwinner,muxsel = <4>;
	bias-pull-up;
};

uart3_pins_b: uart3_pins@1 {
	pins = "PC6", "PC7";
	function = "gpio_in";
};

&uart0 {
	pinctrl-names = "default", "sleep";
	pinctrl-0 = <&uart0_pins_a>;
	pinctrl-1 = <&uart0_pins_b>;
	status = "okay";
};

&uart3 {
	pinctrl-names = "default", "sleep";
	pinctrl-0 = <&uart3_pins_a>;
	pinctrl-1 = <&uart3_pins_b>;
	status = "disabled";
};
修改后
uart3_pins_a: uart3_pins@0 { pins = "PB6", "PB7"; function = "uart0"; drive-strength = <10>; allwinner,muxsel = <7>; bias-pull-up; }; uart3_pins_b: uart3_pins@1 { pins = "PB6", "PB7"; function = "gpio_in"; }; &uart0 { pinctrl-names = "default", "sleep"; pinctrl-0 = <&uart0_pins_a>; pinctrl-1 = <&uart0_pins_b>; status = "disabled"; # 关闭UART0 }; &uart3 { pinctrl-names = "default", "sleep"; pinctrl-0 = <&uart3_pins_a>; pinctrl-1 = <&uart3_pins_b>; status = "okay"; # 开启UART3 };- 修改UBOOT CONSOLE INDEX
路径:
brandy/brandy-2.0/u-boot-2018/configs/sun8iw20p1_defconfig
增加下列内容CONFIG_SPECIFY_CONSOLE_INDEX=y CONFIG_CONS_INDEX=4 # UART 3+1 = 4- 修改启动bootargs
路径:
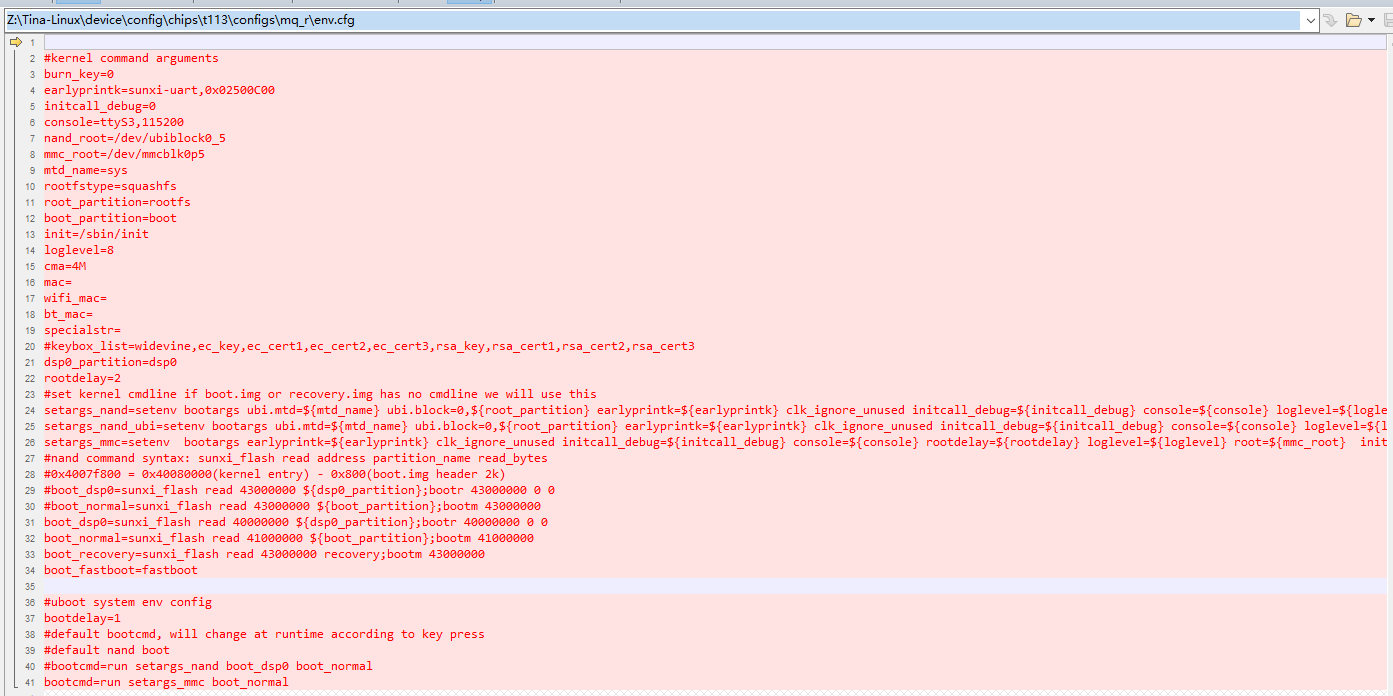
device/config/chips/t113/configs/evb1/env.cfg修改前
earlyprintk=sunxi-uart,0x02500000
initcall_debug=0
console=ttyS0,115200
修改后
earlyprintk=sunxi-uart,0x02500000需要修改为 UART3 的地址,查阅手册可知为0x02500C00
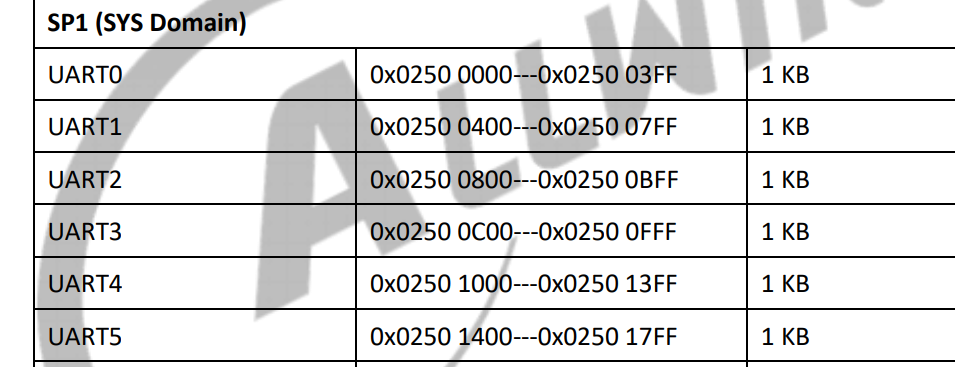
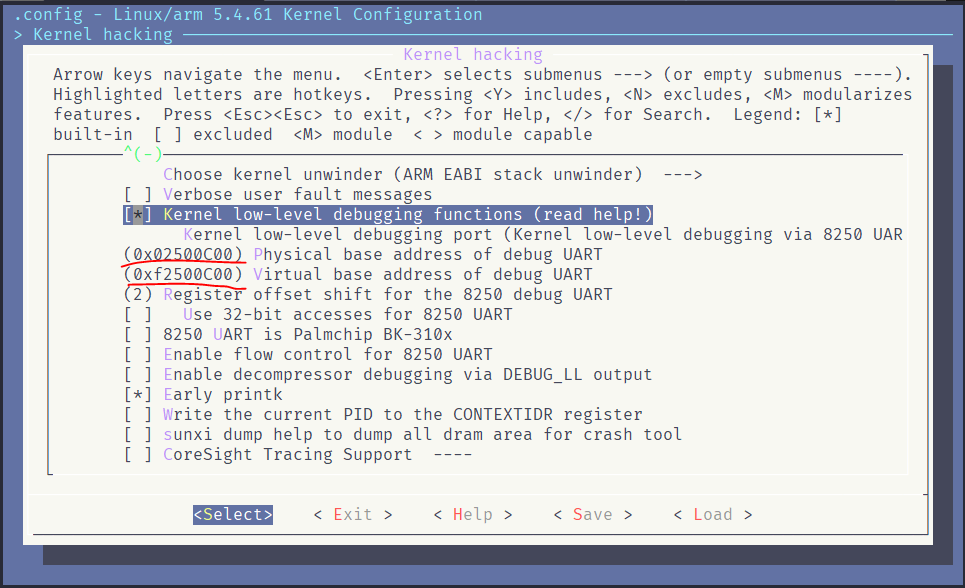
earlyprintk=sunxi-uart,0x02500C00 initcall_debug=0 console=ttyS3,115200- 修改 DEBUG_LL的地址
make kernel_menuconfig找到 Kernel low-level debugging functions,修改寄存器地址
- 修改
-
@yteraa 我也遇到了这个问题,还没解决。
-
@shz18877605430
这里面应该也要改 -
Copyright © 2024 深圳全志在线有限公司 粤ICP备2021084185号 粤公网安备44030502007680号