快来尝鲜!!使用 D1s (RDC2022 纪念版) 运行 RT-Smart
-
软件环境:
- Ubuntu20.0.4
- win10
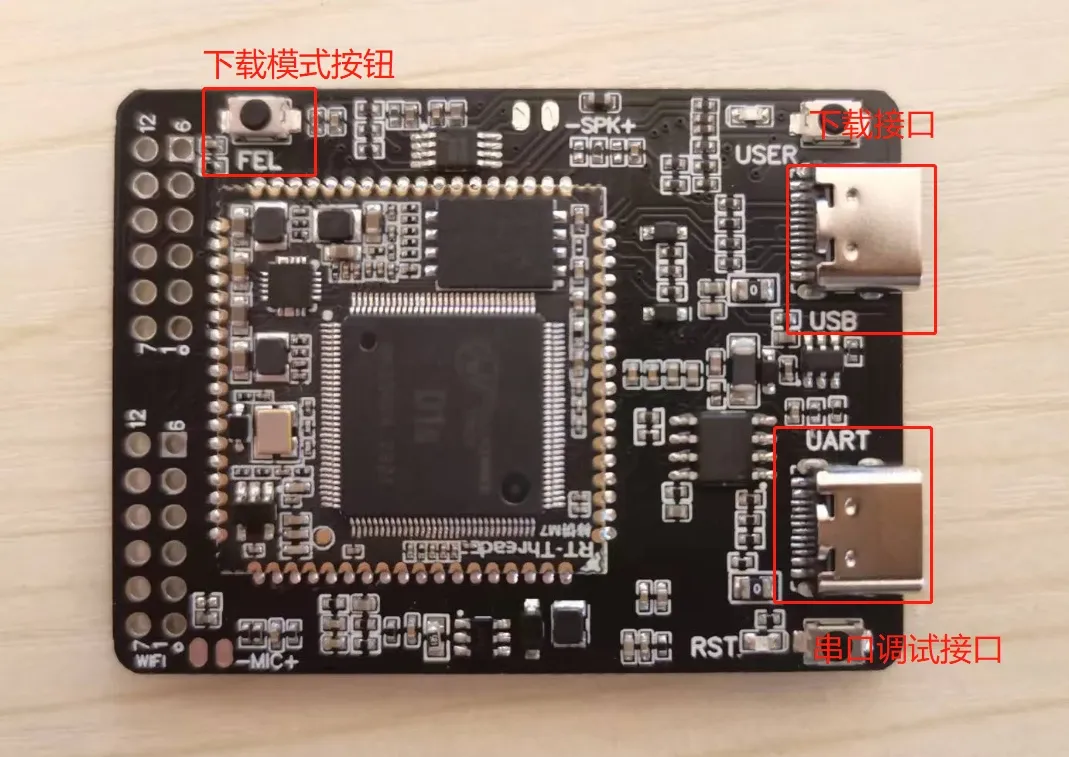
硬件环境:
- RDC2022 纪念版开发板
- Type-c 头数据线
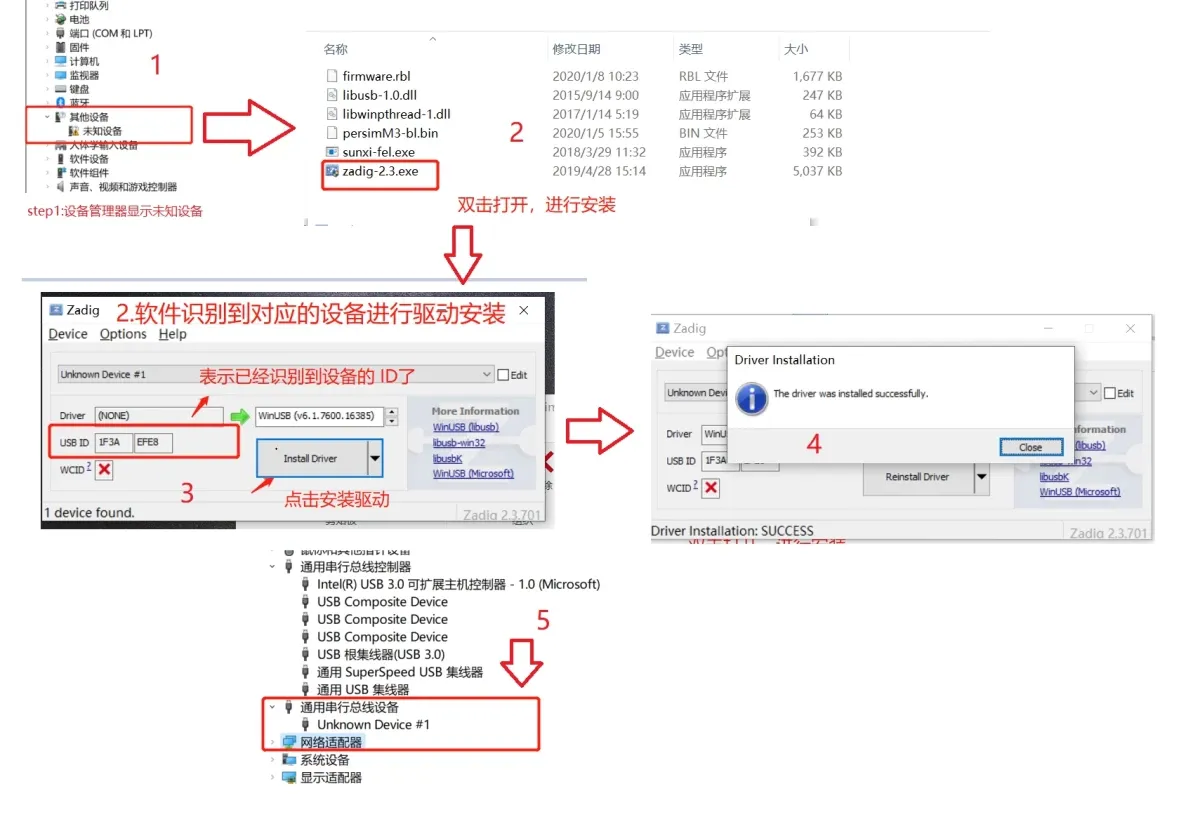
驱动安装
- 上电前,按住下载模式按钮。然后使用 Type-c 数据线插入下载接口给开发板上电。
- 打开资料包中的 zadig 软件/ zadig 官网下载。然后参照如下所示的 “驱动安装示意图”,安装 fel 驱动。
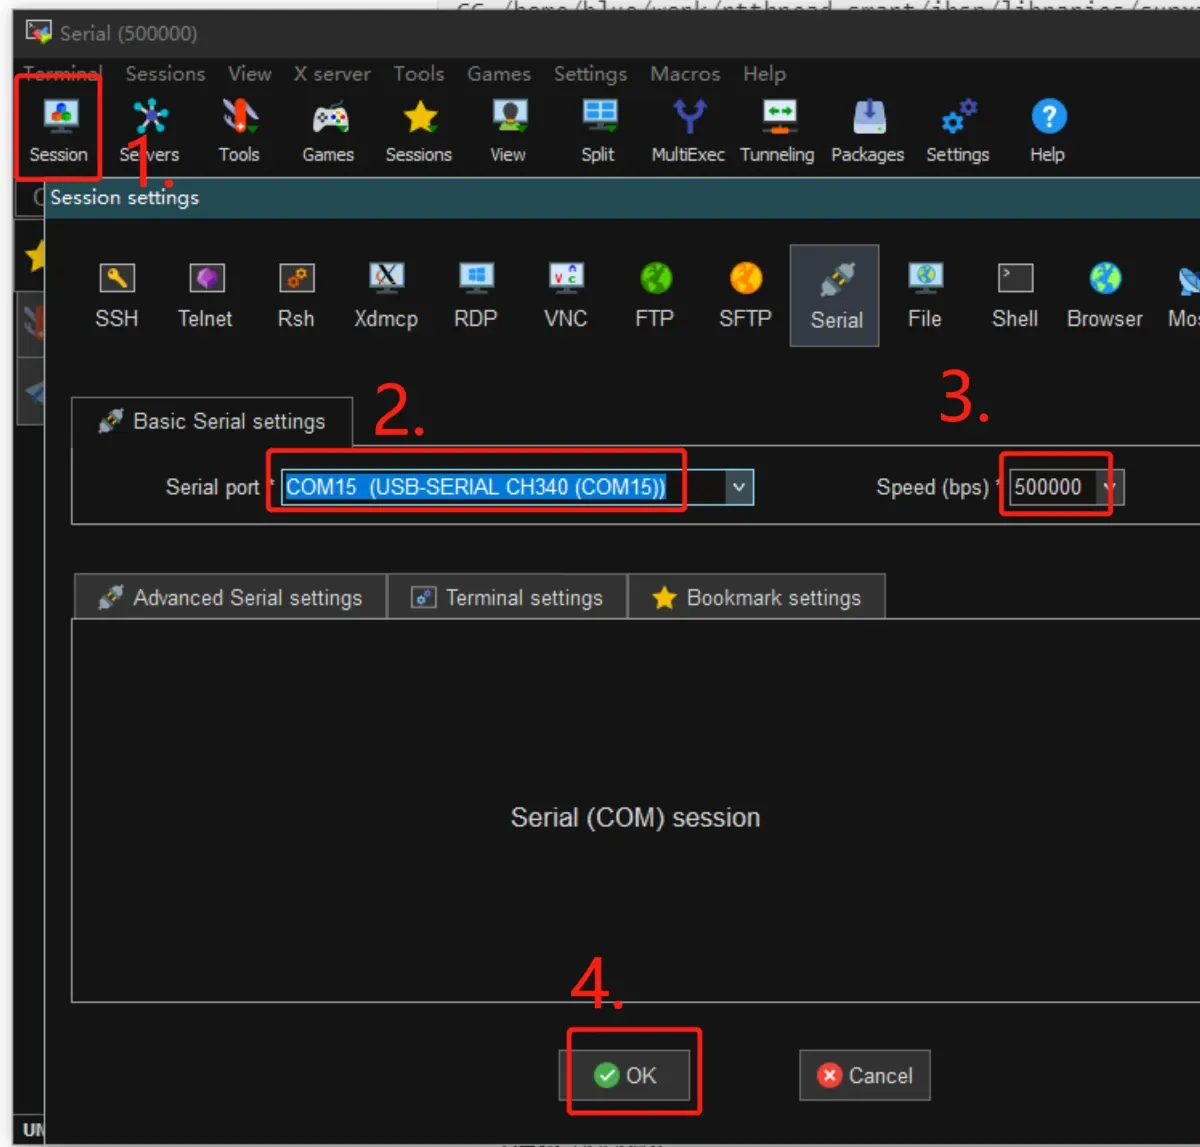
连接串口工具
打开 MobaXterm /其他终端工具,将 Type-C 数据线插入开发板下方的串口调试口,并连接到对应的端口,选择波特率为:500000。
可以按一下开发板的 RST 按钮,可以看到终端输出以下的信息,即为出厂固件

二次开发指南
下载代码
1.下载 RT-Smart 用户态应用代码:
git clone https://github.com/RT-Thread/userapps.git2.进入 userapps 目录,下载 RT-Smart 内核代码(RT-Smart 现在已经合入 master,可以直接使用主线代码)
cd userapps && git clone https://github.com/RT-Thread/rt-thread.git配置工具链
运行 userapps\tools 目录下 get_toolchain.py 的脚本,会下载对应的工具链并展开到userapps\tools\gun_gcc 目录。
因为 D1S 是 RISCV-64 架构的,所以输入下面的命令:
python3 tools/get_toolchain.py riscv64在 userapps 目录下,运行 smart-env.sh 配置工具链路径
source smart-env.sh riscv64编译内核程序
进入 rt-thread/bsp/allwinner/d1s 目录下
cd rt-thread/bsp/allwinner/d1s使用
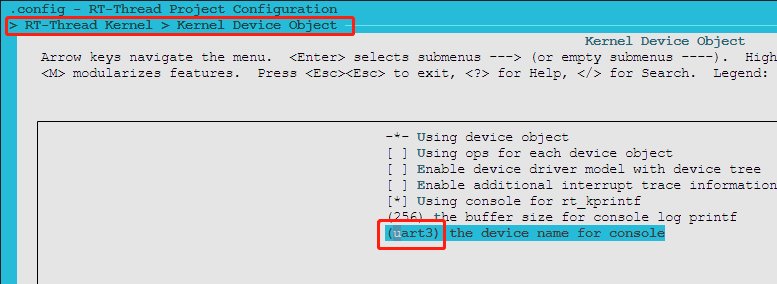
scons --menuconfig查看配置smart 使用的串口为 UART3 ,对应引脚为 PG8 和 PG9。
-
检查 UART3 是否开启,以及引脚是否正确

-
检查终端使用串口是否为 uart3
-
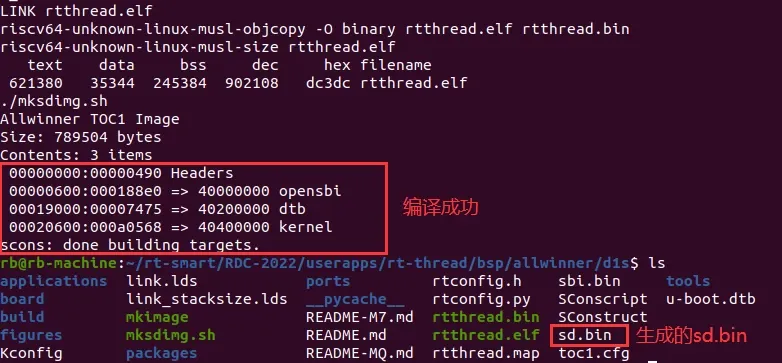
使用 scons 命令编译 BSP
编译完内核之后,会自动执行打包命令./mksdimg.sh打包出 sd.bin 镜像文件。此文件将在后面借助下载工具,下载到 D1s 上运行。
烧录系统内核
接下来借助 fel 工具烧录系统内核。
boot0_sdcard_sun20iw1p1_f133.bin   ---- 第一次烧录需要烧录此boot文件(后面不需要再烧录)
sd.bin                             ---- 打包好的系统内核镜像
xfel.exe                           ---- 烧录工具
在 window 中的
xfel_v1.2.9目录下,打开终端使用以下命令烧录固件:-
烧录boot镜像: xfel.exe write 8192 boot0_sdcard_sun20iw1p1_f133.bin
-
烧录内核镜像: xfel.exe sd write 57344 sd.bin

注意:执行烧录命令前,需要使开发板处于fel下载模式(按住下载按钮并上电)运行用户态应用(可选)
将 D1s BSP 目录下的
./mksdcard.sh拷贝到userapps下。运行该脚本,将生成的sdroot.bin,复制到 window 中的xfel_v1.2.9目录下,使用以下命令即可烧录用户态程序到存储设备 :xfel.exe sd write 8388608 sdroot.bin
参照下面的运行日志,运行对应的用户态应用:
msh />ls
Directory /:
hello.elf           341224
ping.elf            347336
pong.elf            342160
umailbox.elf        357440
vi.elf              517464
webclient.elf       393032
webserver.elf       489416
msh /bin>hello.elf
msh /bin>hello world!
可以看到 hello world 程序已经成功运行,至此我们的用户态程序已经跑起来了。
文章中涉及到的软件以及开发板资料下载:RDC资料.7z
原文链接:https://club.rt-thread.org/ask/article/bd9c5cb55e0bc8f5.html
-
Referenced by N new_bee
-
Referenced by N new_bee
-
Referenced by C canxuetian
-
Referenced by C canxuetian
-
Referenced by S sczh01
-
Referenced by S sczh01
Copyright © 2024 深圳全志在线有限公司 粤ICP备2021084185号 粤公网安备44030502007680号