使用tinyvision制作简单的网络摄像机IPCv2
-
承接上一篇预告的功能
上一篇链接 https://bbs.aw-ol.com/topic/5484功能简介
实现rtsp/rtmp/http-flv服务 rtsp/rtmp推流外部服务器 mp4录制
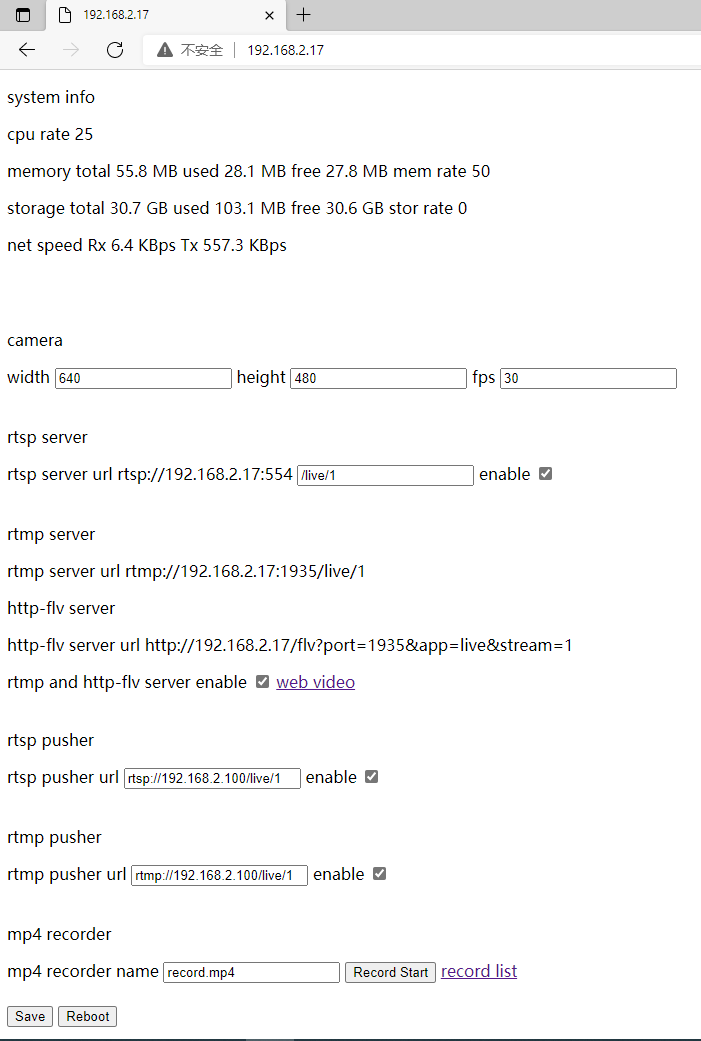
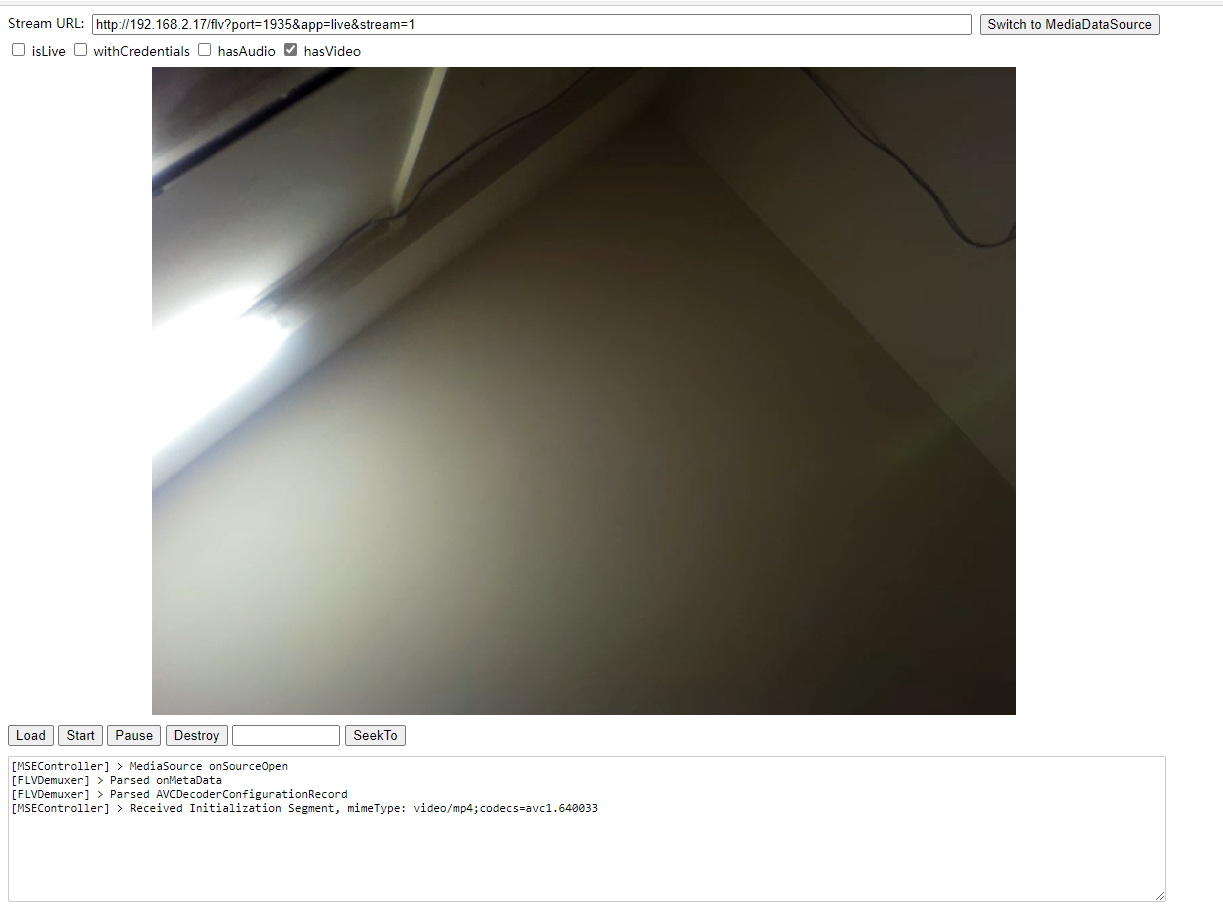
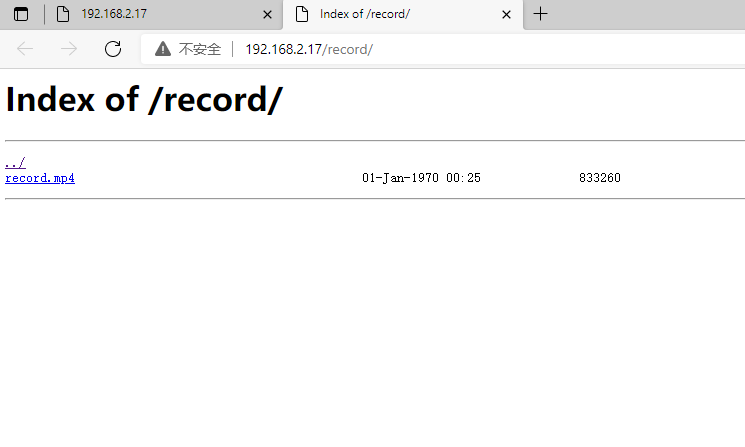
实现web管理后台 可以在网页上查看tinyvision资源占用状态 配置摄像头分辨率 流地址配置 观看摄像机画面 录制管理演示效果
web管理后台

在web上观看摄像机画面

录制管理

web管理后台实现原理
用nginx实现http服务器 然后web前端就是经典html js 后端接口是C艹写的fcgi 后端通过json和udp把配置参数传给读帧编码推流程序tinyvisionIpc附件
使用tinyvision制作简单的网络摄像机IPCv2附件.zip
附件内容
安装包 整套程序的安装包 执行一个脚本就可以安装 本来打算用自解压脚本 后来发现在板子上解压不了 就直接用没压缩的
测试工具 ffmpeg mediamtx流媒体服务
镜像 和官方提供的镜像相比只是加了一些简单常用的命令进去
源码工程 读帧编码推流程序tinyvisionIpcV2 web后端接口程序tinyvisionFcgi安装包安装
先用adb把安装包传入板子
adb push D:\Ubuntu18_tinyvision\share\setupTmp /root
cd /root/setupTmp
增加执行权限 执行安装脚本
chmod +x setup.sh
./setup.sh
等安装完毕后 修改启动脚本里的ip配置 以后开启都会自动配置ip
vi /etc/init.d/S98tinyvisionIpc
完成后重启
reboot重要文件路径
开机启动脚本 /etc/init.d/S98tinyvisionIpc
主要程序 /root/
nginx程序 /www/server/nginx/sbin/nginx/nginx
nginx配置 /www/server/nginx/conf/nginx.conf
web /www/server/nginx/html
配置文件 /root/conf
录制路径 /root/record功能测试
web管理后台
在pc浏览器上输入板子ip进入web管理后台
web每秒刷新板子资源占用状态 可以配置部分参数 注意 配置参数需要保存重启系统才生效摄像机配置
验证过的参数
1920 1080 20
1280 720 30
640 480 30rtsp server配置
可以配置url 和是否开启
用ffplay拉流验证
ffplay.exe -rtsp_transport tcp rtsp://192.168.2.17/live/1rtmp server 和 http-flv server配置
可以配置是否开启 可以点击web video在web上观看摄像机画面
用ffplay拉流验证
ffplay.exe rtmp://192.168.2.17/live/1
ffplay.exe "http://192.168.2.17/flv?port=1935&app=live&stream=1"rtsp push配置
可以配置rtsp推流url和是否开启
与rtsp服务不同的是 rtsp推流可以以rtsp的方式推流到外部的流媒体服务器
在pc用mediamtx.exe开启流媒体服务 只需双击执行程序即可 不需要任何配置 关闭窗口则结束流媒体服务程序
在rtsp推流配置url把ip换成pc的ip
rtsp推流只在程序开始运行时推流 如果当时流媒体服务没开启来则推流失败不再推流 所以必须先开启流媒体服务再给板子重启rtmp push配置
与rtsp push配置同理
rtmp推流可以推流各种直播间mp4 recorder
可以配置录制文件名 开启录制 查看录制文件
配置录制文件名不需要重启才生效 开启录制就生效
录制完成后 可以在record list查看、下载录制文件拉流注意
拉rtmp和http-flv的延迟会比rtsp高
点击web video在web上观看摄像机画面是http-flv协议 所以延迟会高一些最后发发牢骚
整套功能实现难度不大 但是调起来非常繁琐 一会写读帧编码推流程序 一会写后端接口fcgi程序 一会写html js 出来问题各个部分都要看一遍
最后还是一点一点调完了 64MB内存能跑这么多东西做完还是非常有成就感的 -
还是飞经理懂推流,赢麻了
-
Referenced by
 lajuchenghui
-
大佬太强啦!

-
大佬厉害,666666
-
@lajuchenghui
Great job so far on the implementation!I've noticed an opportunity to improve performance significantly in the H264Encoder module. Currently, in the YuvIn function, it appears that the ISP output is being copied to the encoder input. This memory copy operation can negatively impact performance, especially in high-throughput scenarios.
Here’s the relevant part of the code:
int H264Encoder::YuvIn(uint8_t *y, uint8_t *c)
{
    int ret;
    pInputBufInfo = dequeue(&pEncContext->mInputBufMgr.valid_quene);
    LOGV("get input buf, pInputBufInfo = %p", pInputBufInfo);
    if (pInputBufInfo == NULL)
    {
        return -1;
    }
    pInputBuf = &pInputBufInfo->inputbuffer;

    memcpy(pInputBuf->pAddrVirY, y, ALIGN_XXB(16, encode_param.src_width) * ALIGN_XXB(16, encode_param.src_height));
    memcpy(pInputBuf->pAddrVirC, c, ALIGN_XXB(16, encode_param.src_width) * ALIGN_XXB(16, encode_param.src_height / 2));

    // pInputBuf->pAddrVirY = y;
    // pInputBuf->pAddrVirC = c;

    pInputBuf->bEnableCorp = 0;
    pInputBuf->sCropInfo.nLeft = 240;
    pInputBuf->sCropInfo.nTop = 240;
    pInputBuf->sCropInfo.nWidth = 240;
    pInputBuf->sCropInfo.nHeight = 240;
    ...
}
Would it be possible to use a zero-copy approach here? For example, directly assigning the ISP output buffer to the encoder input buffer (pAddrVirY and pAddrVirC) rather than copying data with memcpy. This would reduce the memory overhead and increase performance.
I understand that there might be constraints, such as alignment requirements or format differences. Could you let me know if there’s a way to enable zero-copy in this context, and if not, what the blockers are?
I also found this that do the job in V3s
Thank you, and looking forward to your insights!
-
@amirhos_esm 开发的过程中我也纠结过这个零拷贝问题 主要是这个h264编码器的输入必须要拷贝图像数据进去 不能直接传指针 也许还有传物理地址的办法 但是没找到 厂商还有一套商用sdk是支持零拷贝的 但是那是另一套框架 需要签NDA协议才能拿到 就是4.0的SDK
-
大佬太厉害了
 ,最终的延迟有多少?
 -
大佬,请问我的内存可以于安装的只有10.9M,虚
 拟内存有27M,怎么才能安装进去啊?
 -
去年买的tinyvision吃灰一年
-
大佬厉害,学习了,准备上手试一下
Copyright © 2024 深圳全志在线有限公司 粤ICP备2021084185号 粤公网安备44030502007680号