请问荔枝派zero V3s 怎么修改 TF卡的频率?
tigger 发布的帖子
-
我这边碰到个安卓8.1的设备,EMMC坏了,换个同型号的EMMC后。用U盘导入原数据却不能开机。请问程序可以和emmc绑定吗?如果绑定是在哪个分区?是否可以修改发布在 其它全志芯片讨论区
我这边碰到个安卓8.1的设备,EMMC坏了,换个同型号的EMMC后。用U盘导入原数据却不能开机。请问程序可以和emmc绑定吗?如果绑定是在哪个分区?是否可以修改
-
回复: 请问bootrom是如何加载nand flash的spl呢?发布在 MR Series
@woolen
brom 会检查 magic 和 crc 吧,如果这些都不对,会进入继续查找下一个合法的启动介质。spl 加载到 sram 运行后,那些指令会自动跳过magic 和 crc,因为都是计算好的,反编译一下就知道了。
全志D1芯片之终极探索
https://whycan.com/t_6546.html#p67457至于你说的 spl 长度,可以参考这个wiki:
https://linux-sunxi.org/BROM (每个soc的spl长度可能不同) -
回复: 请问bootrom是如何加载nand flash的spl呢?发布在 MR Series
brom会把spl全部复制到sram,然后pc指过去,指令会自动跳过那些magic,crc,也会去判断是否有magic,crc是否正确。
-
python 脚本根据公网IP自动获取地址和天气信息发布在 MR Series
项目地址: https://github.com/whitejoce/Get_Weather
https://raw.githubusercontent.com/whitejoce/Get_Weather/main/GetWeather.py
#!/usr/bin/python
# _*_coding: utf-8 _*_
#Coder:Whitejoce

import sys
import time
import json
import requests
import bs4
import re
import urllib as urlparse
import http.client

#输出模式,0为shell输出,1为窗口输出(窗口仅输出天气信息)
output=0

def get_CityName():
    try:
        res=requests.post(url='http://ip-api.com/json/?lang=zh-CN', data={'ip': 'myip'},timeout=10)
        result = res.json()['city']
    except:
        print(" [!]正在进行网络自检并重试")
        try:
             res=requests.post(url='http://ip-api.com/json/?lang=zh-CN', data={'ip': 'myip'},timeout=15)
             result = res.json()['city']
        except:
             print(" [!]无法从相关网站获得请求(请求总时长:25s),退出脚本")
             sys.exit(1)
    ##print(res.json())
    City = re.findall('(.*?)市',result)
    CityName = "".join(City)
    #CityName = CityName[-2:]
    if len(CityName) ==0:
             print(' [!] 未自动匹配到你所在地的地区信息:'+result)
    return CityName

def get_city_code(city):
    try:
        parameter = urlparse.parse.urlencode({'cityname': city})
        conn = http.client.HTTPConnection('toy1.weather.com.cn', 80, timeout=5)
        conn.request('GET', '/search?' + parameter)
        r = conn.getresponse()
        data = r.read().decode()[1:-1]
        json_data = json.loads(data)
        code = json_data[0]['ref'].split('~')[0]
        return code
    except:
        print(' [!] 错误,未能找到该地区信息')
        print(" [#] 退出脚本")
        sys.exit()

def get_weaPage(url,headers):
    res = requests.get(url, headers=headers)
    ##print(res.text)
    s=res.content
    s.decode('ISO-8859-1')
    bs = bs4.BeautifulSoup(s,"html.parser")
    html = bs.prettify()
    return html

def CheckInput(InputString):
    if any(char.isdigit() for char in InputString):
        return True
    match = re.search('[a-zA-Z]+$',InputString)
    if match:
        return True
    return False

def GetItem(name,list):
    name = re.findall(r'"'+list+'":"(.*?)"',name)
    name = "".join(name)
    return name

def get_weather(City_code):

    headers1 = {
    'Referer' : "http://www.weather.com.cn",
    'Cookie': '',
    'User-Agent': 'Mozilla/5.0 (Windows NT 10.0; Win64; x64; rv:66.0) Gecko/20100101 Firefox/66.0'
    }

    #timestamp的长度为13
    #timestamp = ''.join(str(random.choice(range(10))) for i in range(13))
    t = time.time()
    timestamp = str(int(round(t * 1000)))
    port = "http://d1.weather.com.cn/weather_index/"+City_code+".html?_="+timestamp
    html = get_weaPage(port,headers1)
    #print(html)
    wea_list_all= html.split("var")
    #print(wea_list_all)
    temp_port = "http://d1.weather.com.cn/dingzhi/"+City_code+".html?_="+timestamp
    temp_html=get_weaPage(temp_port,headers1)
    #print(temp_html)

    #cityDZ
    #-----------------------------------------------------
    html1= wea_list_all[1]
    wea_list1= html1.split(",")
    temp_list=temp_html.split(",")

    #print(temp_list)
    #城市英文
    city_en = wea_list1[1]
    city_en = GetItem(city_en,"cityname")
    #温度区间
    maxtemp = temp_list[3]
    maxtemp = GetItem(maxtemp,"temp")

    mintemp = temp_list[4]
    mintemp = GetItem(mintemp,"tempn")
    #实时天气
    wea_now = wea_list1[4]
    wea_now=GetItem(wea_now,"weather")

    #alarmDZ
    #-----------------------------------------------------
    wea_list2 = wea_list_all[2]
    wea_alarm_all = re.findall(r'alarmDZ ={"w":[(.*?)]};',wea_list2)
    warning = 0
    EmptyList = ['']
    if wea_alarm_all == EmptyList:
         pass
    else :
         warning = 1

    #dataSK
    #-----------------------------------------------------
    html3 = wea_list_all[3]
    wea_list3= html3.split(",")
    #城市
    cityname = wea_list3[1]
    cityname=GetItem(cityname,"cityname")
    #当前温度
    temp_now = wea_list3[3]
    temp_now=GetItem(temp_now,"temp")
    #湿度
    wet = wea_list3[9]
    wet=GetItem(wet,"SD")
    #时间
    update = wea_list3[13]
    update=GetItem(update,"time")
    #空气质量
    aqi = wea_list3[16]
    aqi=GetItem(aqi,"aqi")
    #PM2.5
    aqi_pm25 = wea_list3[17]
    aqi_pm25=GetItem(aqi_pm25,"aqi_pm25")
    #日期
    date = wea_list3[22]
    date=GetItem(date,"date")
    #-----------------------------------------------------

    #dataZS
    wea_list4 = wea_list_all[4]
    #-----------------------------------------------------
    ##print(wea_list4)
    #ataZS=re.findall(r',"(.*?)":',wea_list4)
    ##print(dataZS)
    #-----------------------------------------------------
    umbrella=GetItem(wea_list4,"ys_des_s")

    #和风天气
    headers2 = {
        'User-Agent': 'Mozilla/5.0 (Windows NT 10.0; Win64; x64; rv:66.0) Gecko/20100101 Firefox/66.0'
    }
    qwea_url = "https://www.qweather.com/weather/"+city_en+"-"+City_code+".html"
    qwea_html = get_weaPage(qwea_url,headers2)
    #print(qwea_html)
    wea_comment = re.findall(r'<div class="current-abstract">(.*?)</div>',qwea_html,flags=16)
    wea_comment = "".join(wea_comment)
    aqi_level = re.findall(r'<p class="city-air-chart__txt text-center">(.*?)</p>',qwea_html,flags=16)
    aqi_level=aqi_level[0].replace("\n","")
    aqi_level=aqi_level.replace(" ","")
    wea_comment = wea_comment.strip('\n')
    wea_comment = wea_comment.replace(" ","").replace("\n","")

    #-----------------------------------------------------
    weather_text=''' {0}

 ===================================
 定位城市:  {1}
 实时天气:  {2}
 实时温度:  {3}℃
 温度区间:  {4} - {5}
 空气湿度:  {6}
 空气质量:  {7}({8}),PM2.5: {9}
 雨具携带:  {10}
 [更新时间: {11} {12}]
 ==================================='''.format\
(wea_comment,cityname,wea_now,temp_now,maxtemp,\
mintemp,wet,aqi,aqi_level,aqi_pm25,umbrella,date,update)
    #-----------------------------------------------------
    #print("\n " + wea_comment)

    #print(" ===================================")
    #print(" 定位城市:  "+cityname)
    #print(" 实时天气:  "+wea_now)
    #print(" 实时温度:  "+temp_now+"℃")
    #print(" 温度区间:  "+maxtemp+"℃ - "+mintemp+"℃")
    #print(" 空气湿度:  "+wet)
    #0~50优,51~100良,101~150轻度污染,151~200中度污染,201~300重度污染,>300严重污染
    #print(" 空气质量:  "+aqi+"("+aqi_level+"),PM2.5: "+aqi_pm25)
    #print(" 雨具携带:  "+umbrella)
    #print(" [更新时间: "+date+" "+update +"]")
    #print(" ===================================")
    #-----------------------------------------------------

    #处理天气预警
    if warning==1:
        wea_alarm_all = "".join(wea_alarm_all)
        wea_alarm = re.findall(r'"w9":"(.*?)"',wea_alarm_all)
        wea_counter=len(wea_alarm)
        if wea_counter == 1:
            weather_text=weather_text+"\n [!]气象部门发布预警,请注意:"
            #print(" [!]气象部门发布预警,请注意:")
        else:
            weather_text=weather_text+"\n [!]气象部门发布"+ str(wea_counter) +"则预警,请注意:"
            #print(" [!]气象部门发布"+ str(wea_counter) +"则预警,请注意:")
        #wea_alarm = "".join(wea_alarm)
        if wea_alarm != "":
            i=1
            for alarm in wea_alarm:
                alarm=alarm.replace("\\","")
                alarm=alarm.replace(":",":\n ",1)
                if wea_counter==1:
                    weather_text=weather_text+" \n "+alarm
                    #print(" "+alarm)
                else:
                    weather_text=weather_text+" \n ["+ str(i) +"]"+alarm
                    #print(" ["+ str(i) +"]"+alarm)
                    i=i+1
        else:
            print(" [!]无法获取气象预警详情")
            option = input(" [?]显示完整数据结构?[y/n]")
            if option=="y" or option=="Y":
                #wea_alarm = wea_alarm.replace("{","")
                #wea_alarm = wea_alarm.replace("}","")
                weather_text=weather_text+" \n "+wea_alarm_all
    return weather_text

if __name__ == '__main__':
    try:
        address = get_CityName()
        if len(address)==0:
             address = input(" [?] 请手动输入所在地(例:广州)[输入为空即退出]:")
             if address=="":
                 print(" [#] 退出脚本")
                 sys.exit(1)
             else:
                 if CheckInput(address)==1:
                     print(" [!]检测非地名字符,退出脚本")
                     sys.exit(1)
                 else:
                     print(" [+] 使用手动输入定位位置:"+address)
        else:
             print(" [+] 自动定位位置:"+address)
        code = get_city_code(address)
        try:
            weather_text=get_weather(code)
            if output==0:
                print("\n"+weather_text)
            elif output==1:
                from tkinter import *
                windows = Tk()
                windows.title("GetWeather")
                text1 = Text(windows)
                text1.insert(INSERT,weather_text)
                text1.pack()
                windows.mainloop()
        except Exception as Error:
            print(' [!] 未能找到该地区的天气信息')
            print(" [#] 退出脚本")
            #raise Error
            sys.exit()
    except Exception as Error:
        raise Error
准备工作:
sudo apt install python3 python3-pip
python3 -m pip install bs4
运行
$ python3 GetWeather.py [+] 自动定位位置:深圳 今天多云,比昨天热一些,现在17°,空气一般。 =================================== 定位城市: 深圳 实时天气: 多云 实时温度: 18℃ 温度区间: 23℃ - 15℃ 空气湿度: 60% 空气质量: 65(良),PM2.5: 65 雨具携带: 天气较好,不用带雨伞。 [更新时间: 11月25日(星期四) 09:20] =================================== -
高铁司机的奇葩要求,每隔30秒踩一下踏板,人肉看门狗,如果没踩踏板(喂狗),系统认为司机睡着了,那么列车自动刹车。发布在 灌水区
【高铁司机的奇葩要求,每隔30秒踩一下踏板,不踩会怎样?-哔哩哔哩】
-
回复: 请问这个树莓派MIPI DSI 显示屏是不是用 接口芯片转的?发布在 MR Series
@tigger 在 请问这个树莓派MIPI DSI 显示屏是不是用 接口芯片转的? 中说:
为了防止代码突然失踪, 我把仓库备份到本站: ICN6211-Configurator_git.7z

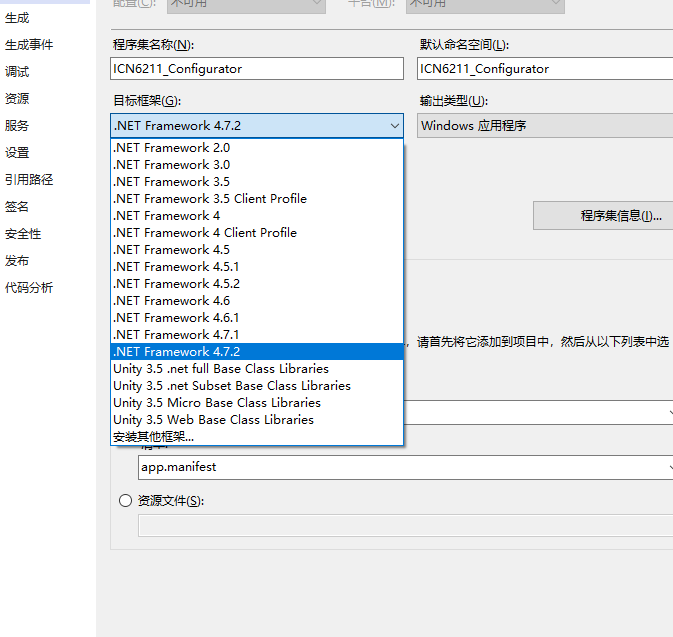
昨天一个网友找我,问有没有这个项目怎么打开,我一脸茫然,回复说里面不是有可执行文件嘛,然后就被打脸。
我又不想装一个动辄20G的VS2019,那厚脸找老铁帮我编译了一个版本,最低依赖 .net 4.7.2 。
-
d1 sdk里 lichee/linux-5.4/drivers/video/fbdev/sunxi/lcd_fb/include.h 引用了riscv平台不存在的 <asm/memory.h>发布在 MR Series
反馈个bug, d1 sdk里 lichee/linux-5.4/drivers/video/fbdev/sunxi/lcd_fb/include.h 引用了riscv平台不存在的 <asm/memory.h>
-
回复: 初始全志D1哪吒开发板,想问问大家这个开发板装的Tina Linux系统和普通的linux差别大不发布在 MR Series
扩展接口和树莓派差不多,性能见仁见智了,编程语言取决于软件平台,社区支持可能树莓派更好一些。
-
回复: 请问哪吒 D1 开发板拔插 HDMI 显示器, 提示sink do not support this mode 是什么问题? 换了两台显示器了.发布在 MR Series
后来改成启动默认就是HDMI:
【固件发布】D1哪吒HDMI测试固件20210804(开机HDMI就有小企鹅启动logo)
https://bbs.aw-ol.com/topic/297/share/2 -
在主线Linux中支持无blob摄像头的开源全志V3 ISP驱动程序发布在 其它全志芯片讨论区
在主线Linux中支持无blob摄像头的开源全志V3 ISP驱动程序
https://cnx-software.cn/2021/10/14/open-source-allwinner-v3-isp-driver/Allwinner SDK 原本是附带了几个二进制 blob的,也就是闭源二进制,但 Bootlin 公司正致力于淘汰这些blob。他们首先为V4L2 框架,以及 Rockchip PX30、RK1808、RK3128 和 RK3288 等处理器中的摄像头接口驱动程序开发了Allwinner A31、V3s/V3/S3 和 A83T MIPI CSI-2的支持,并在不久前实现了对 Omnivision OV8865 和 OV5648 图像传感器的支持。
-
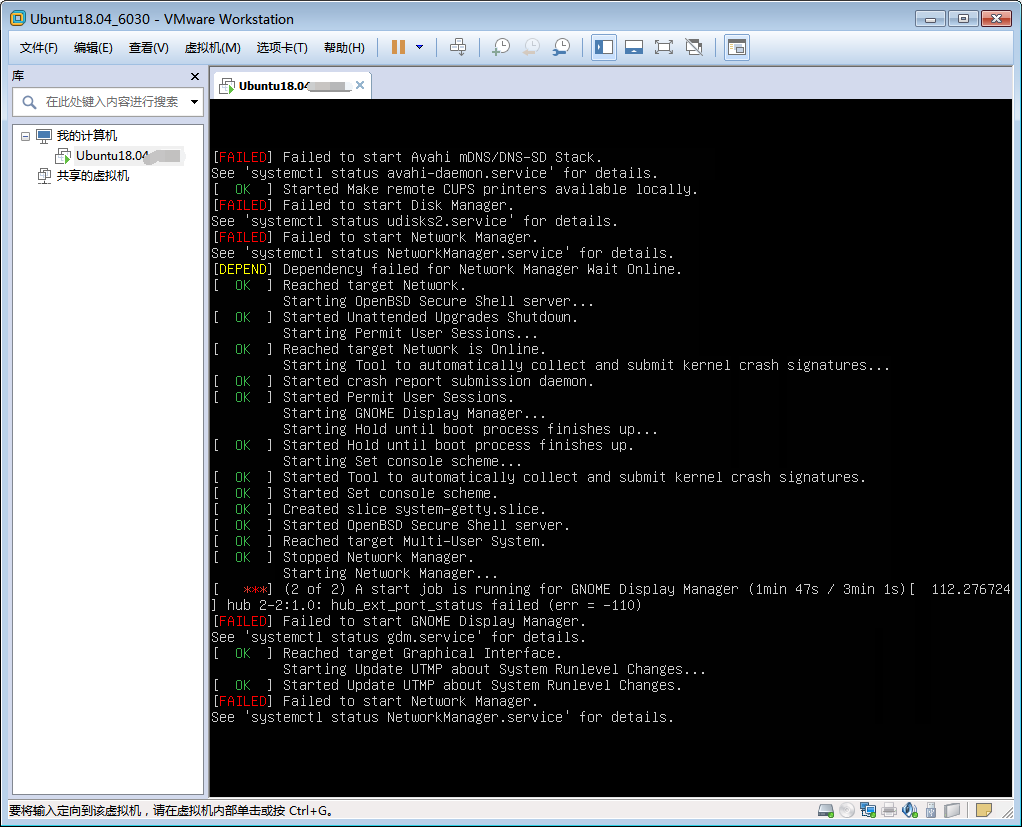
回复: 这虚拟机还有救吗? 图形界面进不去了, 也没有命令行界面,但是ssh终端还能进去,要重新装 gnome ?发布在 灌水区
$ sudo systemctl status gdm.service ● gdm.service - GNOME Display Manager Loaded: loaded (/lib/systemd/system/gdm.service; static; vendor preset: enabled) Active: activating (start) since Wed 2021-10-13 19:56:07 CST; 1min 17s ago Process: 2035 ExecStartPre=/usr/share/gdm/generate-config (code=exited, status=0/SUCCESS) Main PID: 2037 (gdm3) Tasks: 3 (limit: 19097) CGroup: /system.slice/gdm.service └─2037 /usr/sbin/gdm3 Oct 13 19:56:07 ubuntu systemd[1]: Starting GNOME Display Manager... Oct 13 19:56:25 ubuntu gdm3[2037]: GdmLocalDisplayFactory: Failed to issue method call: GDBus.Error:org.freedesktop.DBus.Error.TimedOut: Failed to activa $ -
回复: D1s 跑 Qt4.8.7 出错了发布在 MR Series
搞定了
解决办法:
编译内核时,make menuconfig,在General setup ---> 【】 System V IPC处打上【*】 -
D1s 跑 Qt4.8.7 出错了发布在 MR Series
/tmp # analogclock -qws
QLock::QLock: Cannot create semaphore /tmp/qtembedded-0/QtEmbedded-0 'd' (38, Function not implemented)
Cannot get display lock
Aborted -
又多了一款免费商用字体 ---- HarmonyOS Sans 鸿蒙字体发布在 灌水区
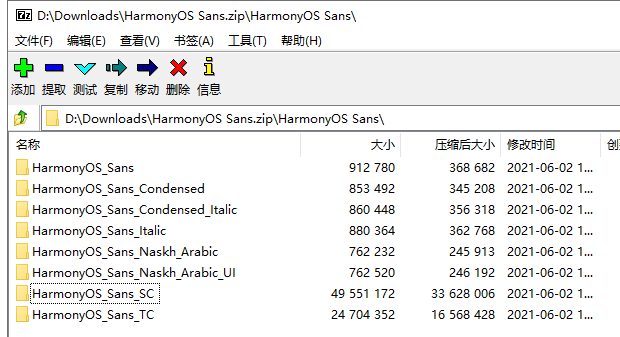
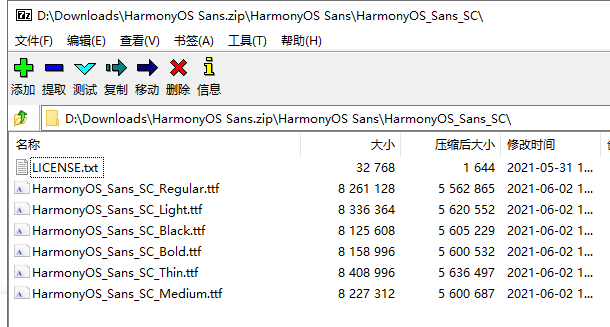
一款免费中文字体—— HarmonyOS Sans 鸿蒙字体,任何个人或企业均能下载并“免费用于商业用途”…鸿蒙字体来自汉仪字库字体团队,设计上聚焦于功能性、普适性,是一款多语言的无级可变字体。该款字体支持包括简体中文、繁体中文、拉丁、西里尔、希腊、阿拉伯等 5 大书写系统,以及 105 种语言全球化覆盖。官方网站下载: https://developer.harmonyos.com/cn/docs/design/des-guides/font-0000001157868583
-
请问哪吒接USB鼠标之后 /dev/input/eventX /dev/input/mouseX /dev/input/mice 这几个设备有神马区别?发布在 MR Series
请问哪吒接USB鼠标之后 /dev/input/eventX /dev/input/mouseX /dev/input/mice 这几个设备有神马区别?
-
坐等芒果派即将推出基于D1s代号麻雀MangoPi-MQ1 的 RISC-V Linux小板发布在 MR Series
MPi-MQ1(麻雀)是针对全志D1s设计的小型RISCV-Linux原型板,
一体化设计,高颜值,炒鸡迷你, 资源:主控D1s(内置64MB运存版本)
USB-OTG Type-C形式(fel方式刷机、接U盘、键盘、摄像头、usb网卡等)
USB-HOST Type-C形式(接U盘、键盘、摄像头、usb网卡等)
22Pin扩展排针 x2(全Pin引出)
Nand/Nor FLASH
TF卡槽
板载基于AP6212/RTL8723的WiFi/BT
15P通用树莓派DSI FPC排座
40P通用RGB FPC排座(内含4线电阻触摸接口)
6P通用电容触摸FPC排座
板载MIC*1
24Pin DVP接口(only R2 R3)
BOOT按键、复位按键
4x4m迷你尺寸,4个固定装配脚 -
回复: 给D1 SDK 添加一个简单的helloworld package发布在 MR Series
ubuntu:/opt/D1/tina_d1_open$ ls package/test1/test2/test3/test4/test5/test6/helloworld/
Makefile  src
ubuntu:/opt/D1/tina_d1_open$
ubuntu:/opt/D1/tina_d1_open$ make package/test1/test2/test3/test4/test5/test6/helloworld/compile
===This's tina environment.===
special target, skip mboot,marisc
make[1]: Entering directory '/opt/D1/tina_d1_open'
make[1]: *** No rule to make target 'package/test1/test2/test3/test4/test5/test6/helloworld/compile'.  Stop.
make[1]: Leaving directory '/opt/D1/tina_d1_open'
/opt/D1/tina_d1_open/build/toplevel.mk:304: recipe for target 'package/test1/test2/test3/test4/test5/test6/helloworld/compile' failed
make: *** [package/test1/test2/test3/test4/test5/test6/helloworld/compile] Error 2

#### make failed to build some targets (8 seconds) ####
真不行,按理 scan.mk 不可能无限层级遍历Makefile 文件。
-
回复: 给D1 SDK 添加一个简单的helloworld package发布在 MR Series
实际测试的时候, helloworld 文件夹可以埋多三层,make 还能找到,如果四层/五层以上就扫描不到不到了。
执行: mv package/helloworld package/test1/test2/test3/
重新 lunch
make package/helloworld/compile
或者:
make package/test1/test2/test3/helloworld/compile
均可以成功。
-
回复: 给D1 SDK 添加一个简单的helloworld package发布在 MR Series
root@TinaLinux:/# helloworld
Hell! O’ world, why won’t my code compile?
烧到板子,执行 helloworld,完全OK
-
给D1 SDK 添加一个简单的helloworld package发布在 MR Series
目录结构:
/opt/D1/tina_d1_open$ tree package/helloworld/
package/helloworld/
├── Makefile
└── src
    ├── helloworld.c
    └── Makefile

1 directory, 3 files
package/helloworld/Makefile 文件内容:
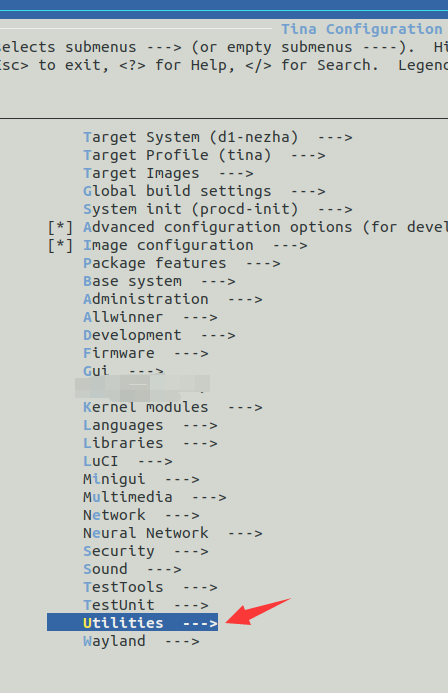
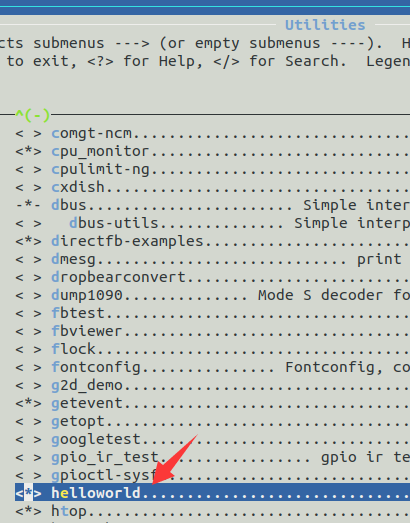
include $(TOPDIR)/rules.mk
# Name and release number of this package
PKG_NAME:=helloworld
PKG_RELEASE:=1

# This specifies the directory where we’re going to build the program.
# The root build directory, $(BUILD_DIR), is by default the build_mipsel
# directory in your OpenWrt SDK directory
PKG_BUILD_DIR := $(COMPILE_DIR)/$(PKG_NAME)
HAVE_SOURCE := yes
include $(BUILD_DIR)/package.mk

# Specify package information for this program.
# The variables defined here should be self explanatory.
# If you are running Kamikaze, delete the DESCRIPTION
# variable below and uncomment the Kamikaze define
# directive for the description below
define Package/$(PKG_NAME)
	SECTION:=utils
	CATEGORY:=Utilities
	TITLE:=hello world test
endef

# Uncomment portion below for Kamikaze and delete DESCRIPTION variable above
define Package/$(PKG_NAME)/description
If you can’t figure out what this program does, you’re probably
brain-dead and need immediate medical attention.
endef

# Specify what needs to be done to prepare for building the package.
# In our case, we need to copy the source files to the build directory.
# This is NOT the default. The default uses the PKG_SOURCE_URL and the
# PKG_SOURCE which is not defined here to download the source from the web.
# In order to just build a simple program that we have just written, it is
# much easier to do it this way.
define Build/Prepare
	mkdir -p $(PKG_BUILD_DIR)
	$(CP) ./src/* $(PKG_BUILD_DIR)/
endef

# We do not need to define Build/Configure or Build/Compile directives
# The defaults are appropriate for compiling a simple program such as this one

# Specify where and how to install the program. Since we only have one file,
# the helloworld executable, install it by copying it to the /bin directory on
# the router. The $(1) variable represents the root directory on the router running
# OpenWrt. The $(INSTALL_DIR) variable contains a command to prepare the install
# directory if it does not already exist. Likewise $(INSTALL_BIN) contains the
# command to copy the binary file from its current location (in our case the build
# directory) to the install directory.
define Package/helloworld/install
	$(INSTALL_DIR) $(1)/bin
	$(INSTALL_BIN) $(PKG_BUILD_DIR)/helloworld $(1)/bin/
endef

# This line executes the necessary commands to compile our program.
# The above define directives specify all the information needed, but this
# line calls BuildPackage which in turn actually uses this information to
# build a package.
$(eval $(call BuildPackage,$(PKG_NAME)))
package/helloworld/src/helloworld.c 文件内容:
/****************
* Helloworld.c
* The most simplistic C program ever written.
* An epileptic monkey on crack could write this code.
*****************/

#include <stdio.h>
#include <unistd.h>

int main(void)
{
	printf("Hell! O’ world, why won’t my code compile?\n\n");
	return 0;
}
package/helloworld/src/Makefile 文件内容:
# build helloworld executable when user executes “make” helloworld: helloworld.o $(CC) $(LDFLAGS) helloworld.o -o helloworld helloworld.o: helloworld.c $(CC) $(CFLAGS) -c helloworld.c # remove object files and executable when user executes “make clean” clean: rm *.o helloworld -
回复: 请问 D1s 的两个LDO输出引脚的电压在哪里配置?发布在 MR Series
D1哪吒开发板DRAM电源是 DCDC输出的,F133开发板的DRAM电源是LDOB输出,我都不知道我的tina linux 为什么能在 F133开发板直接就跑起来了。
-
回复: 第一次调MIPI接口的显示屏,都是什么套路?发布在 MR Series
① SSD_Number 得问厂家是什么定义,或者给个完整的工程文件。
② 树莓派屏不需要初始化,这个地方我们可能占了大便宜 无需考虑初始化了。
③ 理论上只要在uboot初始化一次就可以了,但是如果你用自带的TFT08006驱动,他又会重新驱动一次,所以可能两个都得改。 -
回复: 「RVBoards-哪吒」开启 SSH 和 VNC 远程访问,摆脱烦人的鼠标键盘显示器发布在 MR Series
@aldfaaa
telnetd 是 busybox 的一个app,理论上不应该出现这样问题,再试一试把本机的telnet勾上,看是否能telnet自己? -
回复: Fedora on Allwinner D1 Nezha Board发布在 MR Series
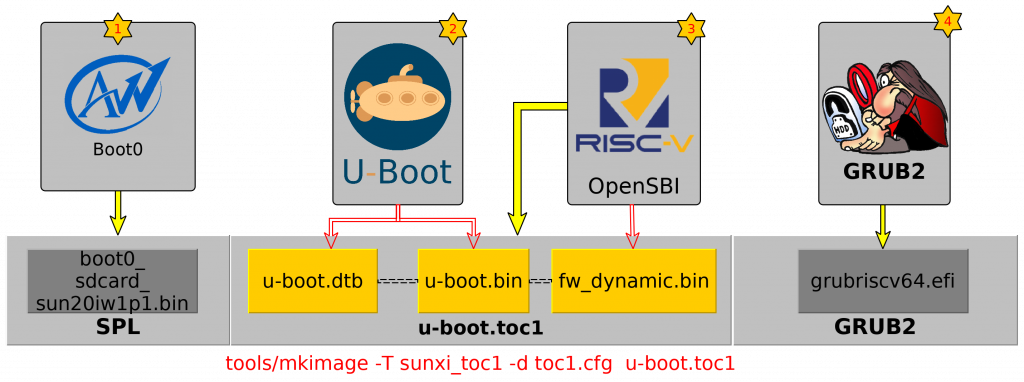
Smaeul's REPO
① SPL/BOOT0
② OpenSBI
③ U-Boot
④ Linux kernel Tekkaman REPOs for Fedora Image
 Firmware Build order
 SPL(Boot0)
boot0 or SPL (Secondary Program Loader) which the first stage after BootROM, it is responsible for initializing DRAM and loading next stage firmware from storage(Flash or SD).Using Smaeul SPL directly.
 Build binary
git clone https://github.com/smaeul/sun20i_d1_spl
pushd sun20i_d1_spl
git checkout origin/mainline
make CROSS_COMPILE=riscv64-linux-gnu- p=sun20iw1p1 mmc
popd Flash to SD card
pushd sun20i_d1_spl
sudo dd if=nboot/boot0_sdcard_sun20iw1p1.bin of=/dev/sdX bs=512 seek=16 OpenSBI
RISC-V Open Source Supervisor Binary Interface, like arm-TFUsing Smaeul's patches, but rebase to the latest upstream OpenSBI, and fix some issue.
Tekkaman's OpenSBI REPO
 Build binary
git clone https://github.com/tekkamanninja/opensbi -b allwinner_d1
pushd opensbi
CROSS_COMPILE=riscv64-linux-gnu- PLATFORM=generic FW_PIC=y make
popdThe build/platform/generic/firmware/fw_dynamic.bin will be used to make u-boot.toc1 below.
 U-boot
Using Smaeul's patches, but enable more features and add some default env for auto-booting into GRUB, and also rebase to the latest upstream U-boot.Tekkaman's U-boot REPO
 Build binary
git clone https://github.com/tekkamanninja/u-boot -b allwinner_d1
pushd u-boot
make CROSS_COMPILE=riscv64-linux-gnu- ARCH=riscv nezha_defconfig
make CROSS_COMPILE=riscv64-linux-gnu- ARCH=riscv menuconfig
make CROSS_COMPILE=riscv64-linux-gnu- ARCH=riscv u-boot.bin u-boot.dtb
popdThe u-boot.bin and u-boot.dtb will be used to make u-boot.toc1 below.
 Build u-boot.toc1
toc1.cfg:[opensbi] file = fw_dynamic.bin addr = 0x40000000 [dtb] file = u-boot.dtb addr = 0x44000000 [u-boot] file = u-boot.bin addr = 0x4a000000build command:
pushd u-boot
cp ${PATH_TO_TOC1_CFG}/toc1.cfg ${PATH_TO_OPENSBI}/fw_dynamic.bin .
tools/mkimage -T sunxi_toc1 -d toc1.cfg  u-boot.toc1
popd
Flash u-boot.toc1 to SD card
pushd u-boot
sudo dd if=u-boot.toc1 of=/dev/sdX bs=512 seek=32800
GRUB for RISC-V
Please reference to this page: Architectures/RISC-V/GRUB2You can build a grubriscv64.efi by following the page above. Then put it into the /EFI/ dir of the EFI partition of SD card.

Some example files in the boot partition:
/boot/uEnv.txt
bootcmd=load mmc 0:2 0x58000000 /EFI/fedora/grubriscv64.efi; bootefi 0x58000000
bootcmd_mmc0=devnum=0; run mmc_boot
/grub.cfg
set default=0
set timeout_style=menu
set timeout=3

set debug="linux,loader,mm"
set term="vt100"

menuentry 'Fedora vmlinux-5.15.0-rc1' {
        linux /vmlinuz-5.15.0-rc1 earlyprintk=sunxi-uart,0x02500000 console=ttyS0,115200 console=tty0 loglevel=8  root=/dev/mmcblk0p4 selinux=0 rhgb LANG=en_US.UTF-8
        devicetree /sun20i-d1-nezha.dtb
	initrd /initramfs-5.15.0-rc1.img
}
Linux kernel for Nezha D1 (WIP)
Using the patches from Smaeul/Ren Guo(T-HEAD)/Allwinner Engineers, enable almost all the features for Fedora,and also rebase to the latest upstream kernel master branch. Important reference
Linux kernel source from T-Head
Allwinner Engineer's REPO
 WIP for Fedora
Tekkaman's Linux kernel REPONote: We are still working on this for Fedora Image
 Build Linux Kernel for D1
 Checkout Source
git clone https://github.com/tekkamanninja/linux.git
pushd linux
git checkout origin/allwinner_nezha_d1_devel
popd
Config
pushd linux
make CROSS_COMPILE=riscv64-linux-gnu- ARCH=riscv nezha_fedora_defconfig
make CROSS_COMPILE=riscv64-linux-gnu- ARCH=riscv menuconfig
popd
Cross Build and install
# RISCV_ROOTFS_BOOT is the mount point of the boot partition in SD card
# RISCV_ROOTFS_BOOT=/run/media/../boot
# RISCV_ROOTFS  is the mount point of the Fedora rootfs partition in SD card
# RISCV_ROOTFS=/run/media/../rootfs
pushd linux
make CROSS_COMPILE=riscv64-linux-gnu- ARCH=riscv
make CROSS_COMPILE=riscv64-linux-gnu- ARCH=riscv INSTALL_PATH=${RISCV_ROOTFS_BOOT} zinstall
make CROSS_COMPILE=riscv64-linux-gnu- ARCH=riscv INSTALL_MOD_PATH=${RISCV_ROOTFS} modules_install
popd
How to Build RPM package for D1
 using rpmbuild on QEMU
How to boot Fedora on QEMU, please reference Architectures/RISC-V/Build Bootable Image#Run_Fedora_on_QEMUBoot into Fedora on QEMU, then:
prepare directory tree: Put spec file to /rpmbuild/SPECS and all source files to /rpmbuild/SOURCES
For building RPM package:#From spec file $ rpmbuild -ba ~/rpmbuild/SPECS/pakcage.spec #'''OR''' to build from an existing SRPM file: $ rpmbuild -ra package.src.rpmPlease reference to How to Create a GNU Hello World RPM Package for more RPM info.
 using mock with Qemu usermod
We also can build riscv64 RPMS on x86_64 machine by mock and Qemu usermode.[WIP] How to Build your own Fedora Remix Image
Please reference to RISC-V: Build Bootable Image How to make D1 as a Koji Builder
If we have already deployed a koji hub(like openkoji and oepkg),then we can add a Nezha D1 as koji builder.For example:
oepkgs hosts
example build on D1 builder in oepkgs
Please follow the simple instruction below:NEED: koji CA certificate and builder authentication certificate: They are provided by koji hub admin.
Install necessary packages# dnf install koji-builderModifying /etc/kojid.conf
server=<koji hub XMLRPC server URL>
topurl=<koji HTT file share URL>
allowed_scms=<SCM repo rules>
cert=<builder certificate>
serverca=<koji CA certificate>
Trust koji hub's CA certcp koji_ca_cert.crt /etc/pki/ca-trust/source/anchors/ update-ca-trustadd host on koji hub (operated by koji hub admin)
koji add-host <hostname> riscv64
#The *hostname* should be same in authentication certificate.
Enable and start kojid
systemctl enable --now kojidVerify koji builder online on koji hub (operated by koji hub admin):
koji list-hosts
# After initialization: The new added builder's status should be ready in the list.
NOTICE:* builder won't ready until free space on /var/lib/mock is greater than 8GiB, and /var/lib/mock on NFS is not supported. Thus, using a high capacity SD card for builder and resize root file system to adapt all free space on SD is necessary.
-
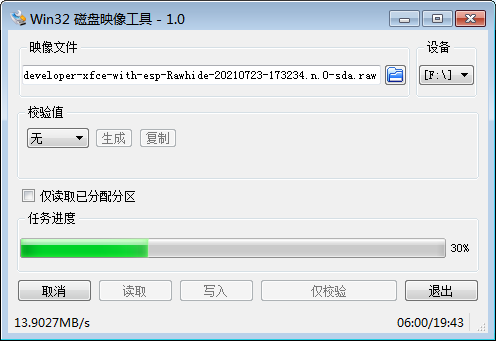
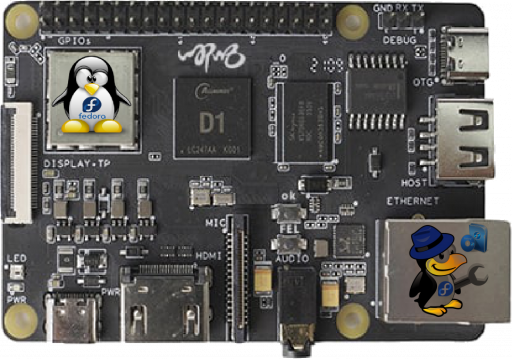
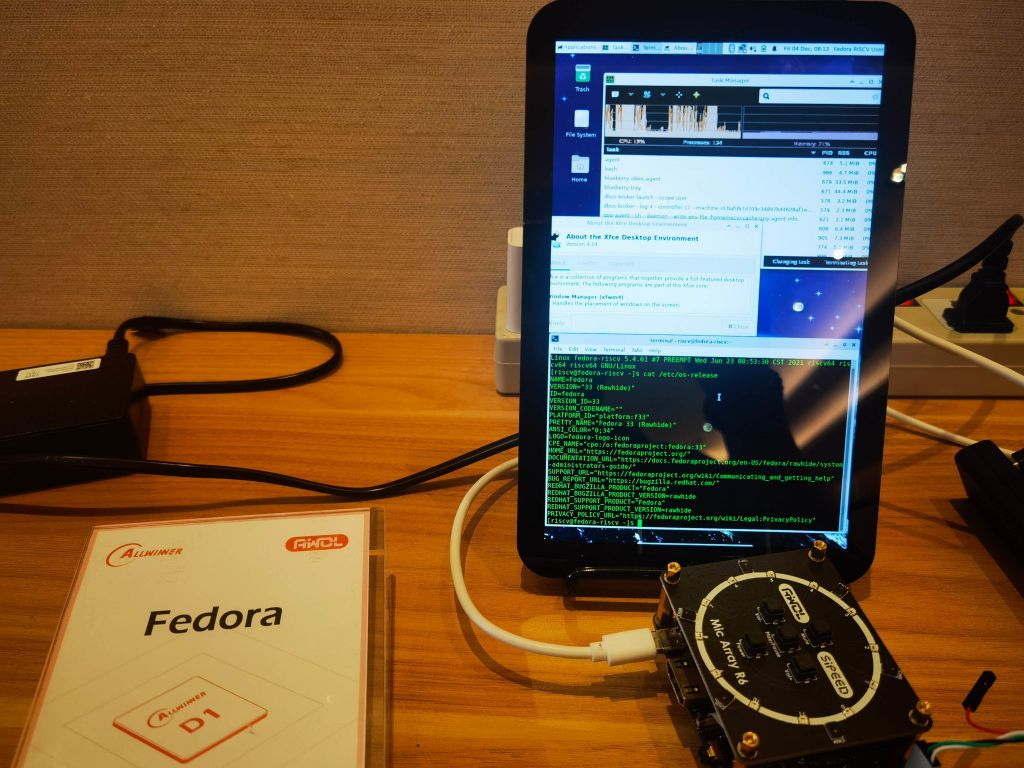
Fedora on Allwinner D1 Nezha Board发布在 MR Series
原wiki地址: https://fedoraproject.org/wiki/Architectures/RISC-V/Allwinner
如果下载遇到困难,也可以加QQ群 498263967,在群附件下载。
-
回复: 【拆机报告】小米sound智能音箱拆机简评发布在 A Series
另外发现的有趣的现象是,镜像的前面1MB左右,都是前1KB有内容,后1KB全FF。开始以为是flash参数填写错误导致读取错误,后面才发现是全志芯片为了兼容旧的小扇区Nand flash做的boot0的兼容性措施。
这是spi nand吧?boot0就是这么操作的。
-
我们公司返修板子(要换驱动板)分了两次生产。返修时重新购买了物料。 问题:第二次生产的板子输出现象不符合预期。发布在 灌水区
问大家一个问题。
背景:我们公司返修板子(要换驱动板)分了两次生产。返修时重新购买了物料。
问题:第二次生产的板子输出现象不符合预期。
备注:第一次的板子没有问题
然后我做了以下实验:
我把旧板子的mcu换到第二批次板子上,现象正常。
我把第二批次的mcu换到旧板子上,会出现我所描述的问题。也就是说芯片的外围电路没有问题,出问题的是mcu。
但诡异的现象出现了,我换了很多个mcu都出现问题。我把旧板子以前剩下的mcu换上也会出现这个问题。
程序是同一批程序。 -
请问V3s可以接1V8的flash吗?最近涨价太猛,刚好朋友有一批1V8的winbond FLASH。发布在 其它全志芯片讨论区
请问V3s可以接1V8的flash吗?最近涨价太猛,刚好朋友有一批1V8的winbond FLASH。
-
请各位大佬推荐方案,芯片或者核心板都可以发布在 其它全志芯片讨论区
我的主要需求是:我们主要需求是:
1、CPU主频≥480MHz。
2、内嵌DDR≥128MB。
3、要能支持模拟音频输入,在CPU内部进行软件或硬件编码(G711A 或 AAC)。
4、要能支持模拟音频输出,在CPU内部进行软件或硬件解码(G711A 或 AAC)。
5、flash支持SPI和EMMC。
6、要支持100M以太网功能,最好能支持1G,如果是PHY内置最好。
7、要支持WIFI接口(通常为SDIO)。
8、除以下功能外,还需要带:至少1个UART、1个USB HOST、10个GPIO接口等。如果有更合适的芯片方案,请推荐,谢谢。
-
回复: 阔怕,虚拟机文件 531G 了,真怕突然崩了。发布在 灌水区
@jordonwu
感谢建议,刚搜了一下 vdi 是 virtualbox 专用的虚拟机文件格式,我的是vmware的,以前用 **vmware-toolbox-cmd disk shrink / ** 是可以瘦身,可能这个虚拟机里面文件太多了,我先去整个2T的移动硬盘备份一下再试一试。 -
回复: Allwinner Mass production start card making tutorial发布在 MR Series
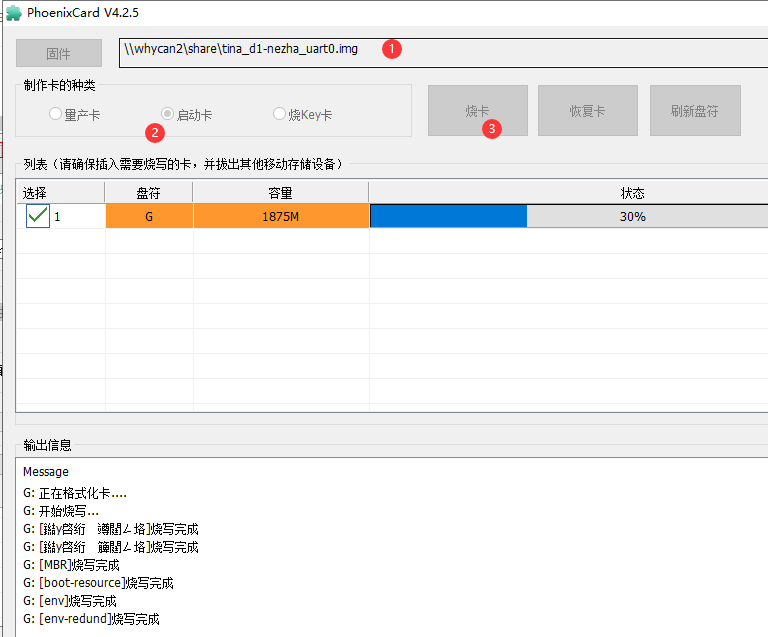
@bedrock 确实不行,只能用 PhoenixCard.exe 烧。
-
回复: 创意怀表 (转载)发布在 灌水区
描述
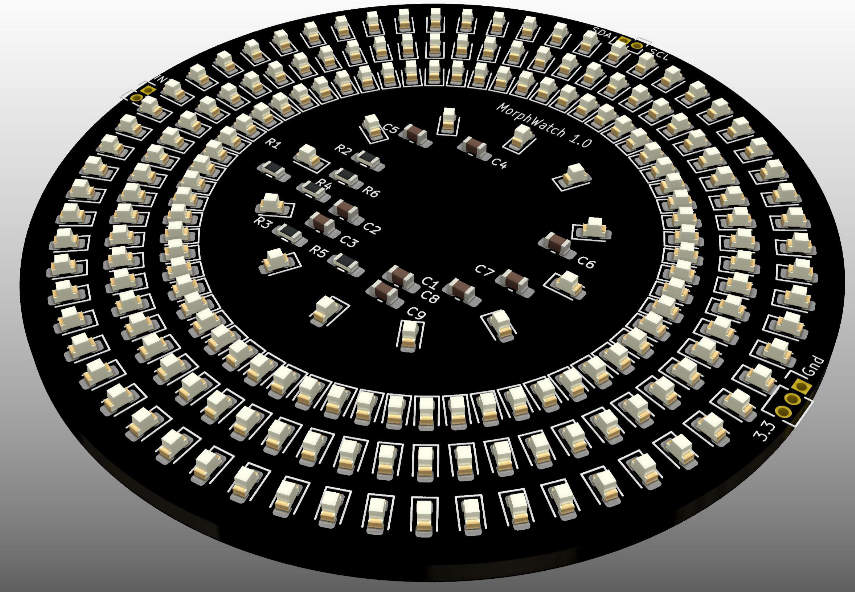
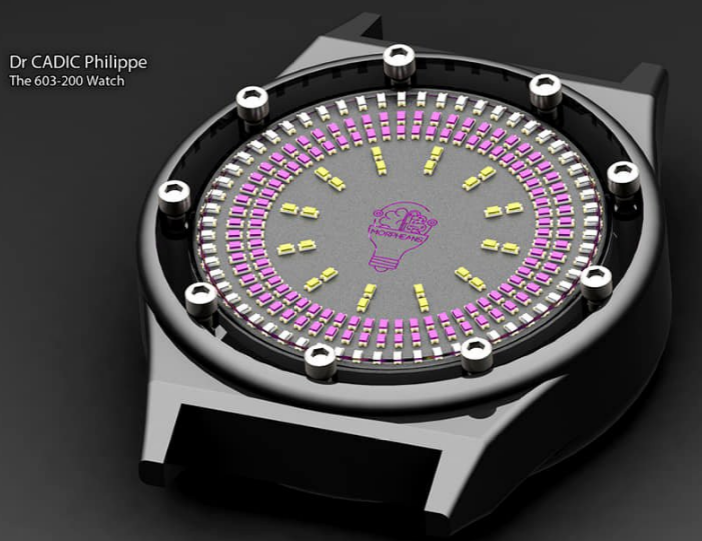
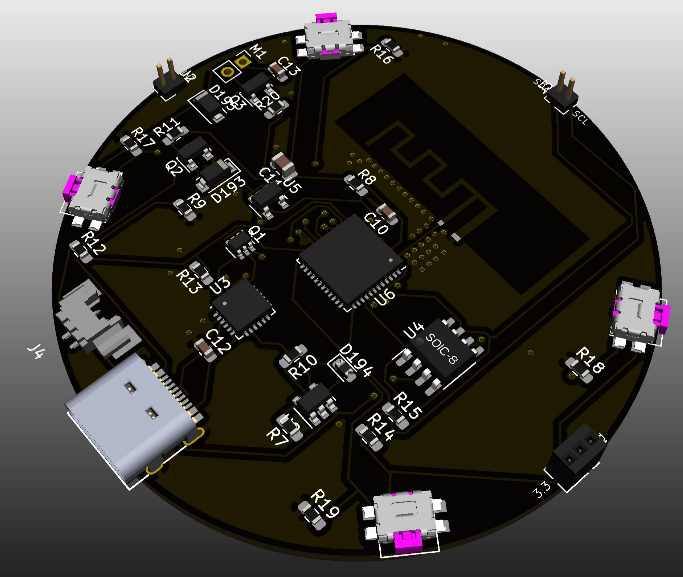
我正在制作这款 ESP32 微型手表。它有 wifi、BT、网状网络、振动电机、RTC、4 个按钮、一个 USBC 连接器,最重要的是:您可以控制 192 603 个 LED。它们允许复杂的灯光效果。有4圈LED。外部用于秒,将是白色的。2 个中间圆圈是紫色的分钟。内圈是黄色的小时。
LED驱动器是:IS31FL3733-TQ
细节产品描述
603-200 是基于相同概念的计划系列手表中的第一款手表,其灵感来自日本 TokyoFlash
 品牌 ( www.tokyoflash.com )。我们希望将这一概念推向一款能够与您的智能手机或任何其他物联网建立通信的完全现代的联网手表。
这款手表是一款开源设备。客户和制造商可以访问所有文档
Kicad-Pcb
 文件进行更正或更新
Arduino IDE Sketches 可从www.github.com获得,用于更新或修改手表的行为
可从www.github.com获得的Python 代码,用于更新或修改手表的行为。您可以访问来自创客社区的数百个 ESP32 代码。
用于创建新顶部显示(sisterboatrd)和设计附加组件的技术文档
CNC 和 3D 打印机的 3D 文件,适合那些愿意用各种材料创建外壳/外壳的人
手表可以做什么:603-200 Morphwatch
 主要设计用于通过其 192 个 LED产生令人兴奋的视觉效果。有 4 圈 603 尺寸格式 SMD 彩色 LED。
1 个外圈 60 个 WHITE 603 LED 秒
2 个中间圈 PURPLE 603 Leds 分钟
1 个内圈黄色 603 Leds 小时
每个 LED 都可以使用 I2C 库或通过 PYTHON 脚本独立编程。用户可以在视觉效果方面非常有创意。现在撇开视觉效果不谈,这款手表还有更多的功能,因为它配备了功能强大的乐鑫
 ESP32 PICO D4 芯片。因此,它是一款完全连接的现代手表,能够通过蓝牙与您的智能手机进行交互。使用您的手机,您可以使用手表与私人 MESH 无线数字网络进行通信。如果您的手机远离(使用蓝牙)或很远(使用 WIFI),您可以让手表振动。
通过4 个按钮,您可以将手表设计为触发继电器、发送紧急电子邮件、向另一只手表发送振动信息 等等……。
使用 MESH ESPNow 协议,每只手表都可以与另一个手表通话,有时超过数百米:您可以在蜂窝网络之外构建您的私人远程消息传递系统......
您可以将手表切换为接入点、网络服务器,这样任何人都可以连接以获取信息(手表名片概念……) 当然,您已经猜到了,这款手表可以告诉您时间!
这个项目的起源来自于看到所有这些千禧一代在手腕上佩戴相同的 i-clock。还担心我们的可穿戴设备失去对前 3 名公司的控制,迫使我们接受他们认为对我们有益的东西(对他们来说更具讽刺意味)。
我们不是在重新发明一切。这款手表的灵感来自我们在CrowdSupply.com 上发现的另一个开源项目。
Wa 想创造一个复古 LED 手表 + 连接手表的混合概念。我们自然而然地来到了ESP32 PICO D4芯片,它功能强大,超级经典的 603 led。如果第一个原型没问题,我们将603的led封装移动到402并减小手表直径。
一组192颗LED,由经典的IS31FL3733-TQ芯片驱动,我们可以设计出一堆很酷的视觉效果,没有限制,只有创意。每个 LED 都可以通过 I2C 独立控制。
ESP32 PICO 4D 使手表能够与 WIFI/BT 以及最重要的ESPNOW连接,这使我们能够创建社区MESH 网络。如果有足够的手表,我们希望在商业锁定的通信网络旁边建立一个世界通信网络。
第一个概念是使用solidworks 创建的。这是一个很酷的软件,用于评估可能性并测试各种图形选项。
-
回复: 使用R329方案的小米xiaomi Sound高保真智能音箱拆解(转)发布在 A Series
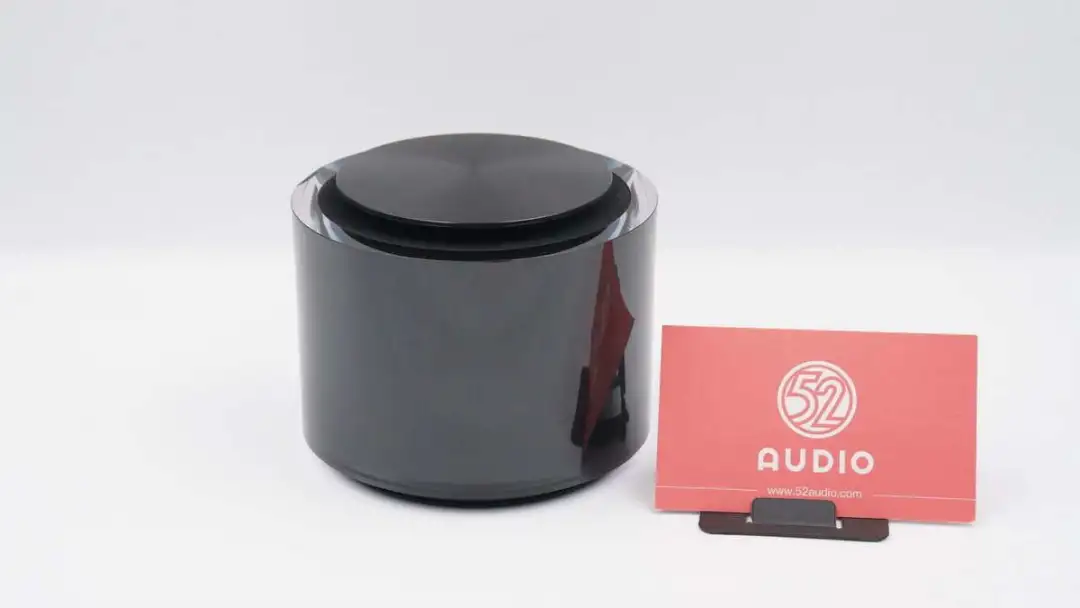
在8月10日,小米“2021雷军年度演讲”成功举行,并同时推出了旗下多款新品。其中,小米首款高端智能音箱xiaomi Sound也正式发布。
xiaomi Sound智能音箱体积小巧,设计灵感来自于唱片机,外观采用了圆柱型的设计,机身为透明材质。顶部触控板像是唱片机上的黑胶唱片,并设计有CD纹理装饰,四周还设计有环形灯带。整体观感极具简约风格但又不失精致。
配置上,采用2.25英寸全频单元+2颗无源辐射器,搭配顶部导音锥结构,实现360°全向出音。音质由HARMAN调音,并支持创新的计算音频技术实时动态调音和夜莺算法;其他方面支持两台设备组成立体声,最多8台设备互联;支持UWB音乐接力,实现音乐的无缝传递;搭配上“小爱同学”智能助手和小米强大的IoT生态系统,提供优质的智能音箱体验。
-
使用R329方案的小米xiaomi Sound高保真智能音箱拆解(转)发布在 A Series
原文链接: https://mp.weixin.qq.com/s/xcV2JIk5XHhLHB1ueMoGGg
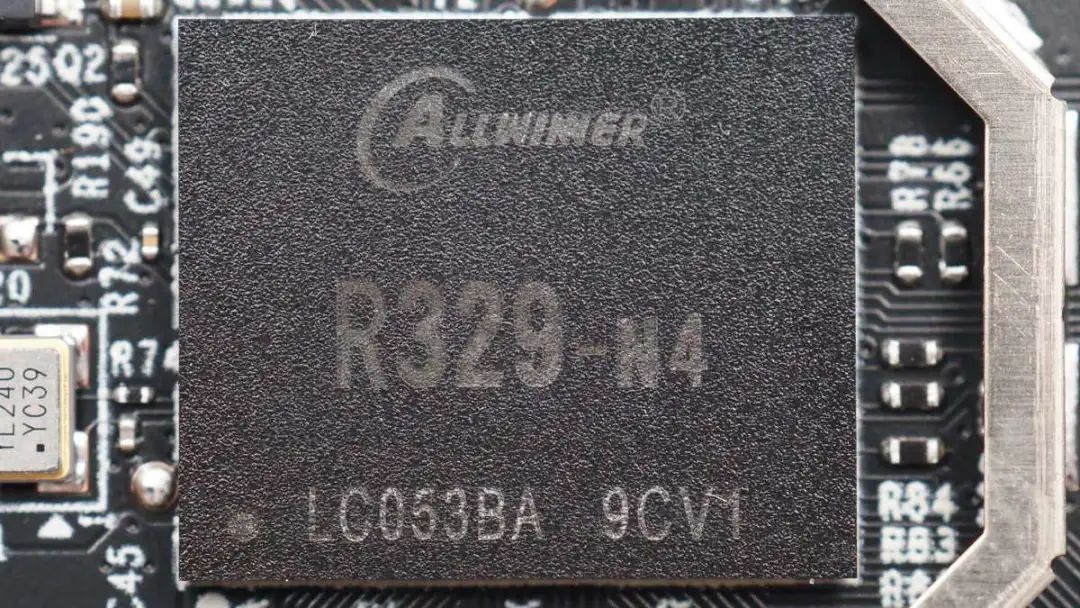
Allwinner全志 R329 AI语音专用芯,内置双核A53 1.5GHz,双核HIFI4 400MHz(2MB SRAM),Arm中国 Zhouyi 0.256T AIPU ;集成多路音频ADC和音频DAC;内置DDR设计精简,是非常强大具有AIPU的智能语音芯片。全志R329可以为智能音箱、智能家居提供高集成度应用方案。

-
回复: 使用D1-H驱动树莓派DSI屏幕发布在 MR Series
# /tmp/sda/qt_fps_test -platform linuxfb
time: 135.000000 fps: 7.407407
time: 147.000000 fps: 6.802721
time: 175.000000 fps: 5.714286
time: 175.000000 fps: 5.714286
time: 175.000000 fps: 5.714286
time: 176.000000 fps: 5.681818
time: 175.000000 fps: 5.714286
time: 179.000000 fps: 5.586592
啊这,全屏画线这刷新率有点低。

