XR806开发板FreeRTOS SDK试用
-
1、根据文档下载SDK
git clone ssh://YOURNAME@sdk.allwinnertech.com/git_repo/XR806/xr806_sdk/xr806_sdk.git -b xr806_sdkYOURNAME是自己在客户平台的用户名,我这里的环境是官方给的Ubuntu14,之前编译D1的tinaLinux用的。
拉代码之前务必确认正确添加了本机公钥。
2、配置
可以看看目录结构:
allwinner@allwinner-VirtualBox:~/xr806_sdk$ tree -L 1
.
├── bin
├── ChangeLog.md
├── chip.mk
├── config.mk
├── gcc.mk
├── include
├── Kconfig
├── lib
├── Makefile
├── project
├── README.md
├── src
└── tools

6 directories, 7 files
打开README.md查看:
# XR806 SDK

XR806 SDK supports XR806 series wireless MCUs.


## Configuration

- Edit "gcc.mk" to define GCC path to your own path, eg.
```
  CC_DIR = ~/tools/gcc-arm-none-eabi-8-2019-q3-update/bin
```


## Building

- Building commands
```
  $                        # make sure in SDK top dir
  $ make PRJ=${prj} defconfig or  cp ${prj_defconfig} .config
                           # eg. make PRJ=demo/wlan_demo defconfig or copy project/demo/wlan_demo/gcc/defconfig .config
  $ make menuconfig        # check configuration, like board/XTAL/XIP/CacheSize/...
  $ make lib               # build libraries and copy them to "lib"
  $ make lib_clean         # remove files in "src" generated by `make lib`
  $ make lib_install_clean # Remove libraries in "lib" generated by `make lib`
  $ make                   # build the executable binary
  $ make clean             # remove files generated by `make`
  $ make image             # create the image file
  $ make image_clean       # remove files generated by `make image`
  $ make objdump           # generate the disassembled file
  $ make build             # same as `make lib && make && make image`
  $ make build_clean       # same as `make image_clean clean lib_clean lib_install_clean`
```


## Links

- SDK: https://github.com/XradioTech/xr806-sdk.git
- WiKi: https://github.com/XradioTech/xradiotech-wiki.git
- DOC: https://docs.xradiotech.com
根据提示需要先指定编译器的位置
下载一下相应的编译器并解压:
gcc-arm-none-eabi-8-2019-q3-update-linux.tar.bz2tar -jxvf gcc-arm-none-eabi-8-2019-q3-update-linux.tar.bz2然后修改gcc.mk中指向的目录即可,如下:
CC_DIR := ~/gcc-arm-none-eabi-8-2019-q3-update/bin后面详细列出了make方式,注意要在SDK最顶层下执行。
3、编译DEMO
首先需要执行一下:
make menuconfig然后保存退出即可。
然后执行:
make PRJ=demo/hello_demo可以看到结果:
   text	   data	    bss	    dec	    hex	filename
  39752	   1576	   2248	  43576	   aa38	hello_demo.elf
make[2]: Leaving directory `/home/allwinner/xr806_sdk/project/demo/hello_demo/gcc'
make[1]: Leaving directory `/home/allwinner/xr806_sdk/project/demo/hello_demo/gcc'
/home/allwinner/xr806_sdk
4、制作镜像
进入上一步的demo目录下:
cd project/demo/hello_demo/gcc/执行
make image可以看到:
Flash Layout:
sec bin 0 boot_40M.bin      :	flash_offs: 0x00000000(   0K)	data_size: 0x00002F28(  12K)
sec bin 1 app.bin           :	flash_offs: 0x00004000(  16K)	data_size: 0x00004920(  19K)
sec bin 2 app_xip.bin       :	flash_offs: 0x00029800( 166K)	data_size: 0x000058D0(  23K)

generate image: xr_system.img
cp -t ../../../../out/ ../image/"xr806"/*.bin ../image/"xr806"/xr_system.img *.map
回到SDK根目录下可以看到out文件夹,进入后可见输出文件:
allwinner@allwinner-VirtualBox:~/xr806_sdk/out$ ls
app.bin  app_xip.bin  boot_40M.bin  hello_demo.map  sys_sdd_40M.bin  wlan_bl.bin  wlan_fw.bin  xr_system.img
5、烧录
在SDK的tools文件夹下可见有烧录工具:
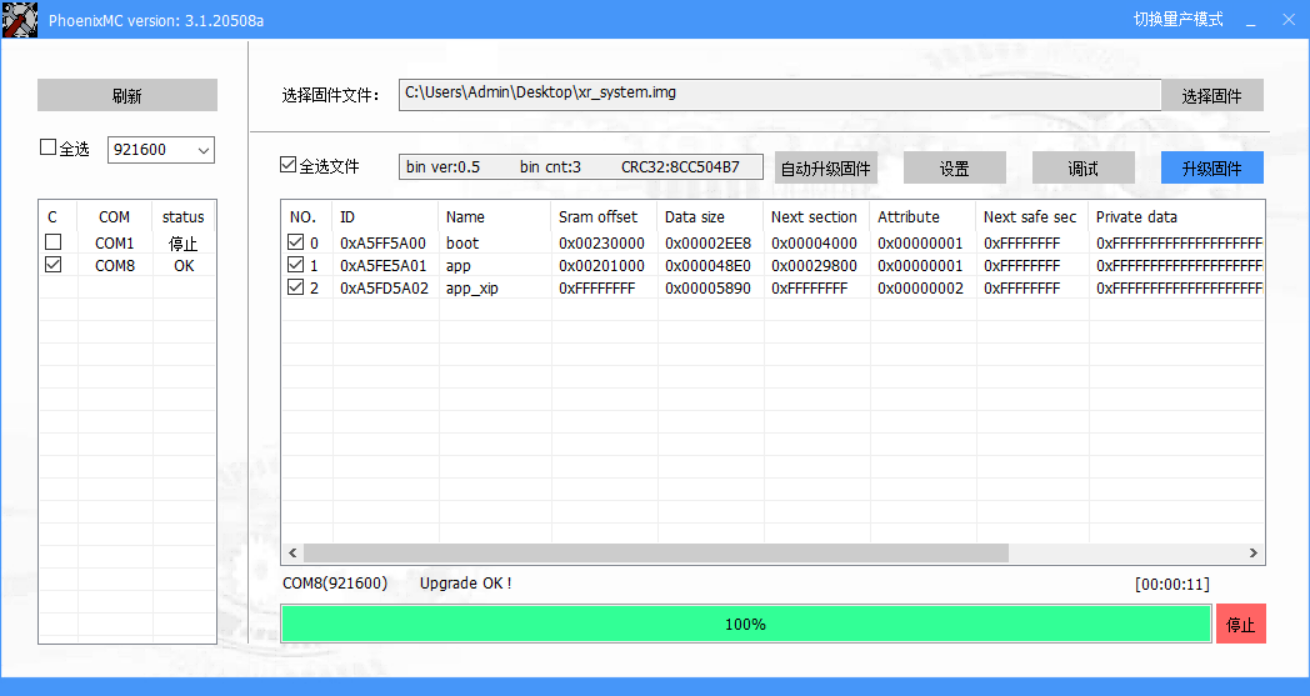
allwinner@allwinner-VirtualBox:~/xr806_sdk/tools$ ls
Blink.apk       fs_img_tools         mkimage.exe        phoenixMC.dll    settings.ini      SoundConfig.apk
config          HcidumpXr.7z         mkimage_mac64      phoenixMC.exe    settings_mac.ini
efuse_tool      map_parse_gcc_v3.py  phoenixMC          phoenixMC_mac64  signpack.sh
etfGuiTool.exe  mkimage              phoenixMC_cli.exe  sdd_editor       SmartConfig.apk
由于想偷懒,没在虚拟机下烧录,直接把img和工具都拖到Windows下:
完成烧录:
6、查看输出
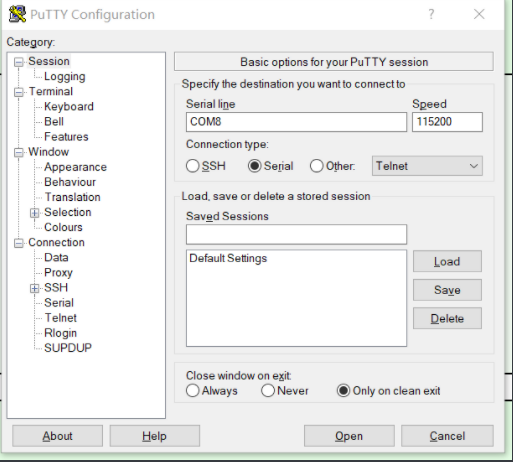
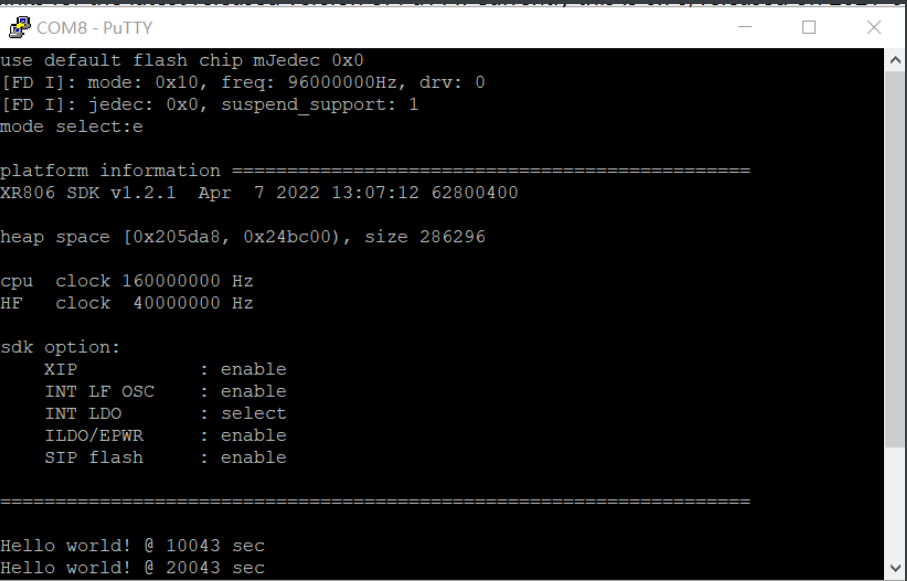
我是用的是putty,波特率115200
熟悉的helloworld:
-
@randolph 在 XR806开发板FreeRTOS SDK试用 中说:
git clone ssh://YOURNAME@sdk.allwinnertech.com/git_repo/XR806/xr806_sdk/xr806_sdk.git -b xr806_sdk
git clone ssh://divadiow@sdk.allwinnertech.com/git_repo/XR806/xr806_sdk/xr806_sdk.git -b xr806_sdk
Cloning into 'xr806_sdk'...
divadiow@sdk.allwinnertech.com's password:
Permission denied, please try again.
divadiow@sdk.allwinnertech.com's password:
Permission denied, please try again.
divadiow@sdk.allwinnertech.com's password:
divadiow@sdk.allwinnertech.com: Permission denied (publickey,gssapi-keyex,gssapi-with-mic,password).
fatal: Could not read from remote repository.Please make sure you have the correct access rights
and the repository exists.I guess this way doesn't work now either?
Copyright © 2024 深圳全志在线有限公司 粤ICP备2021084185号 粤公网安备44030502007680号