【全志T113-S3_100ask】5-编写IIC驱动GY-302(twi)
-
前言
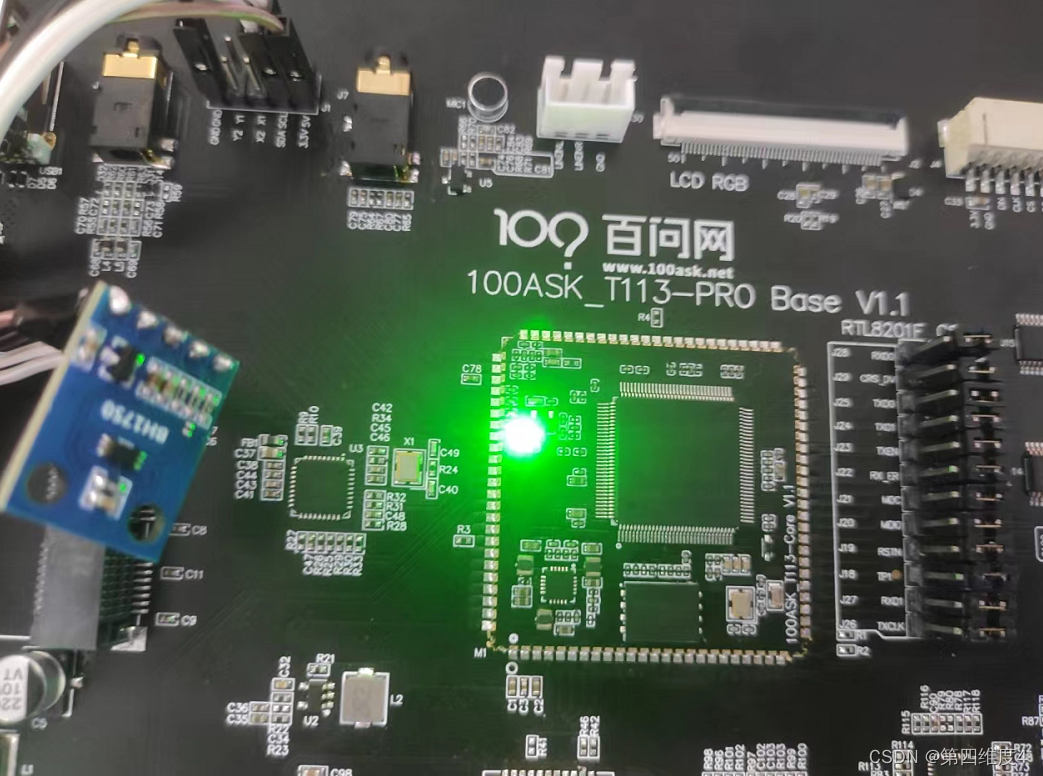
在100ask的板子上预留了一个IIC接口,下面通过这个IIC接口来采集光照强度传感器GY-302(BH1750)。

(一)不使用设备树操作
1、预操作
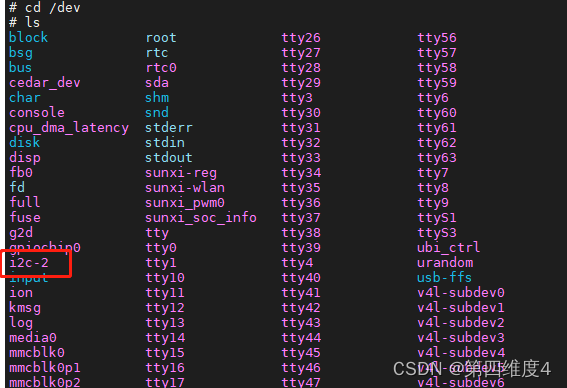
通过查看设备,我们可以看到上面挂载着一个i2c-2设备,且没有其他的i2c。
2、使用i2c tools测试iic
i2c-tools编译,安装步骤
/1、下载i2c-tools-4.0
wget  https://mirrors.edge.kernel.org/pub/software/utils/i2c-tools/i2c-tools-4.0.tar.gz
//2、解压
tar -xzvf i2c-tools-4.0.tar.gz
//3、修改交叉编译:Makefile中的CC该为使用的交叉编译器
CC      ?= arm-linux-gnueabi-gcc
//4、编译
Make
然后将该工具拷贝到开发板,nfs也好,U盘也行。
然后使用该工具检测设备# ls i2c-tools-4.0 # cd i2c-tools-4.0/ # ls CHANGES Makefile eeprom lib tools COPYING README eepromer py-smbus version.h COPYING.LGPL eeprog include stub # cd tools/ # ls Module.mk i2cdetect.c i2cget i2cset.c util.c i2cbusses.c i2cdetect.o i2cget.8 i2cset.o util.h i2cbusses.h i2cdump i2cget.c i2ctransfer util.o i2cbusses.o i2cdump.8 i2cget.o i2ctransfer.8 i2cdetect i2cdump.c i2cset i2ctransfer.c i2cdetect.8 i2cdump.o i2cset.8 i2ctransfer.o !目前只挂载i2c-2 # i2cdetect -l i2c-2 i2c twi2 I2C adapter # i2cdetect -y 2 0 1 2 3 4 5 6 7 8 9 a b c d e f 00: -- -- -- -- -- -- -- -- -- -- -- -- -- -- -- -- 10: -- -- -- -- -- -- -- -- -- -- -- -- -- -- -- -- 20: -- -- -- 23 -- -- -- -- -- -- -- -- -- -- -- -- 30: -- -- -- -- -- -- -- -- -- -- -- -- -- -- -- -- 40: -- -- -- -- -- -- -- -- -- -- -- -- -- -- -- -- 50: -- -- -- -- -- -- -- -- -- -- -- -- -- -- -- -- 60: -- -- -- -- -- -- -- -- -- -- -- -- -- -- -- -- 70: -- -- -- -- -- -- -- --3、编写测试应用
打开设备文件然后设置i2c设备的地址,按照GY-302数据手册中操作流程,连续写0x01和0x11,就可以读出光照信息。
-
初始化 写寄存器0x01 上电
-
设置 0x11 设置成高精度模式 Continuously H-Resolution Mode,即连续高分辨率模式。
-
读数据 unsigned char Buf[3] data=Buf[0]; data=(data<<8)+Buf[1] tmp=data/1.2
#include <stdio.h>
#include <fcntl.h>
#include <linux/i2c-dev.h>
#include <errno.h>
#define I2C_ADDR 0x23

int main(void)
{
    int fd;
    char buf[3];
    char val, value;
    float flight;
    fd = open("/dev/i2c-2", O_RDWR);
    if (fd < 0)
    {
        printf("打开文件错误:%s\r\n", strerror(errno));
        return 1;
    }
    if (ioctl(fd, I2C_SLAVE, I2C_ADDR) < 0)
    {
        printf("ioctl 错误 : %s\r\n", strerror(errno));
        return 1;
    }
    val = 0x01;
    if (write(fd, &val, 1) < 0)
    {
        printf("上电失败\r\n");
    }
    val = 0x11;
    if (write(fd, &val, 1) < 0)
    {
        printf("开启高分辨率模式2\r\n");
    }
    usleep(200000);
    while (1)
    {
        if (read(fd, &buf, 3))
        {
            flight = (buf[0] * 256 + buf[1]) * 0.5 / 1.2;
            printf("光照度: %6.2flx\r\n", flight);
        }
        else
        {
            printf("读取错误\r\n");
        }
        sleep(3);
    }
}
4、测试
# ./iic_gy30_test
光照度:  75.42lx
光照度:  95.14lx
光照度:  311.47lx
(二)使用设备树操作
1、TWI 两线串行接口简介
-
在设备树中,找不到任何i2c的节点信息,只找到twi。
TWI(Two-wire Serial Interface)两线串行接口,TWI 完全兼容 I2C 总线。 -
由于TWI总线与传统的I2C总线极其相似。因此不少人误以为TWI总线就是I2C总线,其实这只是一种简单化的理解。TWI总线是对I2C总线的继承和发展。它定义了自已的功能
-
模块和寄存器,寄存器各位功能的定义与I2C总线并不相同;而且TWI总线引入了状奁寄存器,使得TWI总线在操作和使用上比I2C总线更为灵活。
2、添加节点
添加到 &twi2 下
light-sensor@23 {
			compatible = "gy,bh1750";
			reg = <0x23>;
	};
如图所示:

编译烧录后在以下目录可以找得到:
# cd /sys/firmware/devicetree/base/soc@3000000/twi@2502800/

# ls
#address-cells   compatible       interrupts       pinctrl-names
#size-cells      ctp@14           light-sensor@23  reg
clock-frequency  device_type      name             resets
clock-names      dma-names        pinctrl-0        status
clocks           dmas             pinctrl-1
#
3、编写驱动
#include <linux/ide.h>
#include <linux/module.h>
#include <linux/i2c.h>

struct class *class;    /* 类 		*/
int major;              /* 主设备号 */
struct i2c_client *gy_sensor_client;

// 构造i2c_msg通过这个client调用i2c_tansfer来读写
static int gy_sensor_write_reg(unsigned char addr)
{
    int ret = -1;
    struct i2c_msg msgs;

    printk("gy_sensor_client -> addr=%d\n", gy_sensor_client->addr);
    msgs.addr = gy_sensor_client->addr; //   GY302_ADDR,直接封装于i2c_msg
    msgs.buf = &addr;
    msgs.len = 1;   //长度1 byte
    msgs.flags = 0; //表示写

    ret = i2c_transfer(gy_sensor_client->adapter, &msgs, 1);
    //这里都封装好了,本来根据i2c协议写数据需要先写入器件写地址,然后才能读
    if (ret < 0)
    {
        printk("i2c_transfer write err\n");
        return -1;
    }
    return 0;
}
static int gy_sensor_read_reg(unsigned char *buf)
{
    int ret = -1;
    struct i2c_msg msg;
    msg.addr = gy_sensor_client->addr; // GY30_ADDR
    msg.buf = buf;
    msg.len = 2;                                            //长度1 byte
    msg.flags = I2C_M_RD;                                   //表示读
    ret = i2c_transfer(gy_sensor_client->adapter, &msg, 1); //这里都封装好了,本来根据i2c协议读数据需要先写入读地址,然后才能读
    if (ret < 0)
    {
        printk("i2c_transfer write err\n");
        return -1;
    }
    return 0;
}

// 初始化光线传感器
int gy_sensor_open(struct inode *inode, struct file *file)
{
    printk("open gy_sensor\n");
    gy_sensor_write_reg(0x01); // power up
    gy_sensor_write_reg(0x11);
    return 0;
}

// 读出传感器的两个字节
static ssize_t gy_sensor_read(struct file *file, char __user *buf, size_t count, loff_t *off)
{
    unsigned char addr = 0, data[2];
    gy_sensor_read_reg(data);
    copy_to_user(buf, data, 2);
    return 1;
}

/* bh1750 操作函数 */
static const struct file_operations gy_sensor_fops = {
    .owner = THIS_MODULE,
    .open = gy_sensor_open,
    .read = gy_sensor_read,
};

/* 构造一个platform_driver,
其中的of_match_table字段需要与 light-sensor@23 节点的compatible属性值一致,
当匹配时则调用platform_driver的probe函数 */
static const struct of_device_id ids[] =
{
    {.compatible = "gy,bh1750"},
    {  }
};

// 在i2c_driver的probe函数中得到在总线驱动程序中解析得到的i2c_client,
// 并为该光线传感器注册一个字符设备
static int gy_sensor_probe(struct i2c_client *client,
                           const struct i2c_device_id *id)
{
    gy_sensor_client = client;

    printk("%s %s %d\n", __FILE__, __FUNCTION__, __LINE__);
    major = register_chrdev(0, "gy_sensor", &gy_sensor_fops);
    class = class_create(THIS_MODULE, "gy_sensor");
    device_create(class, NULL, MKDEV(major, 0), NULL, "gy_sensor"); /* /dev/gy_sensor */
    return 0;
}

// 在platform_driver的remove函数中,注销该字符设备
static int gy_sensor_remove(struct i2c_client *client)
{
    device_destroy(class, MKDEV(major, 0));
    class_destroy(class);
    unregister_chrdev(major, "gy_sensor");

    return 0;
}

/* 分配/设置i2c_driver */
static struct i2c_driver gy_sensor_driver = {
    .driver = {
        .name = "bh1750",
        .owner = THIS_MODULE,
        .of_match_table = ids,
    },
    .probe = gy_sensor_probe,
    .remove = gy_sensor_remove,
};

/*
 * @description	: 驱动入口函数
 */
static int __init bh1750_init(void)
{
    int ret = 0;

    ret = i2c_add_driver(&gy_sensor_driver);
    return ret;
}

/*
 * @description	: 驱动出口函数
 */
static void __exit bh1750_exit(void)
{
    i2c_del_driver(&gy_sensor_driver);
}

/* module_i2c_driver(bh1750_driver) */
module_init(bh1750_init);
module_exit(bh1750_exit);
MODULE_LICENSE("GPL");
MODULE_AUTHOR("zhu");
4、编写测试程序
#include <stdio.h>
#include <stdlib.h>
#include <string.h>
#include <sys/types.h>
#include <sys/stat.h>
#include <fcntl.h>

int main(int argc, char **argv)
{
	int fd;
	char val;
	unsigned char buf[3];
	float flight;
	fd = open("/dev/gy_sensor", O_RDWR);
	if (fd < 0)
	{
		printf("can't open /dev/gy_sensor\n");
		return -1;
	}

	usleep(200000);
	while(1)
		{
	     if(read(fd,&buf,3)){
	         flight=(buf[0]*256+buf[1])*0.5/1.2;
	         printf("light: %6.2flx\r\n",flight);
	     }
	     else{
	         printf("read err!\r\n");
	     }
	    sleep(4);
	}

	return 0;
}
5、测试
加载驱动
# insmod iic_gy302_dts.ko
[   62.979905] iic_gy302_dts: loading out-of-tree module taints kernel.
[   62.988058] /disk/vsCode/09_iic_gy302_dts/iic_gy302_dts.c gy_sensor_probe 120


# lsmod
Module                  Size  Used by    Tainted: G
iic_gy302_dts          16384  0
sunxi_ce               57344  0
采集数据
# ./iic_gy302_dts_test
[  164.872116] open gy_sensor
[  164.875291] gy_sensor_client -> addr=35
[  164.879870] gy_sensor_client -> addr=35
light:  46.67lx
light:  46.25lx
light:  40.42lx
light:  61.67lx
light:  65.42lx
light: 2098.33lx
light: 4914.17lx
light: 17047.50lx
light:  40.83lx
light:  40.42lx
测试完成。
原文链接:https://blog.csdn.net/qq_46079439/article/details/126005394
-
Copyright © 2024 深圳全志在线有限公司 粤ICP备2021084185号 粤公网安备44030502007680号