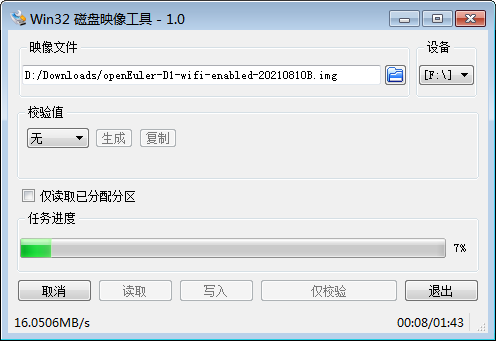
【中科院年度大作】基于D1哪吒开发板移植openEuler!目前第三版已经可以运行,WIFI功能正常使用,欢迎下载测试。
-
各位亲爱的小伙伴,openEuler第二版可以在哪吒D1开发板运行了,WIFI功能正常使用,欢迎下载测试。
D1烧录镜像: https://mirror.iscas.ac.cn/plct/openEuler-D1-wifi-enabled-20210810.img.bz2
-
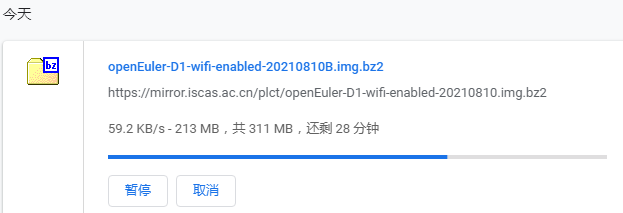
正在下载中
-
-
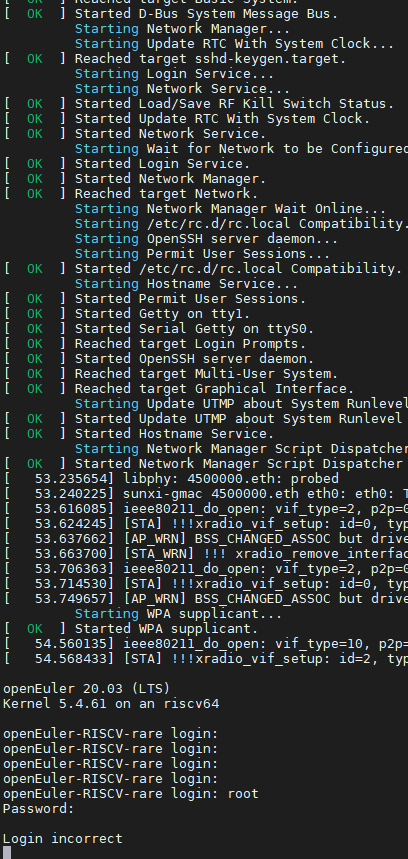
跑起来了, 登录账号密码是多少呢?
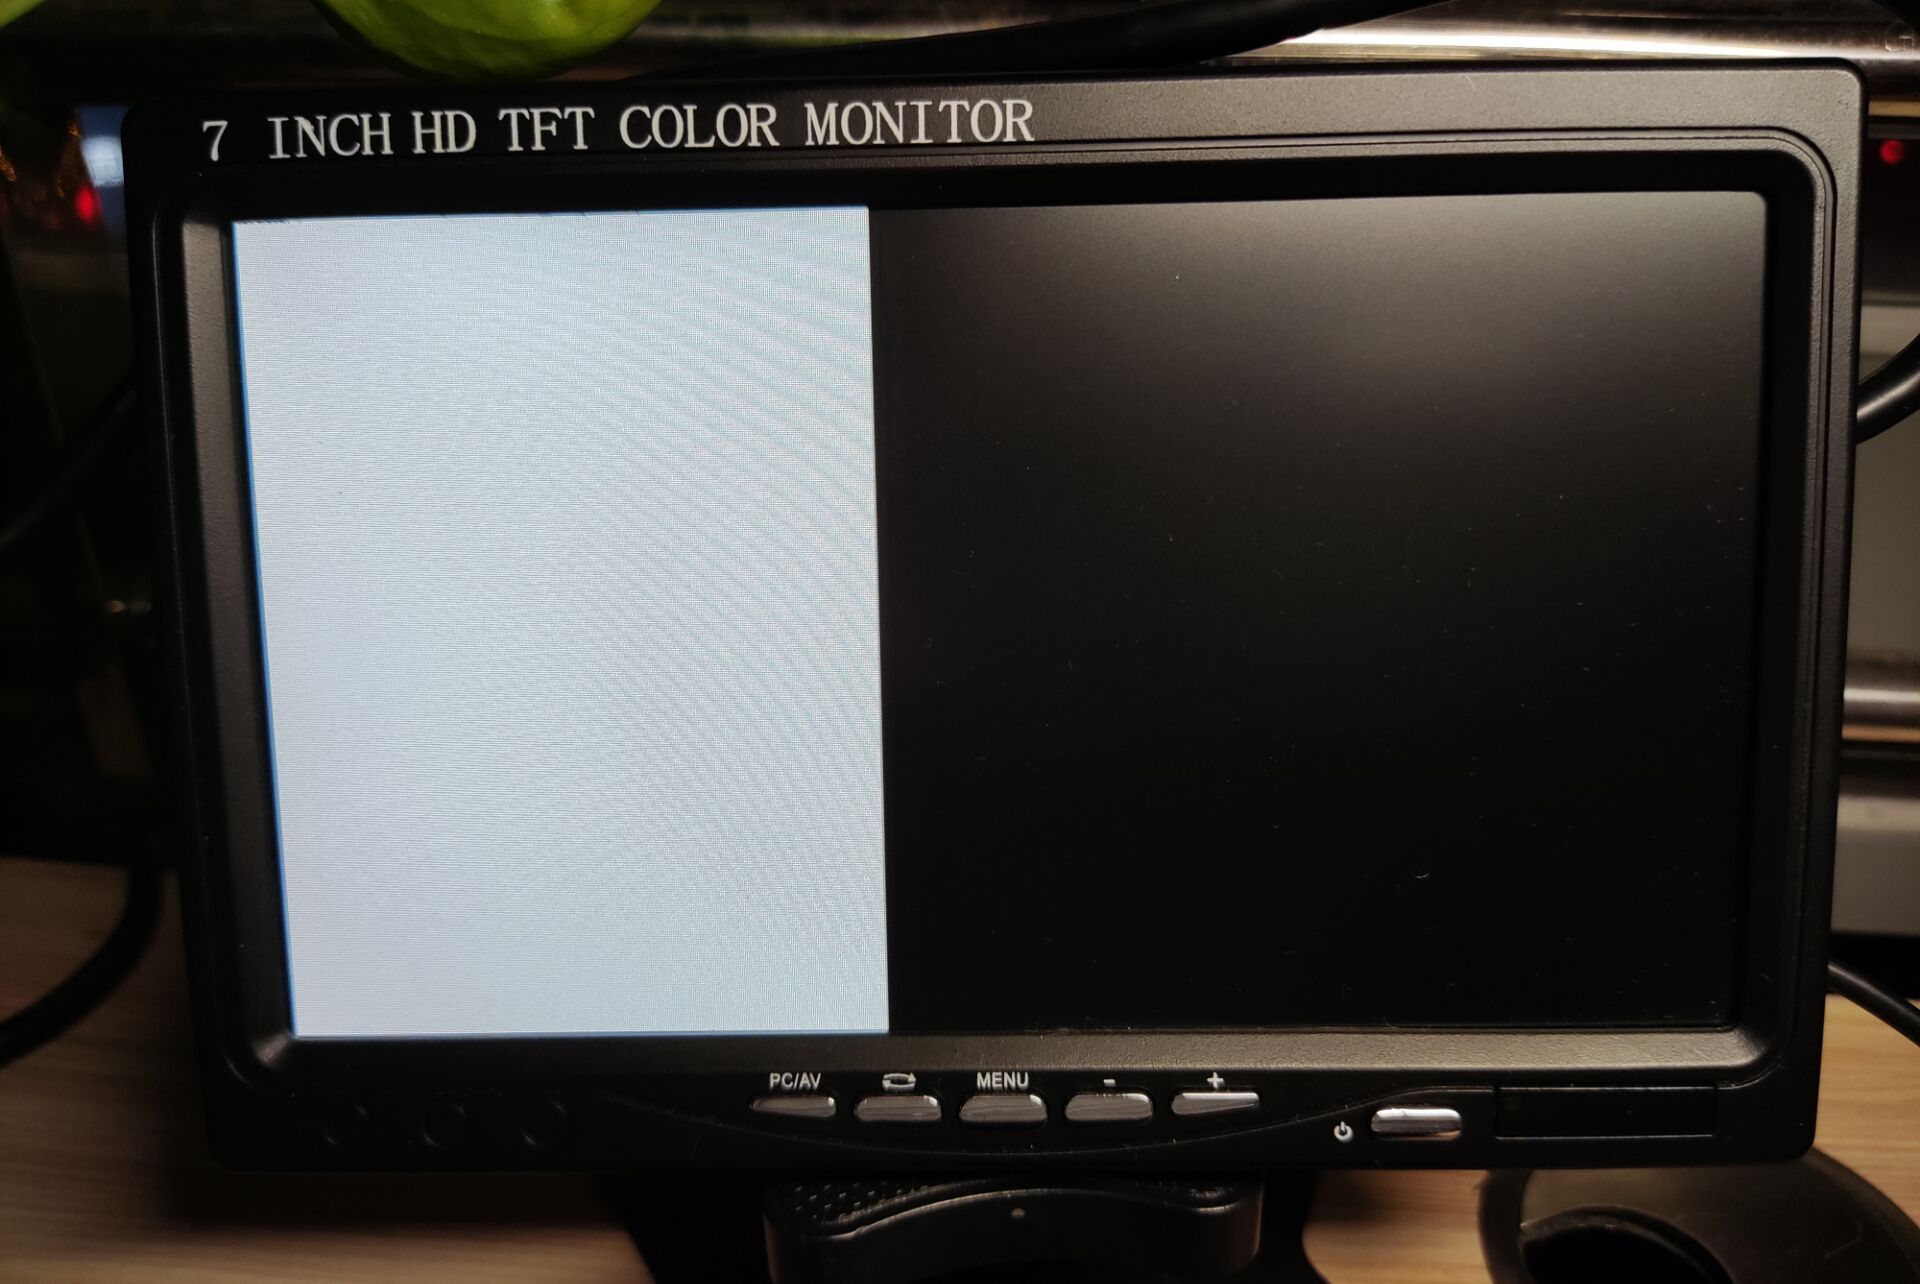
HDMI 和 MIPI DSI 都没有显示.
-
@cube_work
登录账号密码:
root
openEuler12#$你试一试.
-
嗯, 可以进shell, 但是哪吒配的屏幕和HDMI都没显示,
https://bbs.aw-ol.com/topic/279/awol/3
即使手动切到HDMI
cd /sys/kernel/debug/dispdbg
echo disp0 > name; echo switch1 > command; echo 4 10 0 0 0x4 0x101 0 0 0 8 > param; echo 1 > start;
屏幕也是一半白的.
-
让我看看你的屏幕
-
-
论坛中一堆HDMI 类似问题。。。。。
-
openEuler for D1 (RISC-V) 的镜像进行了更新,目前第三版使能了 wifi
和 HDMI 接口(前两版都只能通过调试USB看输出)下载地址:
https://mirror.iscas.ac.cn/plct/openEuler-D1-wifi-hdmi-20210817.img.bz2用户名/密码:
root
openEuler12#$目前只有命令行,图形还没有。希望9月1日之前能出第四版,能把图形界面跑起来。
感谢王翔/merle同学的努力

-
欢迎各位大佬的加入,oE社区越来越壮大


目前openEuler riscv sig组,重点做的事情是openEuler 在riscv64架构下的构建,目前引入了4100+个包,在8.16日之前,成功构建了近1900+个包,目前openEuler riscv sig正在努力解决包构建错误,让更多的包能够成功的构建纳入系统中。
之前9月重点目标是:
1、成功构建3000个包;
2、bishengJDK支持;
3、图形界面支持;
4、在D1上运行起openEuler; -
https://zhuanlan.zhihu.com/p/397651481
D1上的OpenEuler烧录安装及根目录扩容20210810更新:
openEuler在全志D1的tf镜像现在出了第二版, wifi 可以使用了,欢迎试用~
https://mirror.iscas.ac.cn/plct/openEuler-D1-wifi-enabled-20210810.img.bz2本次实验基于 Ubuntu 20.04.2 LTS:
$ lsb_release -a
No LSB modules are available.
Distributor ID:	Ubuntu
Description:	Ubuntu 20.04.2 LTS
Release:	20.04
Codename:	focal
镜像的烧录及扩容方法与之前类似,不过有时候可能在x64主机上执行resize2fs之后在板子上执行df -h发现并空间并没有扩大,这时候需要在D1上再执行一次resize2fs,先执行fdisk -l查看分区情况:
[root@openEuler-RISCV-rare ~]# fdisk -l
Disk /dev/mmcblk0: 29.74 GiB, 31914983424 bytes, 62333952 sectors
Units: sectors of 1 * 512 = 512 bytes
Sector size (logical/physical): 512 bytes / 512 bytes
I/O size (minimum/optimal): 512 bytes / 512 bytes
Disklabel type: gpt
Disk identifier: EACEFD8D-68B3-493F-868A-5364E0A693D8

Device          Start      End  Sectors  Size Type
/dev/mmcblk0p1  34784    35039      256  128K Linux filesystem
/dev/mmcblk0p2  35040    35295      256  128K Linux filesystem
/dev/mmcblk0p3  35296   100831    65536   32M Linux filesystem
/dev/mmcblk0p4 100832 62333918 62233087 29.7G Linux filesystem
这里和x64的分区名sdb4不同,需要操作的是mmcblk0p4分区:
[root@openEuler-RISCV-rare ~]# resize2fs /dev/mmcblk0p4
resize2fs 1.45.3 (14-Jul-2019)
Filesystem at /dev/mmcblk0p4 is [  630.990424] EXT4-fs (mmcblk0p4): resizing filesystem from 1259280 to 31116540 blocks
mounted on /; on-line resizing required
old_desc_blocks = 5, new_desc_blocks = 119
[  636.357985] EXT4-fs (mmcblk0p4): resized filesystem to 31116540
The filesystem on /dev/mmcblk0p4 is now 31116540 (1k) blocks long.

[root@openEuler-RISCV-rare ~]# df -h
Filesystem      Size  Used Avail Use% Mounted on
/dev/root        29G  1.1G   27G   4% /
devtmpfs        492M     0  492M   0% /dev
tmpfs           496M     0  496M   0% /dev/shm
tmpfs           496M  1.7M  494M   1% /run
tmpfs           496M     0  496M   0% /sys/fs/cgroup
tmpfs           496M     0  496M   0% /tmp
tmpfs           100M     0  100M   0% /run/user/0
至此扩容成功。
连接WiFi
执行ifconfig可以看到wlan0,新版本的镜像已经支持了wifi。可以使用nmtui图形模式配置,直接输入命令nmtui即可:
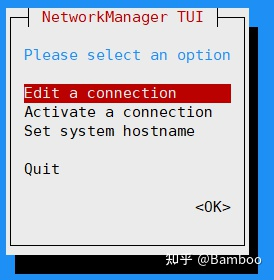
接着选择:Edit a connection -> <Add> -> Wi-Fi
填写Profile name、SSID、选择认证方式,然后就可以连接上WiFi了 : )
以下为原文
本次实验基于 Ubuntu 21.04:$ lsb_release -a No LSB modules are available. Distributor ID: Ubuntu Description: Ubuntu 21.04 Release: 21.04 Codename: hirsute由于该镜像采用了hybrid混合分区,在Ubuntu 18.04上使用fdisk(版本2.34)进行扩容后会破坏分区,导致系统无法正常进入;而Ubuntu 21.04的fdisk版本为2.36,并且在fdisk使用M命令可以进入MBR分区,应该是对hybrid混合分区提供了支持。
将sd卡放入读卡器,连接到x64主机上。
下载openEuler for D1的镜像:
$ wget https://mirror.iscas.ac.cn/plct/openEuler-D1-20210731.img.bz2查看sd卡的盘符:
$ sudo fdisk -l
Disk /dev/sdb: 29.72 GiB, 31914983424 bytes, 62333952 sectors
Disk model: SDDR-B531
Units: sectors of 1 * 512 = 512 bytes
Sector size (logical/physical): 512 bytes / 512 bytes
I/O size (minimum/optimal): 512 bytes / 512 bytes
Disklabel type: gpt
Disk identifier: EACEFD8D-68B3-493F-868A-5364E0A693D8
可以看到/dev/sdb即为SD卡。
使用dd命令将镜像烧录到sd卡中:
bzcat openEuler-D1-20210731.img.bz2 | sudo dd of=/dev/sdb bs=1M iflag=fullblock oflag=direct conv=fsync status=progressdd命令参数解释
dd --help中对各参数作用描述如下:Each FLAG symbol may be: dsync use synchronized I/O for data // 对应oflag=dsync sync likewise, but also for metadata // 对应oflag=sync Each CONV symbol may be: fdatasync physically write output file data before finishing // 对应conv=fdatasync fsync likewise, but also write metadata // 对应conv=fsync除此之外上述命令的参数含义如下:
bs 一次读写的比特数
conv 依照每个逗号分割的标志列表转换文件
direct 使用直接I/O 存取模式
fullblock 为输入积累完整块(仅iflag)
执行完成后在x86主机上使用fdisk进行扩容
$ sudo fdisk /dev/sdb

Welcome to fdisk (util-linux 2.36.1).
Changes will remain in memory only, until you decide to write them.
Be careful before using the write command.

A hybrid GPT was detected. You have to sync the hybrid MBR manually (expert command 'M').

Command (m for help): p #查看并记录第四个分区的起始扇区

Disk /dev/sdb: 29.72 GiB, 31914983424 bytes, 62333952 sectors
Disk model: SDDR-B531
Units: sectors of 1 * 512 = 512 bytes
Sector size (logical/physical): 512 bytes / 512 bytes
I/O size (minimum/optimal): 512 bytes / 512 bytes
Disklabel type: gpt
Disk identifier: EACEFD8D-68B3-493F-868A-5364E0A693D8

Device      Start     End Sectors  Size Type
/dev/sdb1   34784   35039     256  128K Linux filesystem
/dev/sdb2   35040   35295     256  128K Linux filesystem
/dev/sdb3   35296  100831   65536   32M Linux filesystem
/dev/sdb4  100832 2607103 2506272  1.2G Linux filesystem

Command (m for help): d #删除分区
Partition number (1-4, default 4): 4

Partition 4 has been deleted.

Command (m for help): n #新建分区
Partition number (4-128, default 4): 4
First sector (100832-62333918, default 102400): 100832 #和最开始记录的第四个分区的起始扇区相同
Last sector, +/-sectors or +/-size{K,M,G,T,P} (100832-62333918, default 62333918):

Created a new partition 4 of type 'Linux filesystem' and of size 29.7 GiB.
Partition #4 contains a ext4 signature.

Do you want to remove the signature? [Y]es/[N]o: n

Command (m for help): w  #写入修改
The device contains hybrid MBR -- writing GPT only.

The partition table has been altered.
Syncing disks.
这时候扩容的空间还不能完全使用,需要对第四个分区执行resize2fs命令:
$ sudo resize2fs /dev/sdb4
resize2fs 1.45.7 (28-Jan-2021)
Filesystem at /dev/sdb4 is mounted on /media/linux/rootfs; on-line resizing required
old_desc_blocks = 8, new_desc_blocks = 119
The filesystem on /dev/sdb4 is now 31116540 (1k) blocks long.
即烧录完成并扩容成功,之后将sd卡放入D1并开机,耐心等待。
登陆账号密码: root/openEuler12#$
openEuler 20.03 (LTS)
Kernel 5.4.61 on an riscv64

openEuler-RISCV-rare login:
进入后查看空间大小:
[root@openEuler-RISCV-rare ~]# df -h
Filesystem      Size  Used Avail Use% Mounted on
/dev/root        29G  952M   27G   4% /
devtmpfs        492M     0  492M   0% /dev
tmpfs           496M     0  496M   0% /dev/shm
tmpfs           496M  1.6M  495M   1% /run
tmpfs           496M     0  496M   0% /sys/fs/cgroup
tmpfs           496M     0  496M   0% /tmp
tmpfs           100M     0  100M   0% /run/user/0
进入系统之后使用 date -s 修改系统时间,否则无法使用yum命令。
运行BishengJDK
交叉编译过程可以参考官方文档:BUILDING.md · openEuler/bishengjdk-11 - Gitee.com
gitee.com/openeuler/bishengjdk-11/blob/risc-v/BUILDING.md或者参考:
Bamboo:毕昇JDK 11 for RICSV64构建及HiFive Unleashed测试
error while loading shared libraries: libz.so: cannot open shared object file: No such file or directory
这个报错,有两种解决方法:在D1上执行
yum install zlib-devel.riscv64
2. 在编译JDK的时候加上参数,即将zlib库打包到镜像中,而不使用系统本身的库(默认为--with-zlib=system):--with-zlib=bundled
运行结果:
-
您好,我在D1开发板上使用您的openeuler镜像,虽然可以连接wifi,但是终端一直不停打印信息,导致我无法正常工作,请问这是什么原因呢?
-
@whycan 这个openeuler版本镜像有什么犀利之处~~,求科普
Copyright © 2024 深圳全志在线有限公司 粤ICP备2021084185号 粤公网安备44030502007680号
