TinyVision V851se 使用 SyterKit 启动 Linux 6.7 主线内核
-
原文:https://www.gloomyghost.com/live/20231216.aspx
SyterKit
SyterKit 是一个纯裸机框架,用于 TinyVision 或者其他 v851se/v851s/v851s3/v853 等芯片的开发板,SyterKit 使用 CMake 作为构建系统构建,支持多种应用与多种外设驱动。同时 SyterKit 也具有启动引导的功能,可以替代 U-Boot 实现快速启动
获取 SyterKit 源码
SyterKit 源码位于GitHub,可以前往下载。
git clone https://github.com/YuzukiHD/SyterKit.git从零构建 SyterKit
构建 SyterKit 非常简单,只需要在 Linux 操作系统中安装配置环境即可编译。SyterKit 需要的软件包有:
gcc-arm-none-eabiCMake
对于常用的 Ubuntu 系统,可以通过如下命令安装
sudo apt-get update
sudo apt-get install gcc-arm-none-eabi cmake build-essential -y
然后新建一个文件夹存放编译的输出文件,并且进入这个文件夹
mkdir build
cd build
然后运行命令编译 SyterKit
cmake ..
make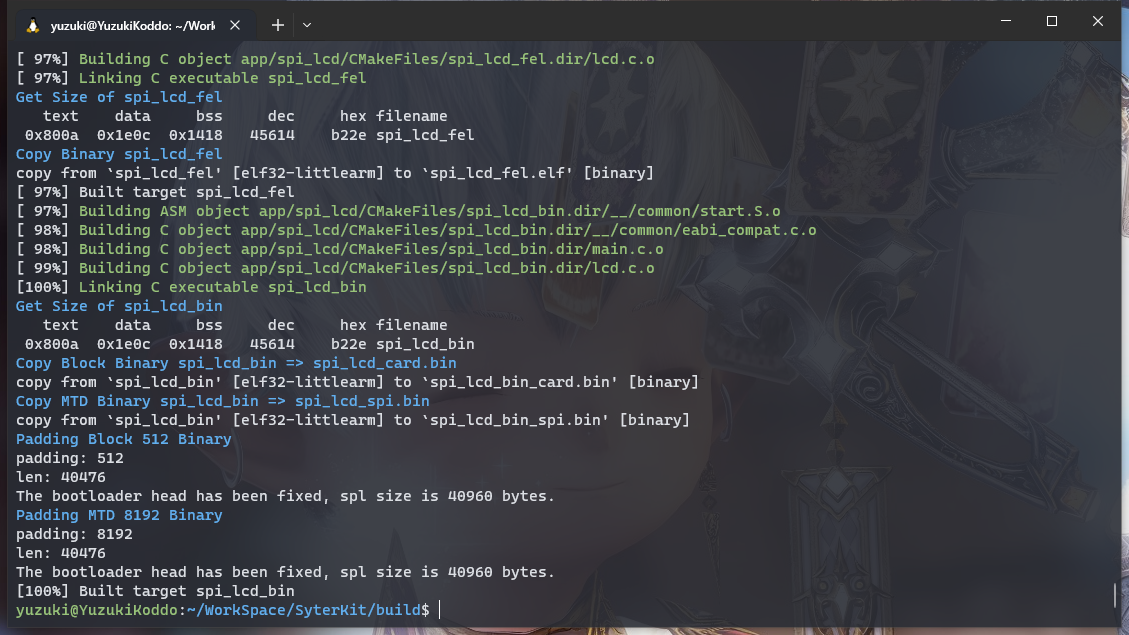
编译后的可执行文件位于
build/app中,这里包括 SyterKit 的多种APP可供使用。
这里我们使用的是
syter_boot作为启动引导。进入 syter_boot 文件夹,可以看到这些文件
由于 TinyVision 是 TF 卡启动,所以我们需要用到
syter_boot_bin_card.bin
移植 Linux 6.7 主线
有了启动引导,接下来是移植 Linux 6.7 主线,前往 https://kernel.org/ 找到 Linux 6.7,选择
tarball下载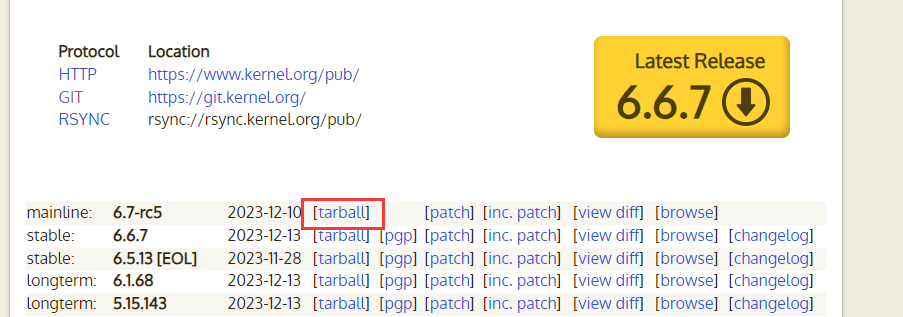
下载后解压缩
tar xvf linux-6.7-rc5.tar.gz进入 linux 6.7 目录,开始移植相关驱动。
搭建 Kernel 相关环境
Kernel 编译需要一些软件包,需要提前安装。
sudo apt-get update && sudo apt-get install -y gcc-arm-none-eabi gcc-arm-linux-gnueabihf g++-arm-linux-gnueabihf build-essential libncurses5-dev zlib1g-dev gawk flex bison quilt libssl-dev xsltproc libxml-parser-perl mercurial bzr ecj cvs unzip lsof安装完成后可以尝试编译一下,看看能不能编译通过,先应用配置文件
CROSS_COMPILE=arm-linux-gnueabihf- make ARCH=arm sunxi_defconfig
然后尝试编译
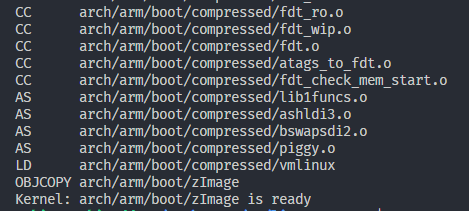
CROSS_COMPILE=arm-linux-gnueabihf- make ARCH=arm可以用
-j32来加速编译,32指的是使用32线程编译,一般cpu有几个核心就设置几线程CROSS_COMPILE=arm-linux-gnueabihf- make ARCH=arm -j32正常编译
移植 clk 驱动
这里提供已经适配修改后的驱动:https://github.com/YuzukiHD/TinyVision/tree/main/kernel/linux-6.7-driver 可以直接使用。
也可以参考 https://github.com/YuzukiHD/TinyVision/tree/main/kernel/bsp/drivers/clk 中的驱动移植。
进入文件夹
include/dt-bindings/clock/新建文件sun8i-v851se-ccu.h,将 CLK 填入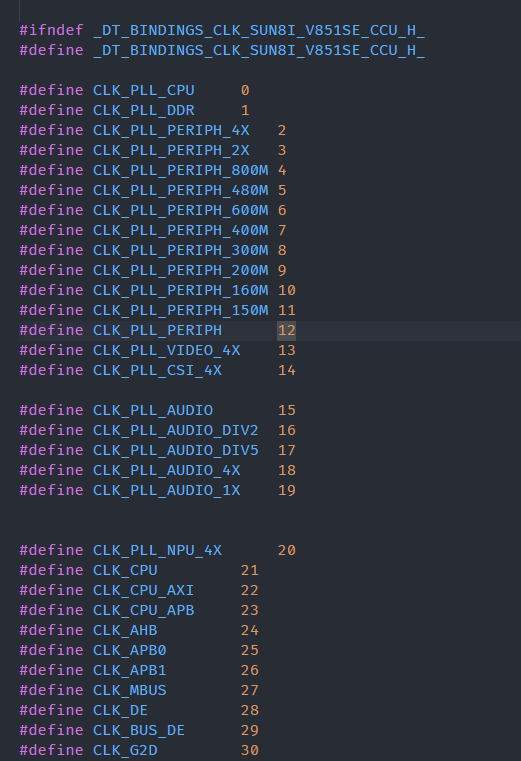
进入
include/dt-bindings/reset新建文件sun8i-v851se-ccu.h将 RST 填入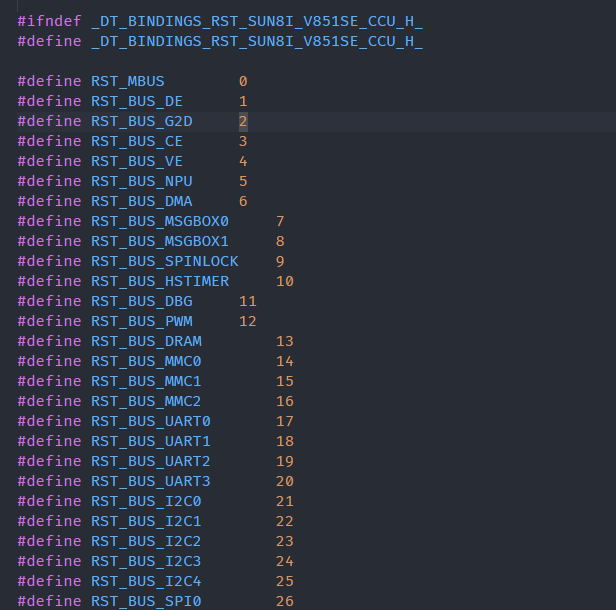
进入
drivers/clk/sunxi-ng找到sunxi-ngclk 驱动,复制文件ccu-sun20i-d1.c和ccu-sun20i-d1.h文件并改名为ccu-sun8i-v851se.c,ccu-sun8i-v851se.h作为模板。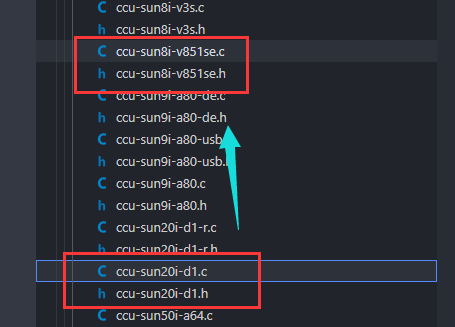
将文件中的
SUN20I_D1改为SUN8I_V851SE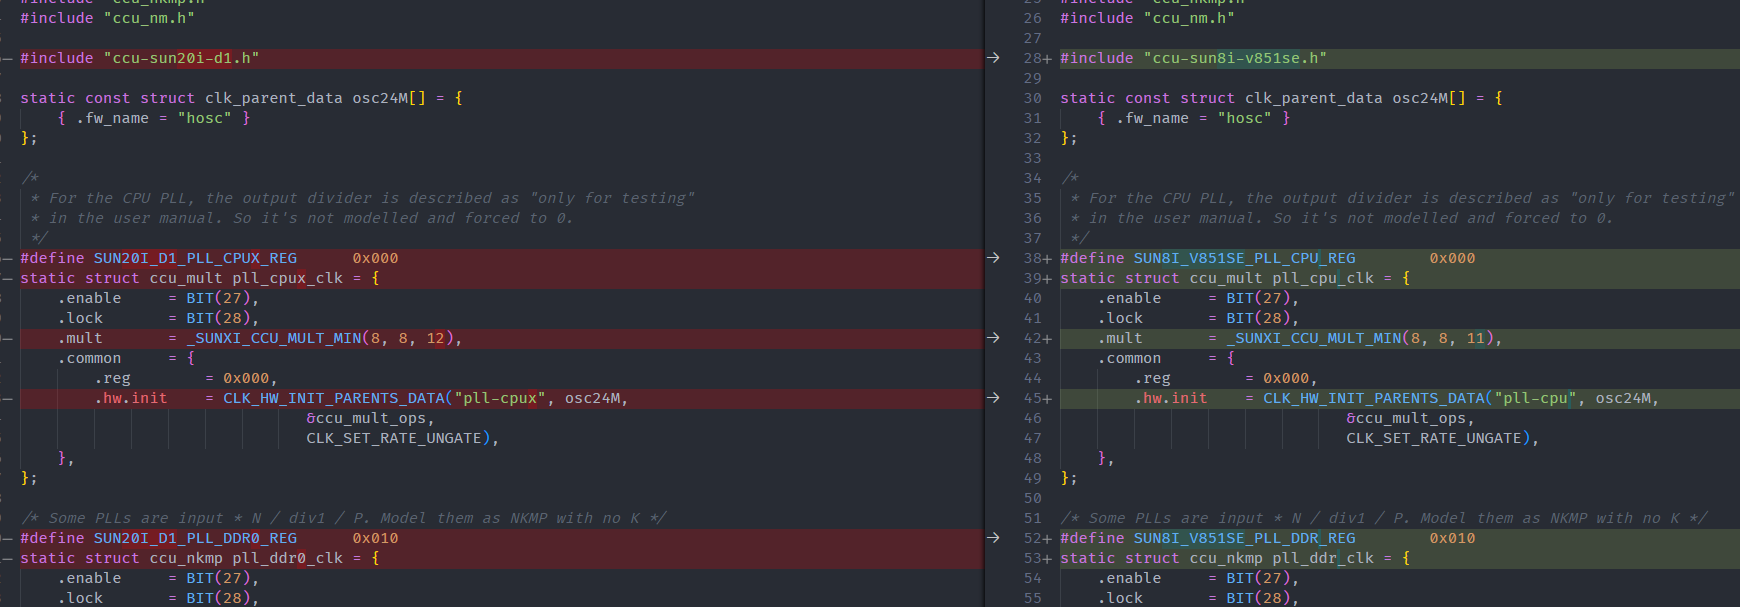
打开芯片数据手册V851SX_Datasheet_V1.2.pdf,找到 CCU 章节
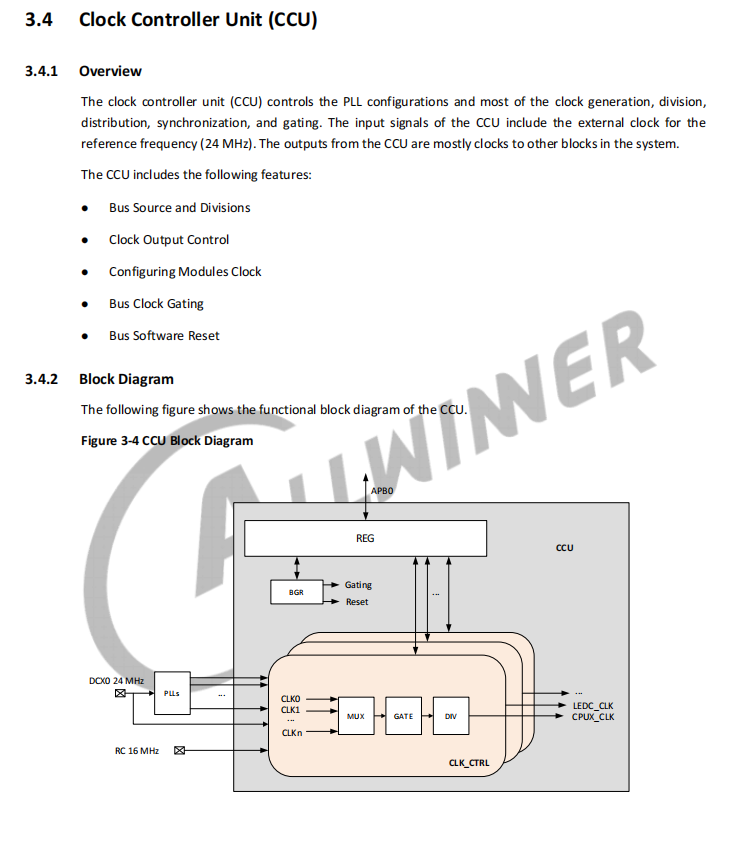
对照手册编写驱动文件适配 V851se 平台。
然后找到
drivers/clk/sunxi-ng/Kconfig文件,增加刚才编写的驱动的 Kconfig 说明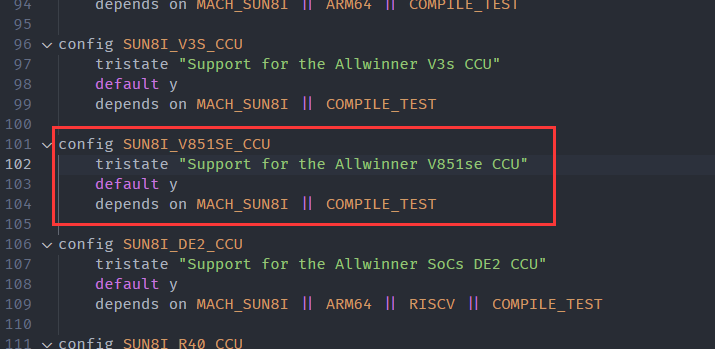
config SUN8I_V851SE_CCU
	tristate "Support for the Allwinner V851se CCU"
	default y
	depends on MACH_SUN8I || COMPILE_TEST
同时打开
drivers/clk/sunxi-ng/Makefile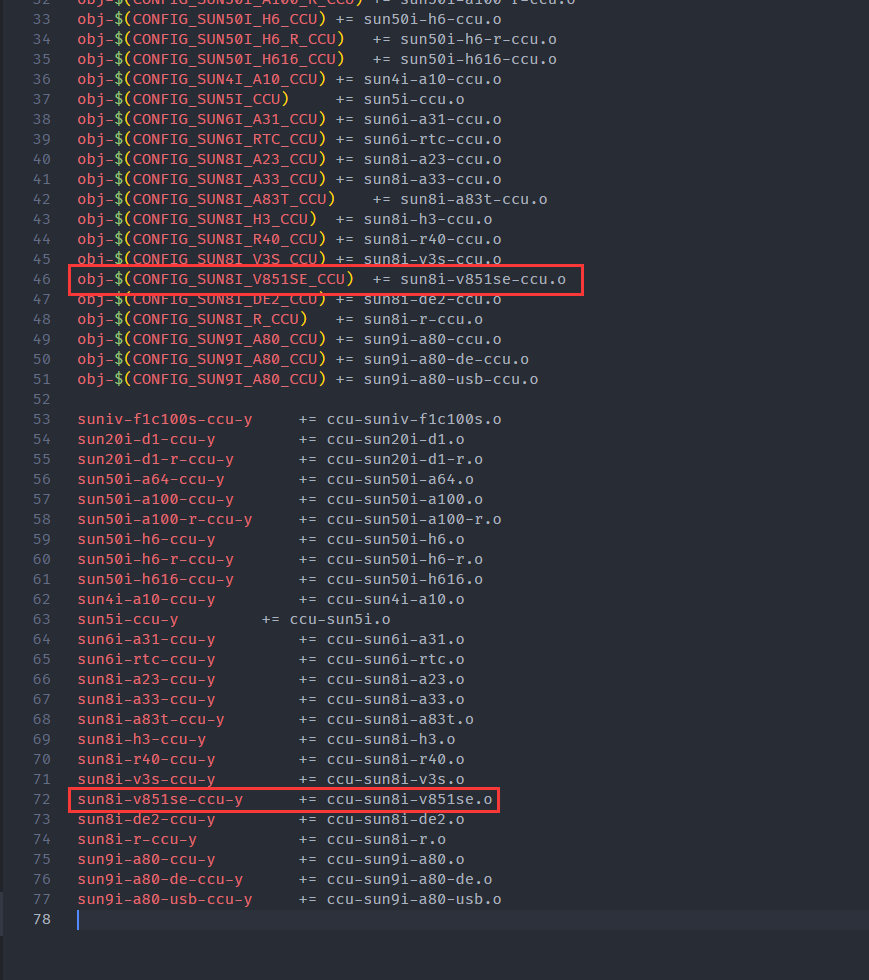
obj-$(CONFIG_SUN8I_V851SE_CCU)	+= sun8i-v851se-ccu.o

sun8i-v851se-ccu-y		+= ccu-sun8i-v851se.o
来检查一下是否移植成功,先查看
menuconfig,找到Device Drivers > Common Clock Framework,查看是否有 V851se 平台选项出现CROSS_COMPILE=arm-linux-gnueabihf- make ARCH=arm menuconfig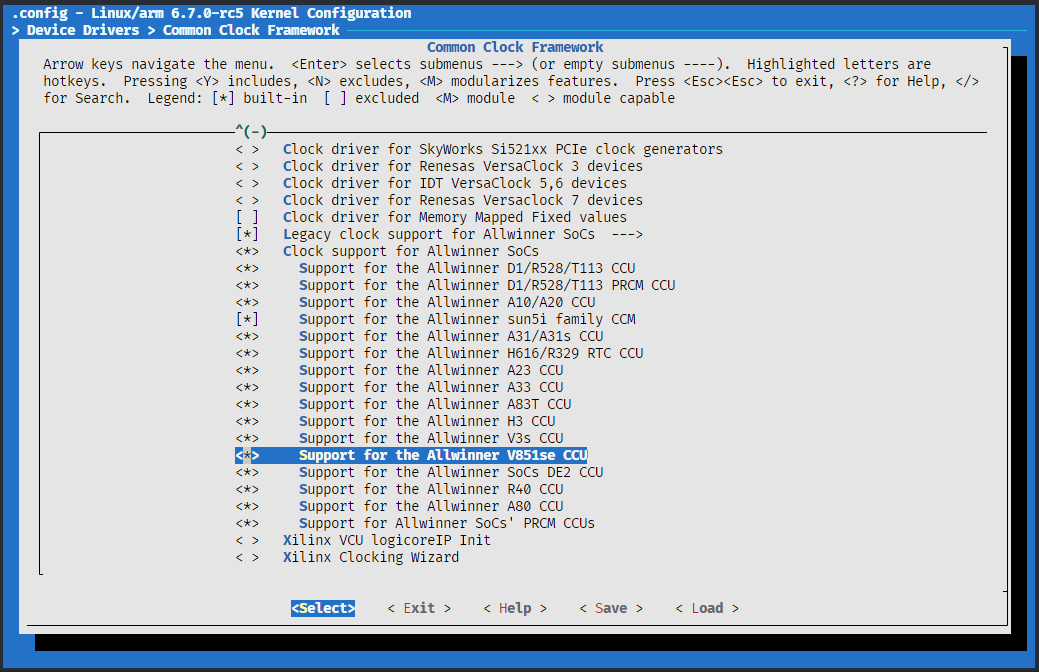
编译测试,有几处未使用的变量的警告,无视即可。
CROSS_COMPILE=arm-linux-gnueabihf- make ARCH=arm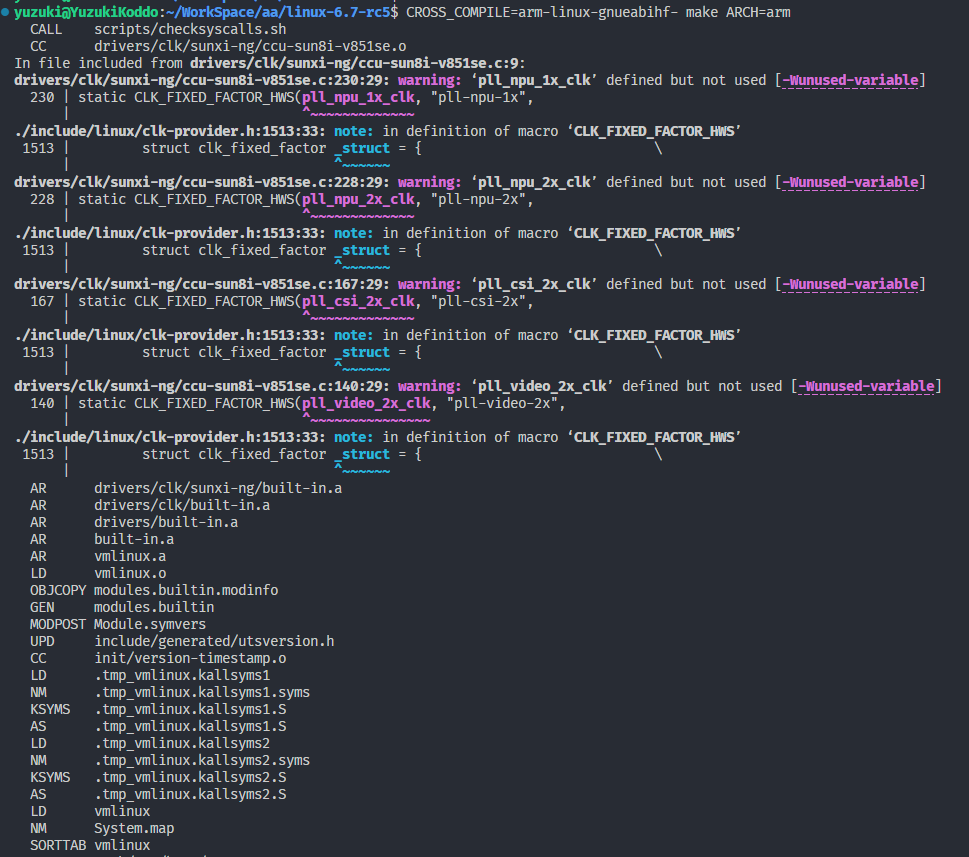
正常编译成功
移植 pinctrl 驱动
这里提供已经适配修改后的驱动:https://github.com/YuzukiHD/TinyVision/tree/main/kernel/linux-6.7-driver 可以直接使用。
前往
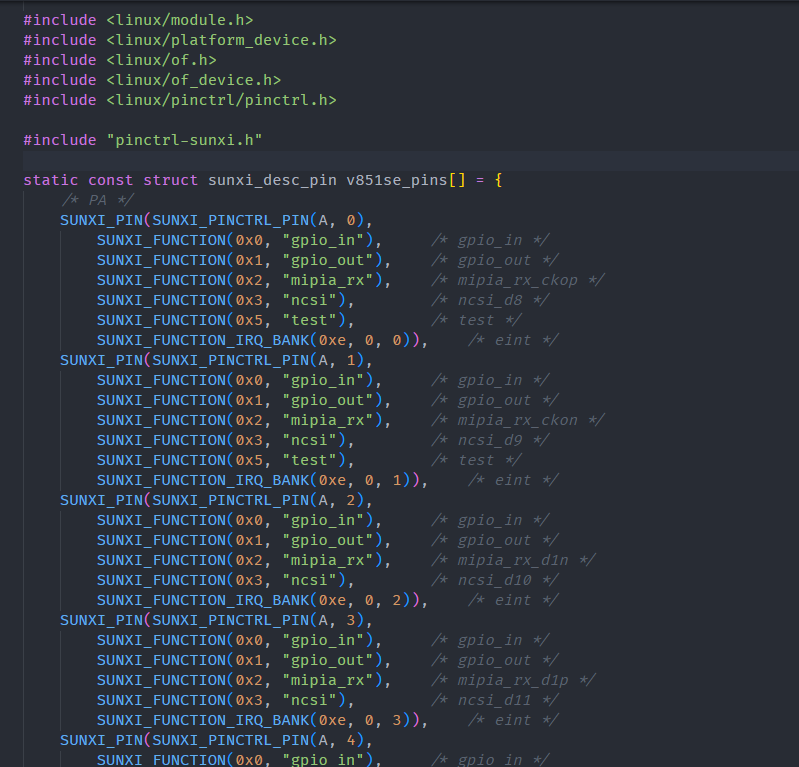
drivers/pinctrl/sunxi/新建文件pinctrl-sun8i-v851se.c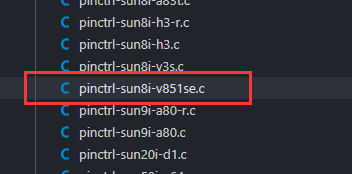
打开 V851SE_PINOUT_V1.0.xlsx 对照填入PIN的值与功能。
同样的,修改
drivers/pinctrl/sunxi/Kconfig增加选项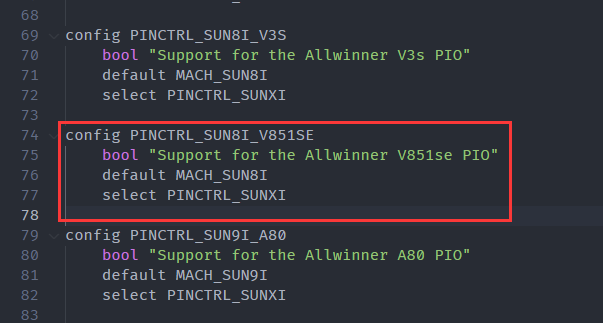
修改
drivers/pinctrl/sunxi/Makefile增加路径
来检查一下是否移植成功,先查看
menuconfig,找到> Device Drivers > Pin controllers,查看是否有 V851se 平台选项出现CROSS_COMPILE=arm-linux-gnueabihf- make ARCH=arm menuconfig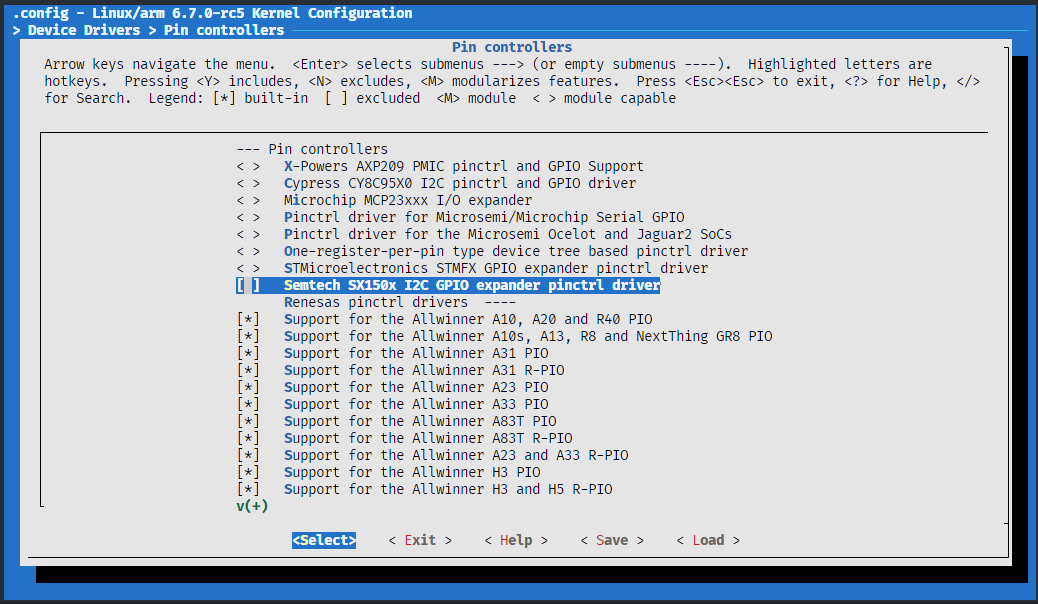
编译测试,编译通过
CROSS_COMPILE=arm-linux-gnueabihf- make ARCH=arm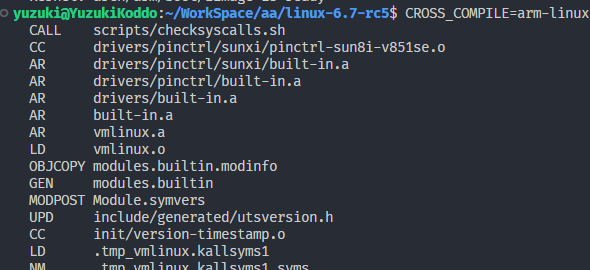
编写设备树
这里提供已经适配修改后的驱动:https://github.com/YuzukiHD/TinyVision/tree/main/kernel/linux-6.7-driver/dts 可以直接使用。
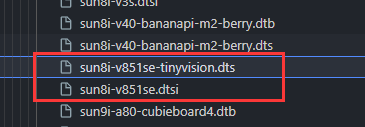
这部分直接给结果了,把上面适配的设备树放到
/home/yuzuki/WorkSpace/aa/linux-6.7-rc5/arch/arm/boot/dts/allwinner/,修改/home/yuzuki/WorkSpace/aa/linux-6.7-rc5/arch/arm/boot/dts/allwinner/Makefile
sun8i-v851se-tinyvision.dtb
生成刷机镜像
编译内核后,可以在文件夹
arch/arm/boot/dts/allwinner生成sun8i-v851se-tinyvision.dtb,在文件夹arch/arm/boot生成zImage,把他们拷贝出来。
然后将
sun8i-v851se-tinyvision.dtb改名为sunxi.dtb,这个设备树名称是定义在 SyterKit 源码中的,如果之前修改了 SyterKit 的源码需要修改到对应的名称,SyterKit 会去读取这个设备树。然后编写一个
config.txt作为配置文件[configs] bootargs=cma=4M root=/dev/mmcblk0p2 init=/sbin/init console=ttyS0,115200 earlyprintk=sunxi-uart,0x02500000 rootwait clk_ignore_unused mac_addr=4a:13:e4:f9:79:75 bootdelay=3安装 genimage
这里我们使用 genimage 作为打包工具
sudo apt-get install libconfuse-dev #安装genimage依赖库
sudo apt-get install genext2fs      # 制作镜像时genimage将会用到
git clone https://github.com/pengutronix/genimage.git
cd genimage
./autogen.sh                        # 配置生成configure
./configure                         # 配置生成makefile
make
sudo make install
编译后运行试一试,这里正常

使用 genimage 打包固件
编写 genimage.cfg 作为打包的配置
image boot.vfat {
	vfat {
		files = {
			"zImage",
			"sunxi.dtb",
			"config.txt"
		}
	}
	size = 8M
}

image sdcard.img {
	hdimage {}

	partition boot0 {
		in-partition-table = "no"
		image = "syter_boot_bin_card.bin"
		offset = 8K
	}

	partition boot0-gpt {
		in-partition-table = "no"
		image = "syter_boot_bin_card.bin"
		offset = 128K
	}

	partition kernel {
		partition-type = 0xC
		bootable = "true"
		image = "boot.vfat"
	}
}
由于genimage的脚本比较复杂,所以编写一个
genimage.sh作为简易使用的工具#!/usr/bin/env bash die() { cat <<EOF >&2 Error: $@ Usage: ${0} -c GENIMAGE_CONFIG_FILE EOF exit 1 } # Parse arguments and put into argument list of the script opts="$(getopt -n "${0##*/}" -o c: -- "$@")" || exit $? eval set -- "$opts" GENIMAGE_TMP="${BUILD_DIR}/genimage.tmp" while true ; do case "$1" in -c) GENIMAGE_CFG="${2}"; shift 2 ;; --) # Discard all non-option parameters shift 1; break ;; *) die "unknown option '${1}'" ;; esac done [ -n "${GENIMAGE_CFG}" ] || die "Missing argument" # Pass an empty rootpath. genimage makes a full copy of the given rootpath to # ${GENIMAGE_TMP}/root so passing TARGET_DIR would be a waste of time and disk # space. We don't rely on genimage to build the rootfs image, just to insert a # pre-built one in the disk image. trap 'rm -rf "${ROOTPATH_TMP}"' EXIT ROOTPATH_TMP="$(mktemp -d)" GENIMAGE_TMP="$(mktemp -d)" rm -rf "${GENIMAGE_TMP}" genimage \ --rootpath "${ROOTPATH_TMP}" \ --tmppath "${GENIMAGE_TMP}" \ --inputpath "${BINARIES_DIR}" \ --outputpath "${BINARIES_DIR}" \ --config "${GENIMAGE_CFG}"准备完成,文件如下所示

运行命令进行打包
chmod 777 genimage.sh
./genimage.sh -c genimage.cfg
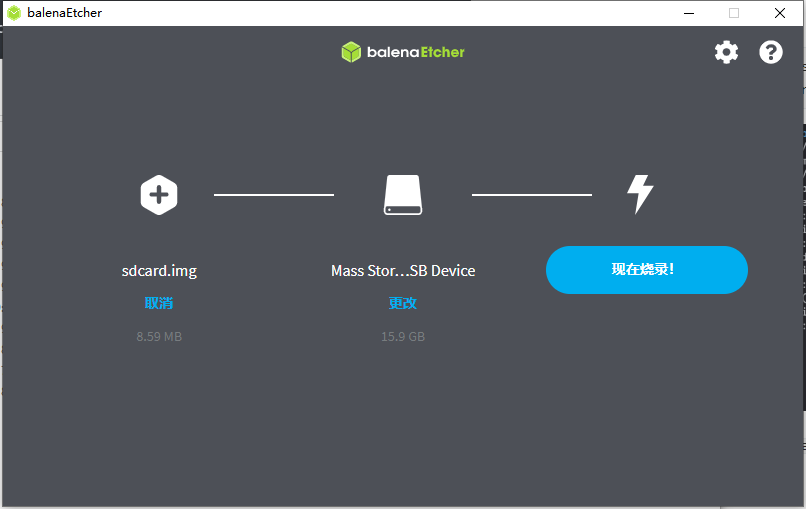
打包完成,可以找到
sdcard.img使用软件烧录固件到TF卡上
测试
插卡,上电,成功启动系统
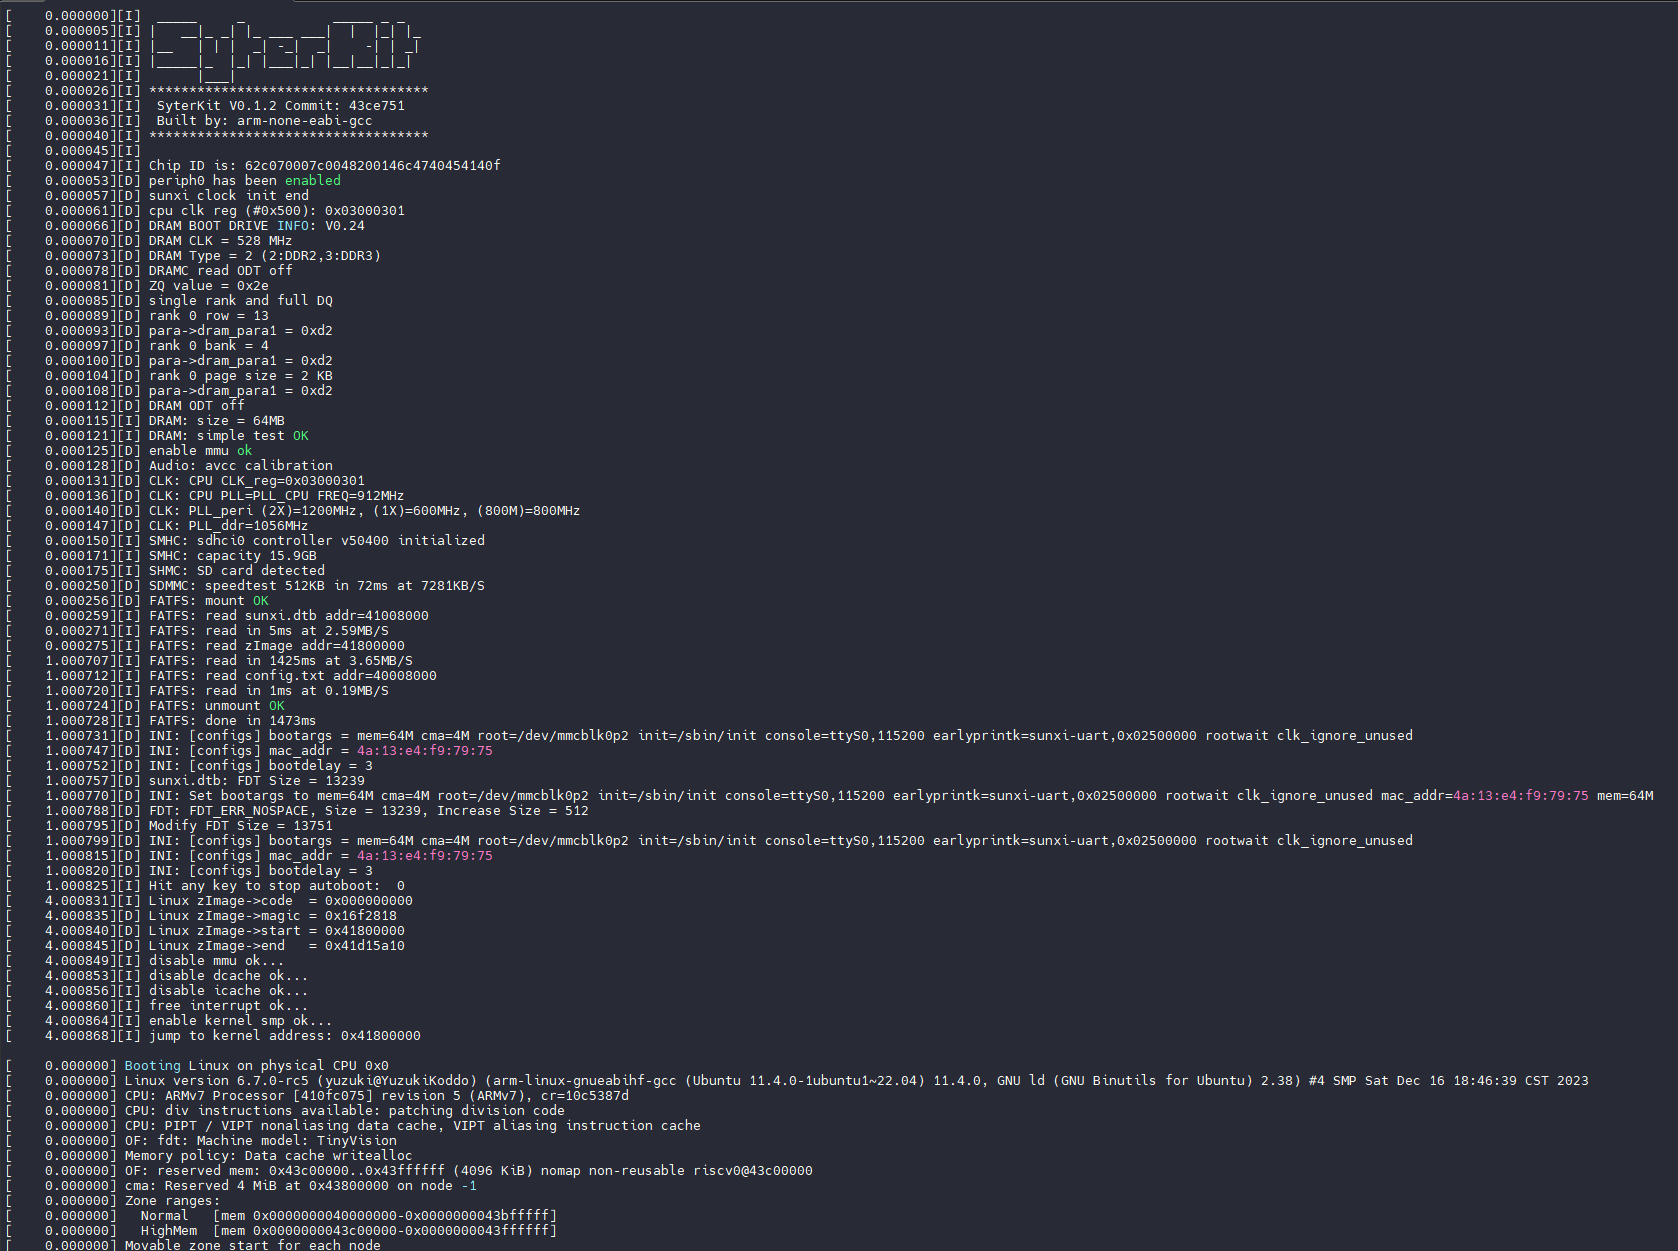
可以看到 Linux 版本是 6.7.0

-
@yuzukitsuru 赞,深度好文。
-
@yuzukitsuru 精采大作,获益良多。
淘了TinyVision准备折腾。请问SyterKit是您的大作吗?我看src/drivers底下有sys-sdcard及usb/usb_mass代码,请问SyterKit可以用USB OTG模拟成读卡机吗?方便上位机直接写入记忆卡。
-
已购入TinyVision初步学习,膜拜大佬
-
这个能使用 V851SE 自带的网络部分吗?
Copyright © 2024 深圳全志在线有限公司 粤ICP备2021084185号 粤公网安备44030502007680号