之前都说好了是兄弟就来“砍”我,我看有点难,还是先送一波搞搞气氛。
大伙支支招。
根据当前各平台粗略统计,MQ春节前预计生产约4000pcs才够得上,也可能再补些货。
(嘘,小声说下,MQ Pro 12月底开晒,小巧、精致、黑科技)
之前都说好了是兄弟就来“砍”我,我看有点难,还是先送一波搞搞气氛。
大伙支支招。
根据当前各平台粗略统计,MQ春节前预计生产约4000pcs才够得上,也可能再补些货。
(嘘,小声说下,MQ Pro 12月底开晒,小巧、精致、黑科技)
MQ(D1s)可以录音,效果不错。
默认录音通道时MICIN3,看D1的图,是通过HS-MIC灌入信号。外边焊接的MIC的话需要HBIAS提供电源。测量下MIC两端有没1.5V左右电压?
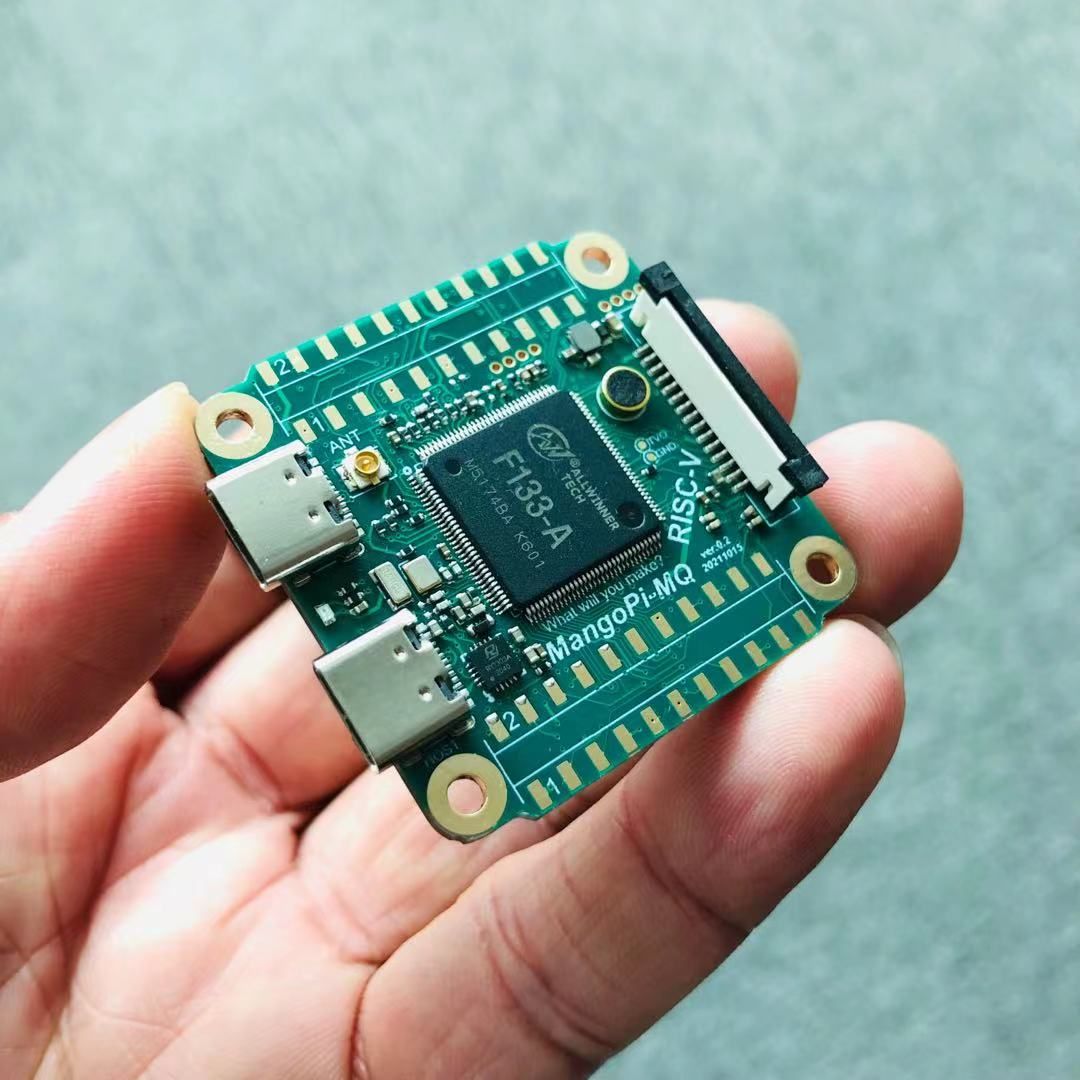
@tigger 基础版:9.9刀
带WiFi版:11.9刀
童叟无欺,真的真的真的
12月初上架。
SDK目前用的从D1修改过来的Tina Linux,针对D1s做了fix,基本已调完,上架后放到github上。
遇到点小插曲,由于厂家那边给GT911固化错了配置(把800480分辨率搞成了1024600),所以找厂家要了一份正确配置,需要ctp驱动中开启自动更新配置。
另外,tina linux驱动文件夹gt9xxnew中,分析gtp_init_panel初始化函数。因为手头这个屏幕与文件的都不同,并且看到源文件注释掉了从屏幕读取id。所以可确定sensor_id恒为0,那么就很简单了,自己的配置直接写到gt9xx.h的GOURP1即可。
#if GTP_COMPATIBLE_MODE
		msleep(50);
#endif
//       ret = gtp_i2c_read_dbl_check(ts->client, GTP_REG_SENSOR_ID, &sensor_id, 1);
		dprintk(DEBUG_INIT, "CTP name : %s\n", config_info.name);
		if (!strcmp(config_info.name, "gt9271_mb976a9")) {
			sensor_id = 0;
			dprintk(DEBUG_INIT, "gt9xx:sensor_id = %d\n", sensor_id);

		} else if (!strcmp(config_info.name, "gt9110_wt097")) {
			sensor_id = 1;
			dprintk(DEBUG_INIT, "gt9xx:sensor_id = %d\n", sensor_id);

		} else if (!strcmp(config_info.name, "gt9271_wt097")) {
			sensor_id = 2;
			dprintk(DEBUG_INIT, "gt9xx:sensor_id = %d\n", sensor_id);

		} else if (!strcmp(config_info.name, "gt9110_g200")) {
			sensor_id = 3;
			dprintk(DEBUG_INIT, "gt9xx:sensor_id = %d\n", sensor_id);

		} else if (!strcmp(config_info.name, "gt9271_noah")) {
			sensor_id = 4;
			dprintk(DEBUG_INIT, "gt9xx:sensor_id = %d\n", sensor_id);
		} else if (!strcmp(config_info.name, "gt9271_p2")) {
			sensor_id = 5;
			dprintk(DEBUG_INIT, "gt9xx:sensor_id = %d\n", sensor_id);
		} else if (!strcmp(config_info.name, "gt911_1060")) {
			sensor_id = 6;
			dprintk(DEBUG_INIT, "gt9xx:sensor_id = %d\n", sensor_id);
		} else if (!strcmp(config_info.name, "gt911_784")) {
			sensor_id = 7;
			dprintk(DEBUG_INIT, "gt9xx:sensor_id = %d\n", sensor_id);
		} else {
			sensor_id = 0;
			dprintk(DEBUG_INIT, "gt9xx:sensor_id = %d\n", sensor_id);
		}
		ret = SUCCESS;
		if (SUCCESS == ret) {
			if (sensor_id >= 0x08) {
				printk("Invalid sensor_id(0x%02X), No Config Sent!\n", sensor_id);
				ts->pnl_init_error = 1;
				return -1;
			}
		} else {
			printk("Failed to get sensor_id, No config sent!\n");
			ts->pnl_init_error = 1;
			return -1;
		}
	}
	ts->gtp_cfg_len = cfg_info_len[sensor_id];
	GTP_INFO( "CTP_CONFIG_GROUP%d used, config length: %d\n", sensor_id + 1, ts->gtp_cfg_len);
#define CTP_CFG_GROUP1 {\
	0x42,0x20,0x03,0xE0,0x01,0x0A,0x3D,0x00,0x01,0x08,0x28,0x08,\
	0x5A,0x46,0x03,0x05,0x00,0x00,0x00,0x00,0x00,0x00,0x00,0x18,\
	0x1A,0x1E,0x14,0x89,0x2A,0x09,0x57,0x5C,0xB5,0x06,0x00,0x00,\
	0x00,0x02,0x01,0x1D,0x00,0x01,0x00,0x00,0x00,0x00,0x00,0x00,\
	0x00,0x00,0x00,0x46,0x82,0x94,0xC5,0x02,0x07,0x00,0x00,0x04,\
	0x96,0x4A,0x00,0x85,0x54,0x00,0x77,0x5F,0x00,0x6A,0x6C,0x00,\
	0x5F,0x7A,0x00,0x5F,0x00,0x00,0x00,0x00,0x00,0x00,0x00,0x00,\
	0x00,0x00,0x00,0x00,0x00,0x00,0x00,0x00,0x00,0x00,0x00,0x00,\
	0x00,0x00,0x00,0x00,0x00,0x00,0x00,0x00,0x00,0x00,0x00,0x00,\
	0x00,0x00,0x00,0x00,0x02,0x04,0x06,0x08,0x0A,0x0C,0x10,0x12,\
	0x14,0xFF,0xFF,0xFF,0xFF,0xFF,0x00,0x00,0x00,0x00,0x00,0x00,\
	0x00,0x00,0x00,0x00,0x00,0x00,0x00,0x00,0x00,0x00,0x00,0x02,\
	0x04,0x06,0x08,0x0A,0x0F,0x10,0x12,0x16,0x18,0x1C,0x1D,0x1E,\
	0x1F,0x20,0x21,0x22,0x24,0xFF,0xFF,0xFF,0xFF,0xFF,0xFF,0xFF,\
	0x00,0x00,0x00,0x00,0x00,0x00,0x00,0x00,0x00,0x00,0x00,0x00,\
	0x00,0x00,0x00,0x00,0x4B,0x01}
效果:
TODO:以后再尝试把group配置放到dts中,会不会更优雅些?
mp3用music-play, wav则用aplay
https://www.bilibili.com/video/BV1dQ4y1m7Bc?share_source=copy_web
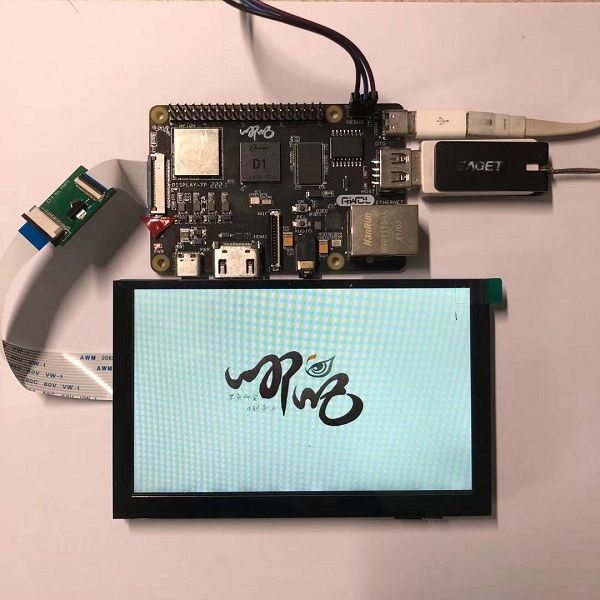
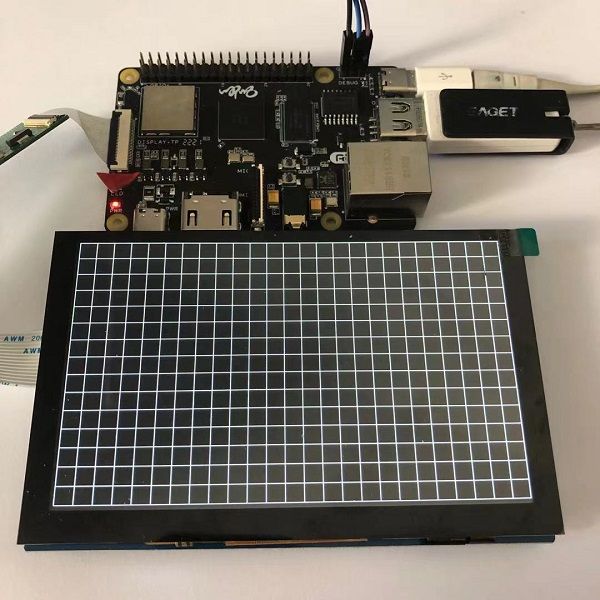
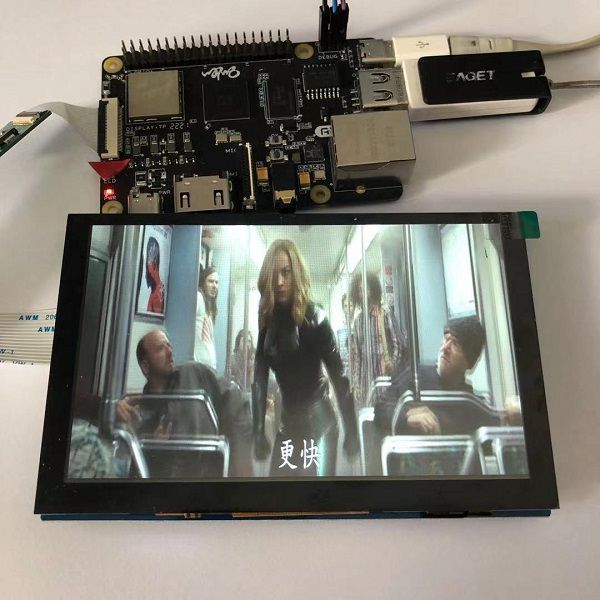
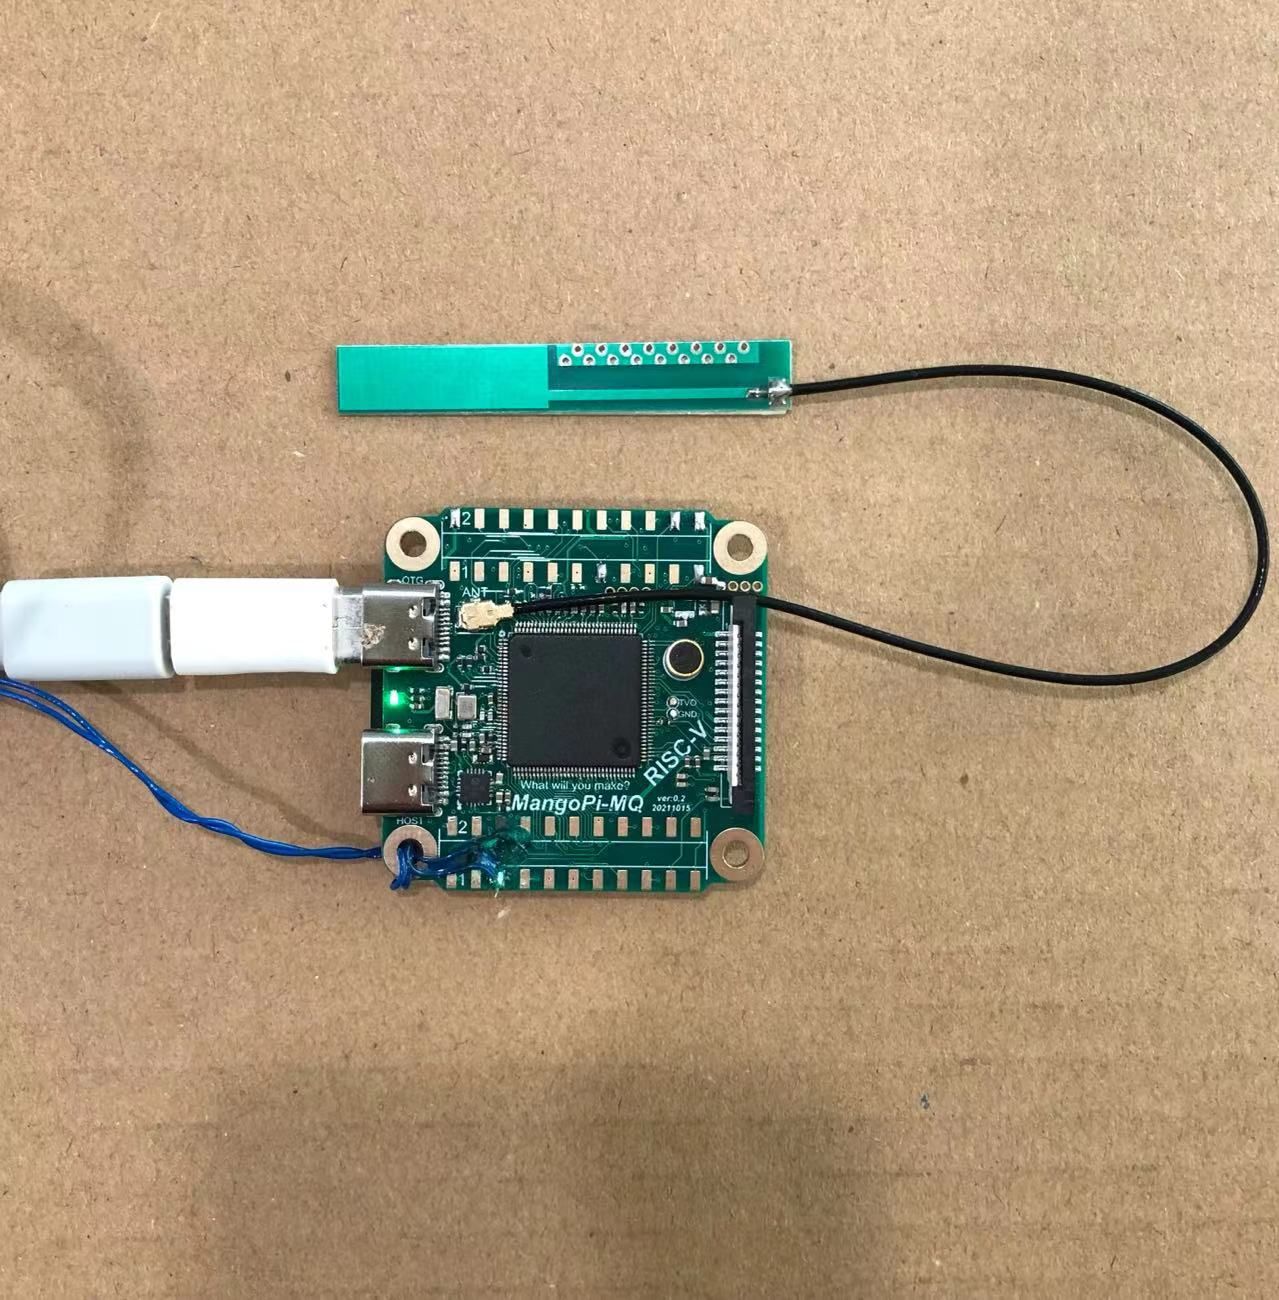
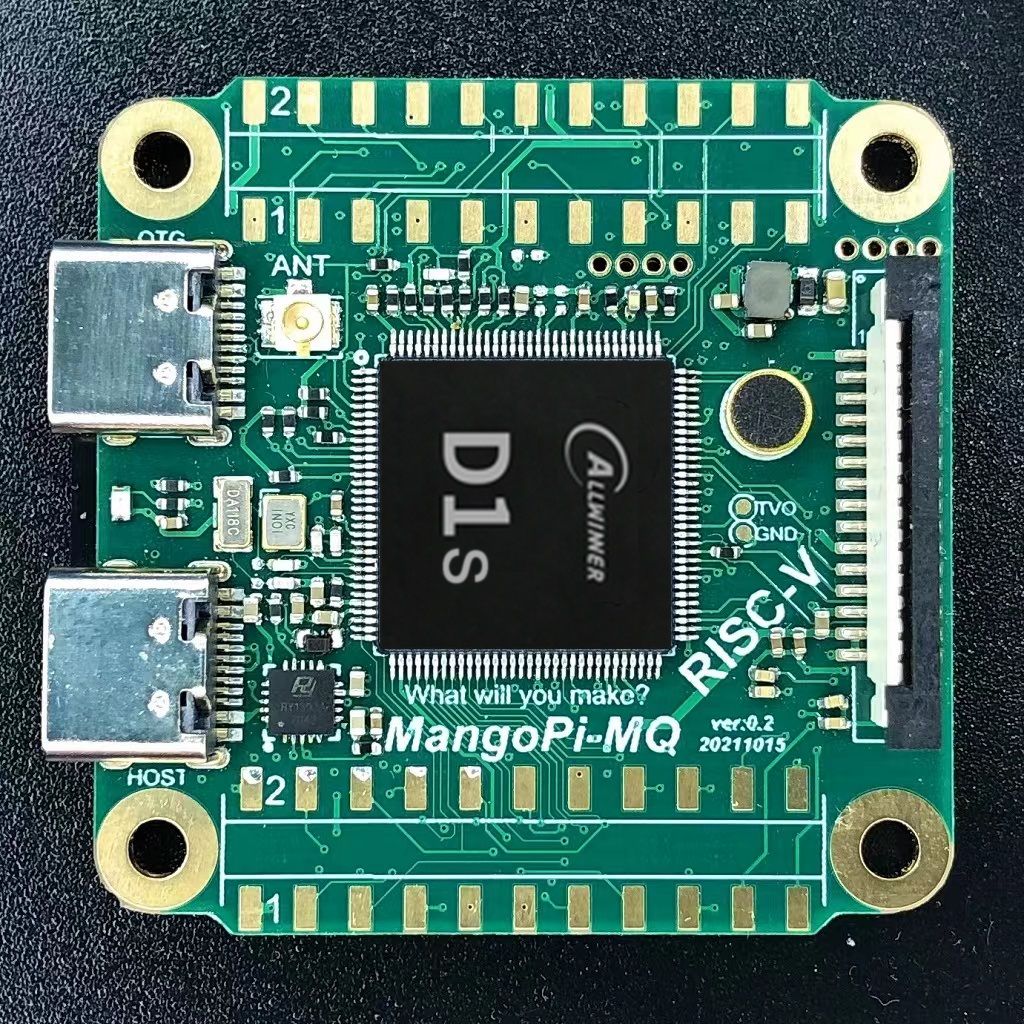
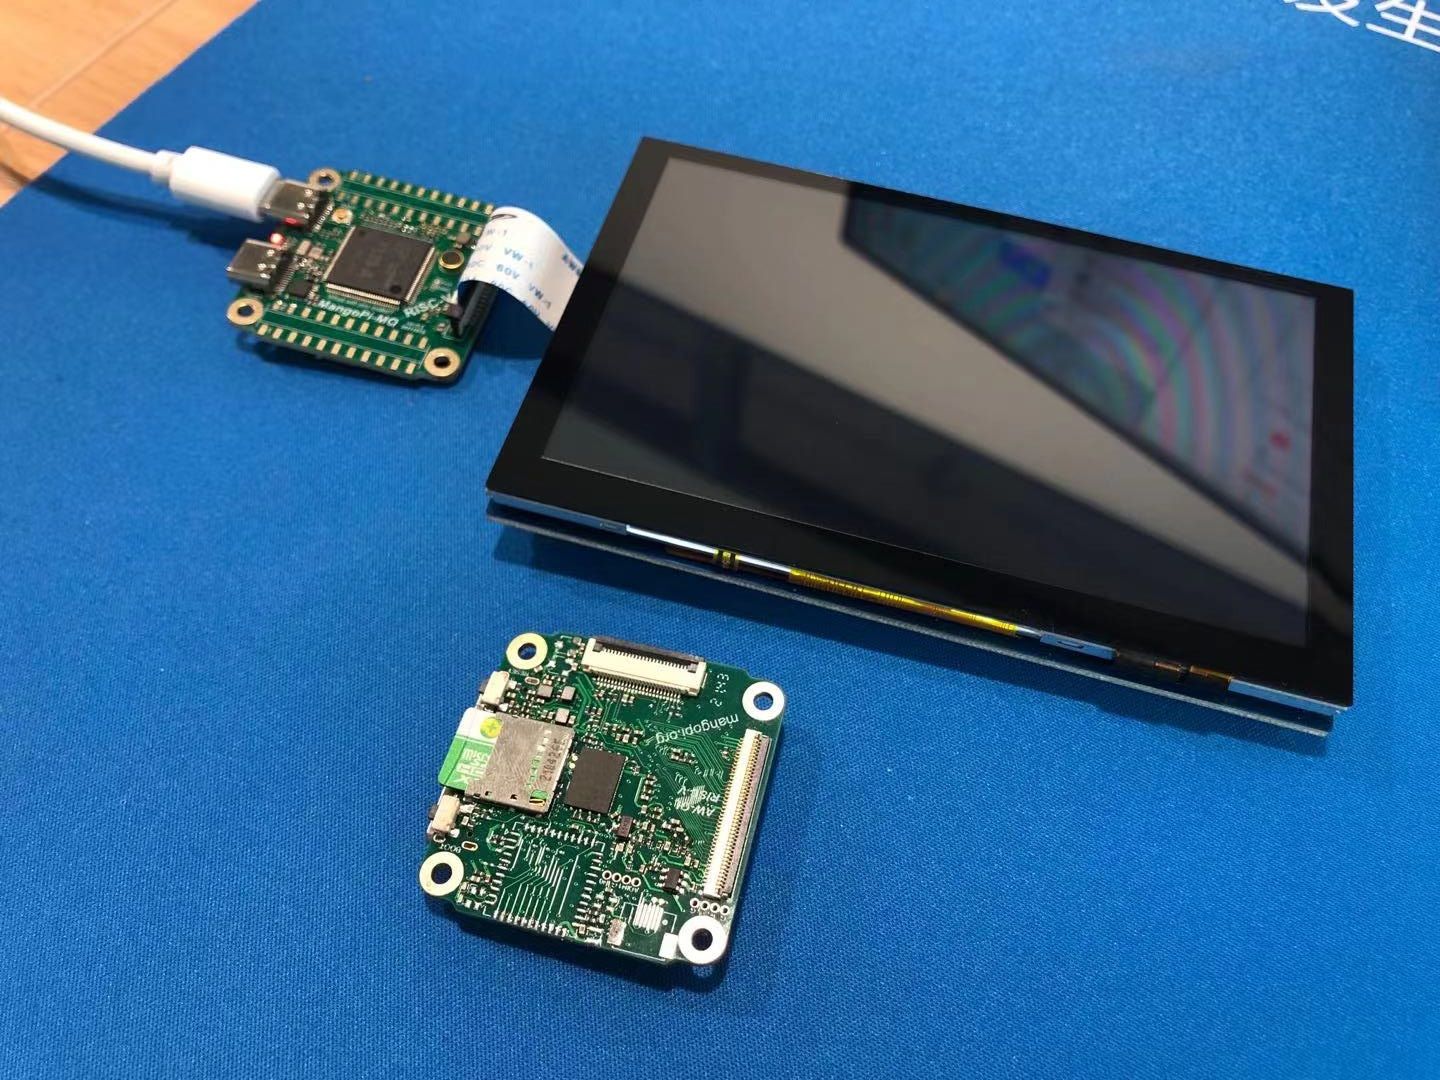
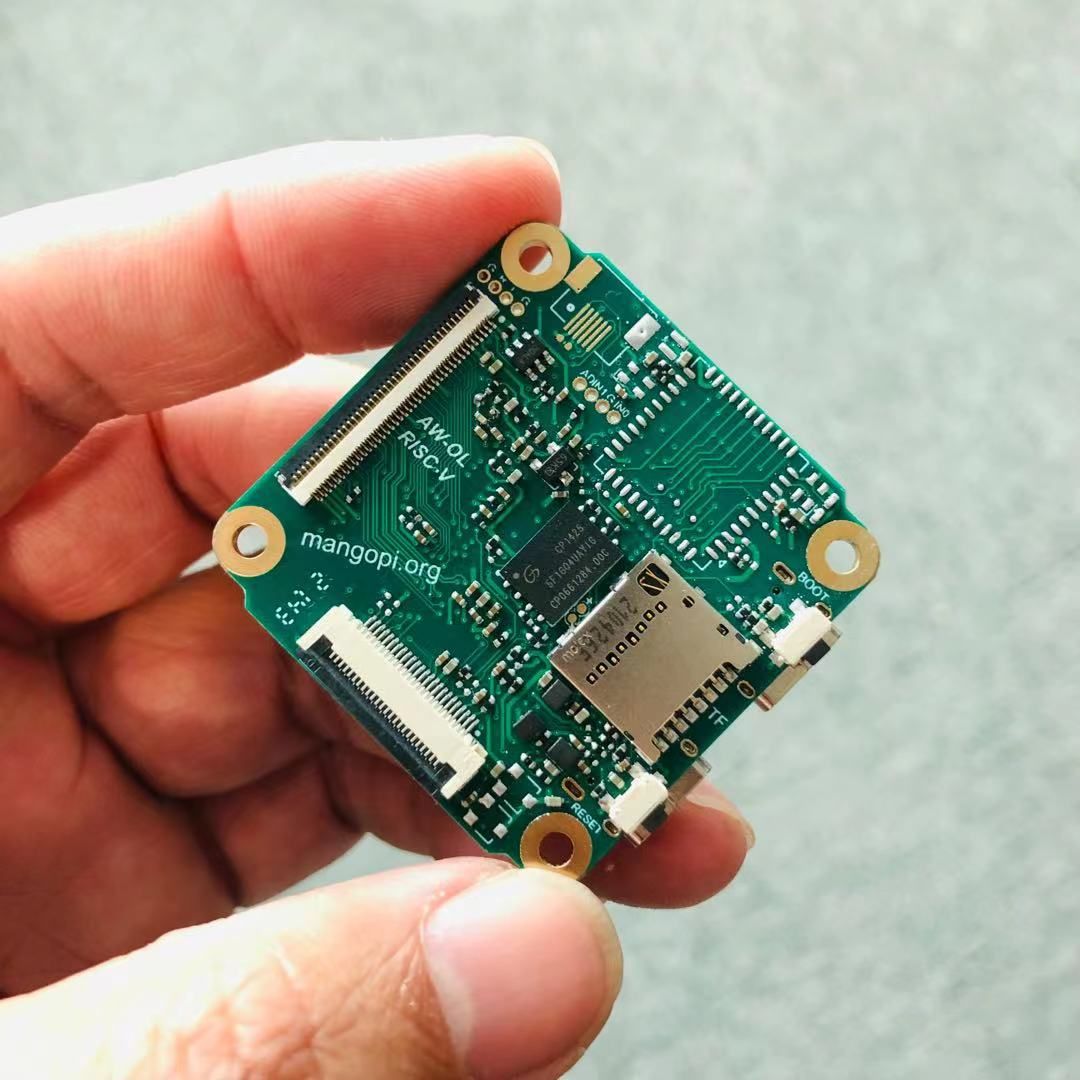
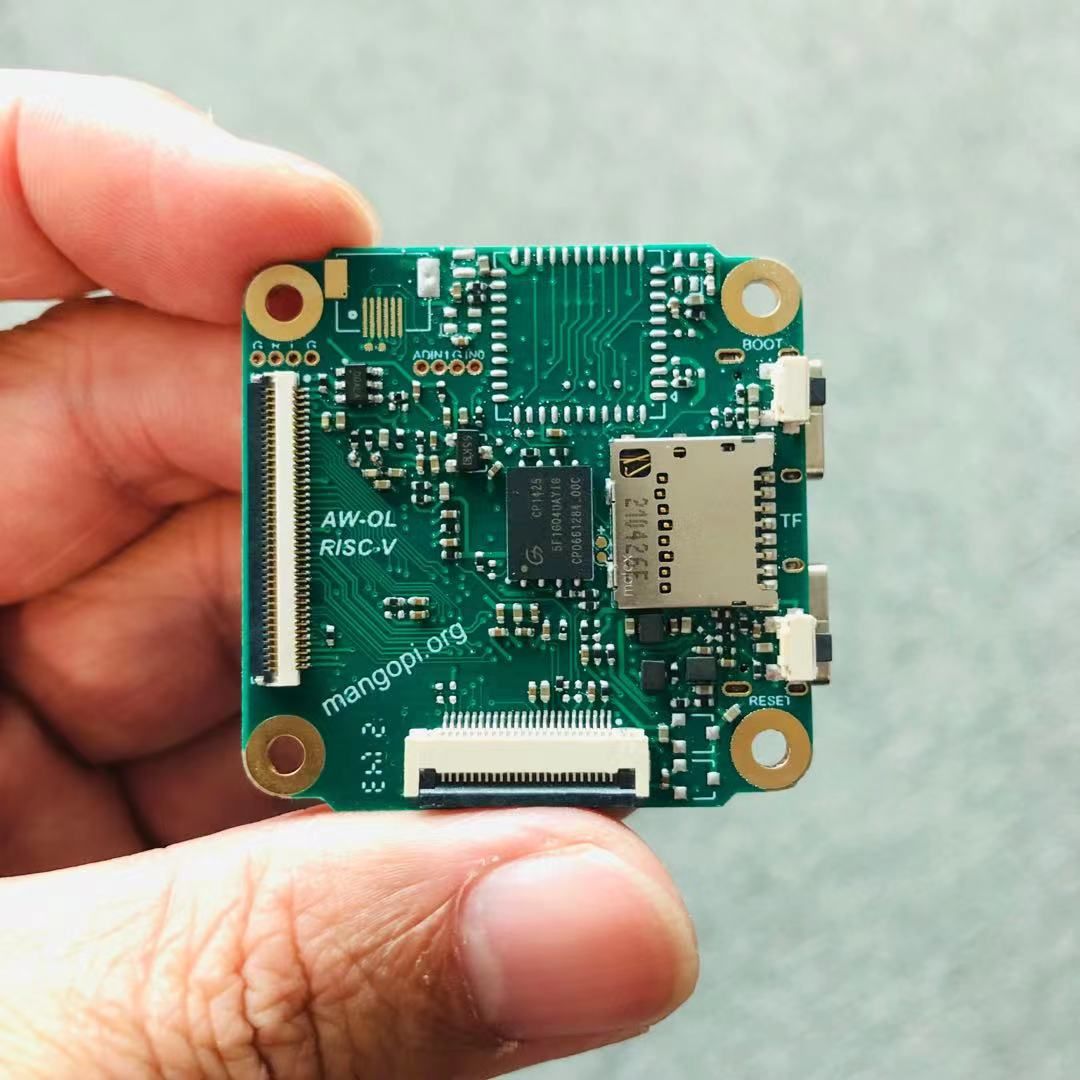
系统:Tina for D1 (参考:https://bbs.aw-ol.com/topic/384 修改成适配D1s的)
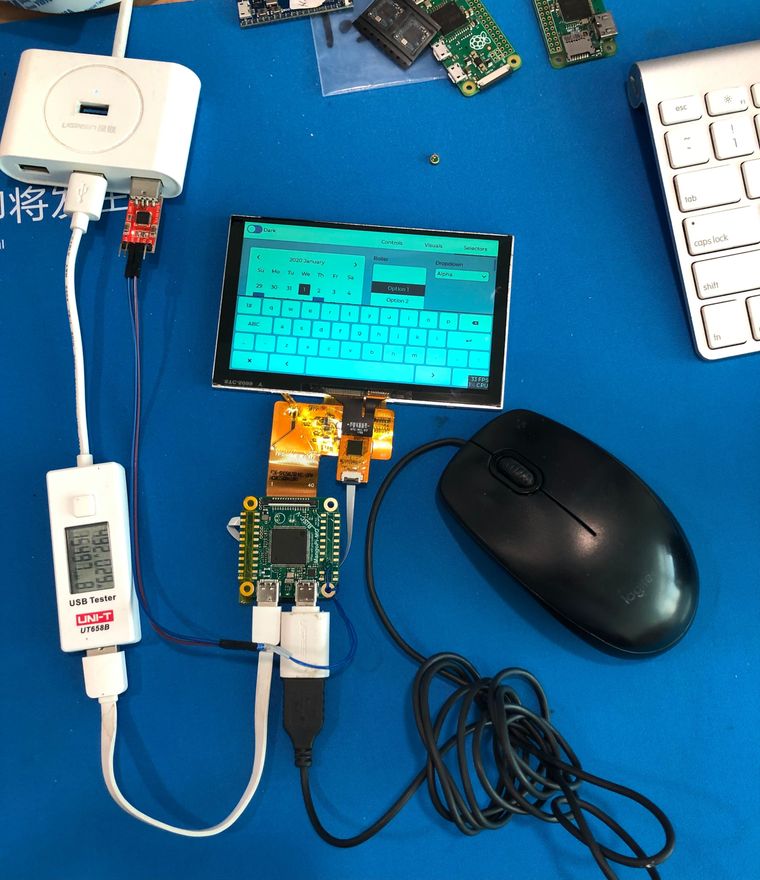
硬件:MangoPi-Nezha MQ (芒果派-哪吒MQ),主控D1s,屏幕800*480 RGB接口
@aldfaaa 有爱好者下个月出个外壳。
我们官方的麻雀外壳(巢),连同麻雀Pro板子一起出。
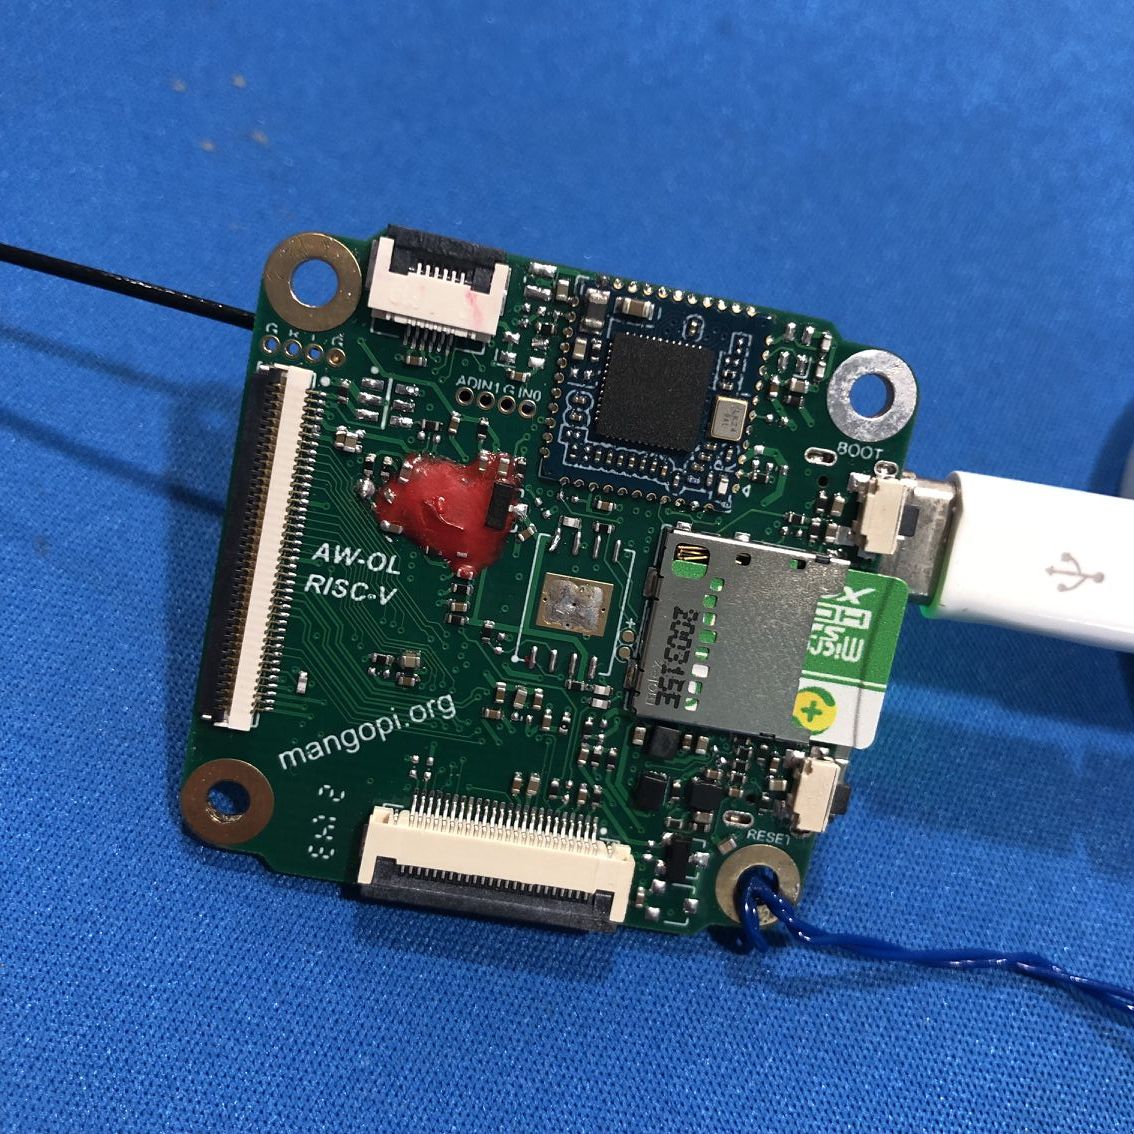
测试xfel_20211104_whycan.exe,手头的MangoPi-MQ麻雀 焊接了GD5F1GQ,运行如下:
$ ./xfel_20211104_whycan.exe version
AWUSBFEX soc=0x00185900(D1/F133) 0x00000001 ver=0x0001 0x44 0x08 scratchpad=0x00045000

$ ./xfel_20211104_whycan.exe spinand
Found spi nand flash 'GD5F1GQ4xAYIG' with 134217728 bytes
手动将NAND换成W25N01,未能识别,输出如下:
$ ./xfel_20211104_whycan.exe spinand
The spi nand flash '0xefaa' is not yet supported
Can't detect any spi nand flash
@whycan 这两天在猛劲的调试,完事第一时间送到你桌子上
别嫌我焊的丑就行 
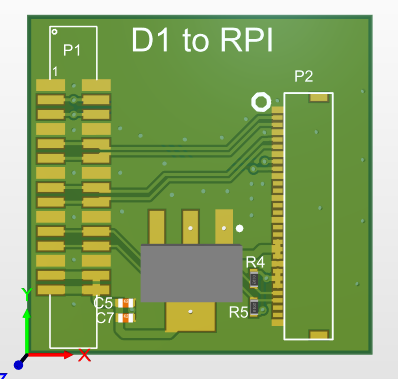
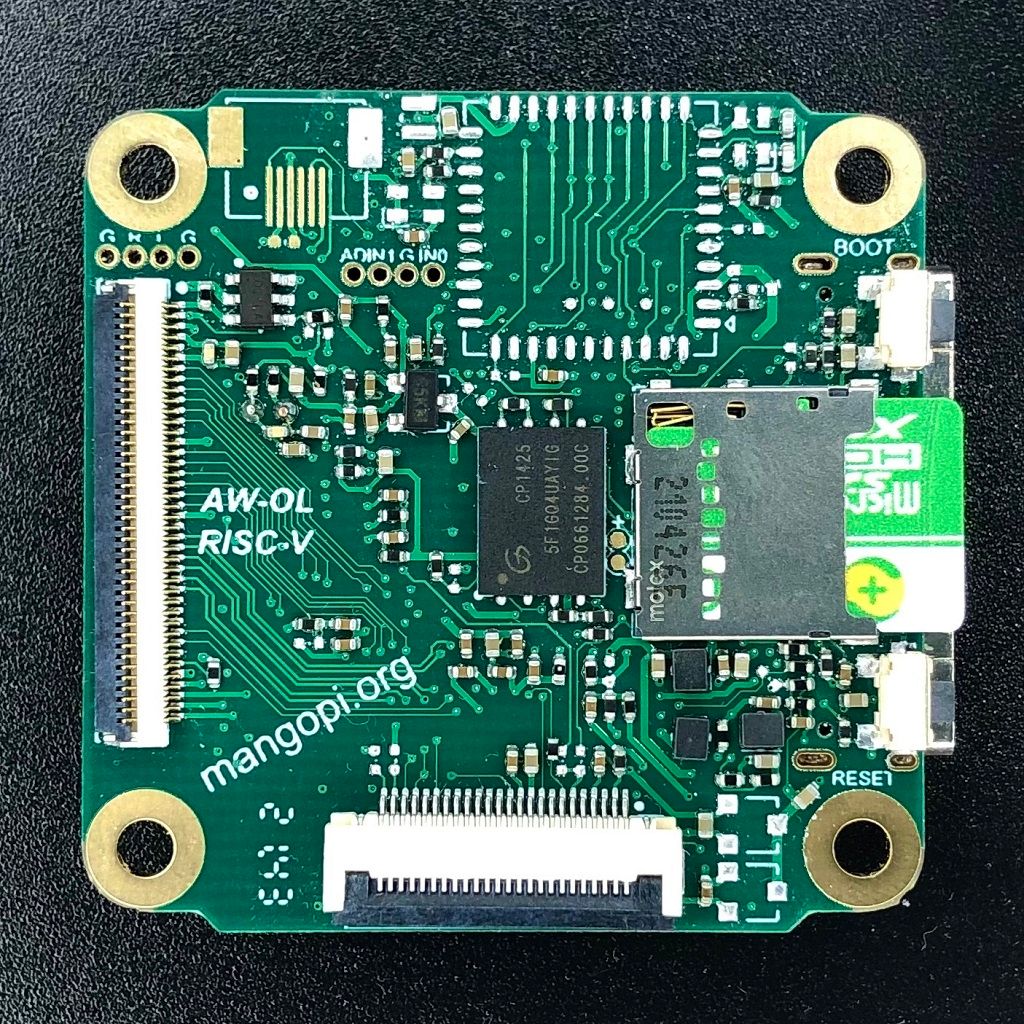
@jordonwu 按照当前的设计,直接背靠背安装到屏后边就行。
螺丝孔位置最好还是单独画个小板子桥接下
@whycan 背面下方的24Pin FPC是DVP接口,电路上默认兼容性和R3一致。也就是直插ov5640,2640这些。
@jordonwu 对,正面DSI是树莓派线序;背面RGB屏接口则是通用40Pin
SSD_Number 对应每一次mipi发送控制的数量,但你的程序这个可能把CMD也算上了,到uboot驱动中数量-1就行。
比如这一段:
//VGMP,VGSP,VGMN,VGSN 4.2
SSD_Number(0x05);
SSD_CMD(0xB7);
SSD_PAR(0x1E);
SSD_PAR(0x7D);
SSD_PAR(0x1E);
SSD_PAR(0x2B);
到tina里uboot驱动中修改为:
{ 0xb7, 4, {0x1e, 0x7d, 0x1e, 0x28}},
当前tina默认编译出来的是依靠uboot阶段初始化了fb,所以你只需修改uboot驱动就行。
按照晕哥的修改方法就可以显示。贴一下我暂时用的参数:
	lcd_dclk_freq       = <27>;

	lcd_hbp             = <25>;
	lcd_ht              = <871>;
	lcd_hspw            = <14>;
	lcd_vbp             = <40>;
	lcd_vt              = <550>;
	lcd_vspw            = <4>;
如果是默认的sdk 1.0.1,修改完后在uboot启动logo时会报个图片太大的错误,修改下configs目录的bootlogo.bmp就行:
bootlogo.zip
续这位仁兄的贴子:https://bbs.aw-ol.com/topic/263
屏幕链接:https://item.taobao.com/item.htm?id=623507778498
转接板工程:
还没详细调时序参数,但初步已有显示。
软件过几天有空了详细调试后整理上传。
环境:1.0.1 tina-d1-open
在运行OK的代码基础上,只将uboot下configs里的 sun20iw1p1_defconfig 中 CONFIG_DISP2_SUNXI 注释掉,方法参考自:( D1_Tina_linux_LCD_调试指南.pdf p70)。
启动log会卡到如下位置:
[    2.520958] sunxi-spinand-phy: ========== logical info ==========
[    2.527747] sunxi-spinand-phy: TotalSize:    256 M
[    2.550957] sunxi-spinand-phy: SectorSize:   512 B
[    2.556294] sunxi-spinand-phy: PageSize:     4 K
[    2.570958] sunxi-spinand-phy: BlockSize:    256 K
[    2.576294] sunxi-spinand-phy: OOBSize:      128 B
[    2.590959] sunxi-spinand-phy: ========================================
[    2.611031] sunxi-spinand-phy: block lock register: 0x00
[    2.617123] sunxi-spinand-phy: feature register: 0x11
[    2.630966] sunxi-spinand-phy: sunxi physic nand init end
[    2.641473] Creating 4 MTD partitions on "sunxi_mtd_nand":
[    2.647611] 0x000000000000-0x000000100000 : "boot0"
后卡住不动。
正常系统应该继续如下打印:
[    1.472105] 0x000000100000-0x000000500000 : "uboot"
[    1.477818] random: fast init done
[    1.512083] 0x000000500000-0x000000600000 : "secure_storage"
[    1.532115] 0x000000600000-0x000010000000 : "sys"
[    1.936841] random: crng init done
[    2.702598] libphy: Fixed MDIO Bus: probed
@andy89926 你这个原理图可能是最早的吧,片选不太对,20210520的和你的不一样:
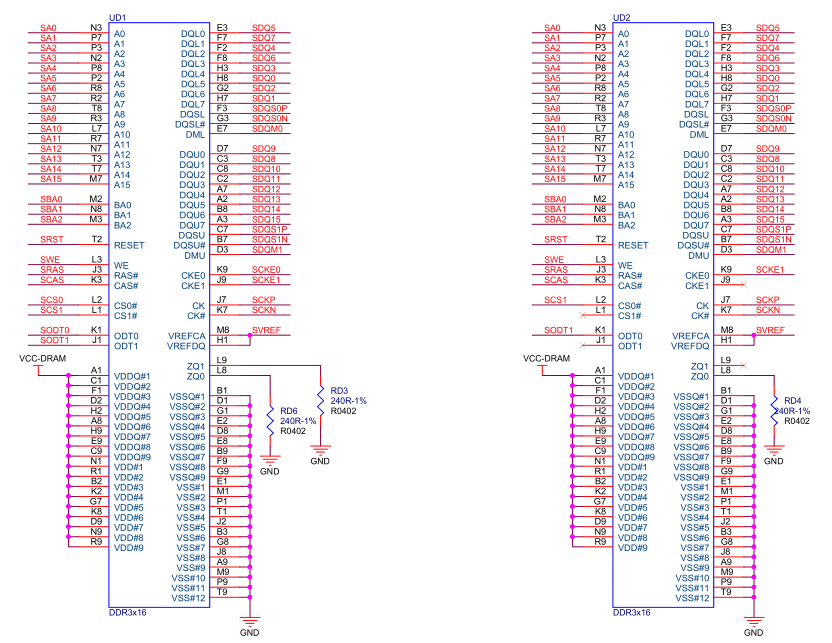
片选部分的设计是为了兼容两种类型的颗粒:
当用单片选的DDR3颗粒时,贴两片颗粒,此时J1引脚是空脚不影响。
如果用的是双片选颗粒(内部双die的),那只贴UD1芯片就行。
我这里intel上用phoenixcard也是怪怪的。
暂时改用 https://sourceforge.net/projects/win32diskimager/
头铁没注意看官方默认版本是14.04,总体来说还挺顺利,编译过程中遇到小坑记录一下。
https://d1.docs.allwinnertech.com/study/study_2getsdk/
repo branch 输出是 product-smartx-d1-tina-v1.0-release
参考官方:https://d1.docs.allwinnertech.com/study/study_3ubuntu/
gdbusauth.c: In function '_g_dbus_auth_run_server':
gdbusauth.c:1298:11: error: '%s' directive argument is null [-Werror=format-overflow=]
 1298 |           debug_print ("SERVER: WaitingForBegin, read '%s'", line);
解决:
out/d1-nezha/compile_dir/target/host/glib-2.50.1/gio/gdbusauth.c 将1298行的挪到 if语句后边,改完如下:
   1294           line = _my_g_input_stream_read_line_safe (g_io_stream_get_input_stream (auth->priv->stream),
   1295                                                     &line_length,
   1296                                                     cancellable,
   1297                                                     error);
   1298           //debug_print ("SERVER: WaitingForBegin, read '%s'", line);
   1299           if (line == NULL)
   1300             goto out;
   1301           debug_print ("SERVER: WaitingForBegin, read '%s'", line);
gdbusmessage.c: In function 'g_dbus_message_to_blob':
gdbusmessage.c:2698:30: error: '%s' directive argument is null [-Werror=format-overflow=]
 2698 |       tupled_signature_str = g_strdup_printf ("(%s)", signature_str);
解决方法:同坑1,把gio/gdbusmessage.c: 2698行的tupled_signature_str = g_strdup_printf ("(%s)", signature_str);移到if else 语句块后面
   2697       gchar *tupled_signature_str;
   2698       //tupled_signature_str = g_strdup_printf ("(%s)", signature_str);
   2699       if (signature == NULL)
   2700         {
   2701           g_set_error (error,
   2702                        G_IO_ERROR,
   2703                        G_IO_ERROR_INVALID_ARGUMENT,
   ---
   2717           goto out;
   2718         }
   2719       tupled_signature_str = g_strdup_printf ("(%s)", signature_str);
   2720       g_free (tupled_signature_str);
./mkerrcodes | gawk -f ./mkerrcodes2.awk >code-from-errno.h
gawk: ./mkerrcodes2.awk:94: warning: regexp escape sequence `\#' is not a known regexp operator
gawk -f ./mkstrtable.awk -v textidx=2 -v nogettext=1 \
        ./err-sources.h.in >err-sources-sym.h
gawk: ./mkstrtable.awk:113: warning: regexp escape sequence `\#' is not a known regexp operator
比较省事的办法是gawk降级。
sudo apt autoremove gawk
wget https://ftp.gnu.org/gnu/gawk/gawk-4.2.1.tar.gz
然后解压,./configure --prefix=/usr --libexecdir=/usr/lib , make , make check , sudo make install , 再检查gawk:
mg@Ubuntu:~/tina-d1-open$ gawk --version
GNU Awk 4.2.1, API: 2.0
然后清理一遍之前输出: rm -r out/d1-nezha/compile_dir/target/libgpg-error-1.27
再 make -j1 编译通过。
 这速度666。


 )
)
 不能不过七夕啊对吧